Happy Independence Day!
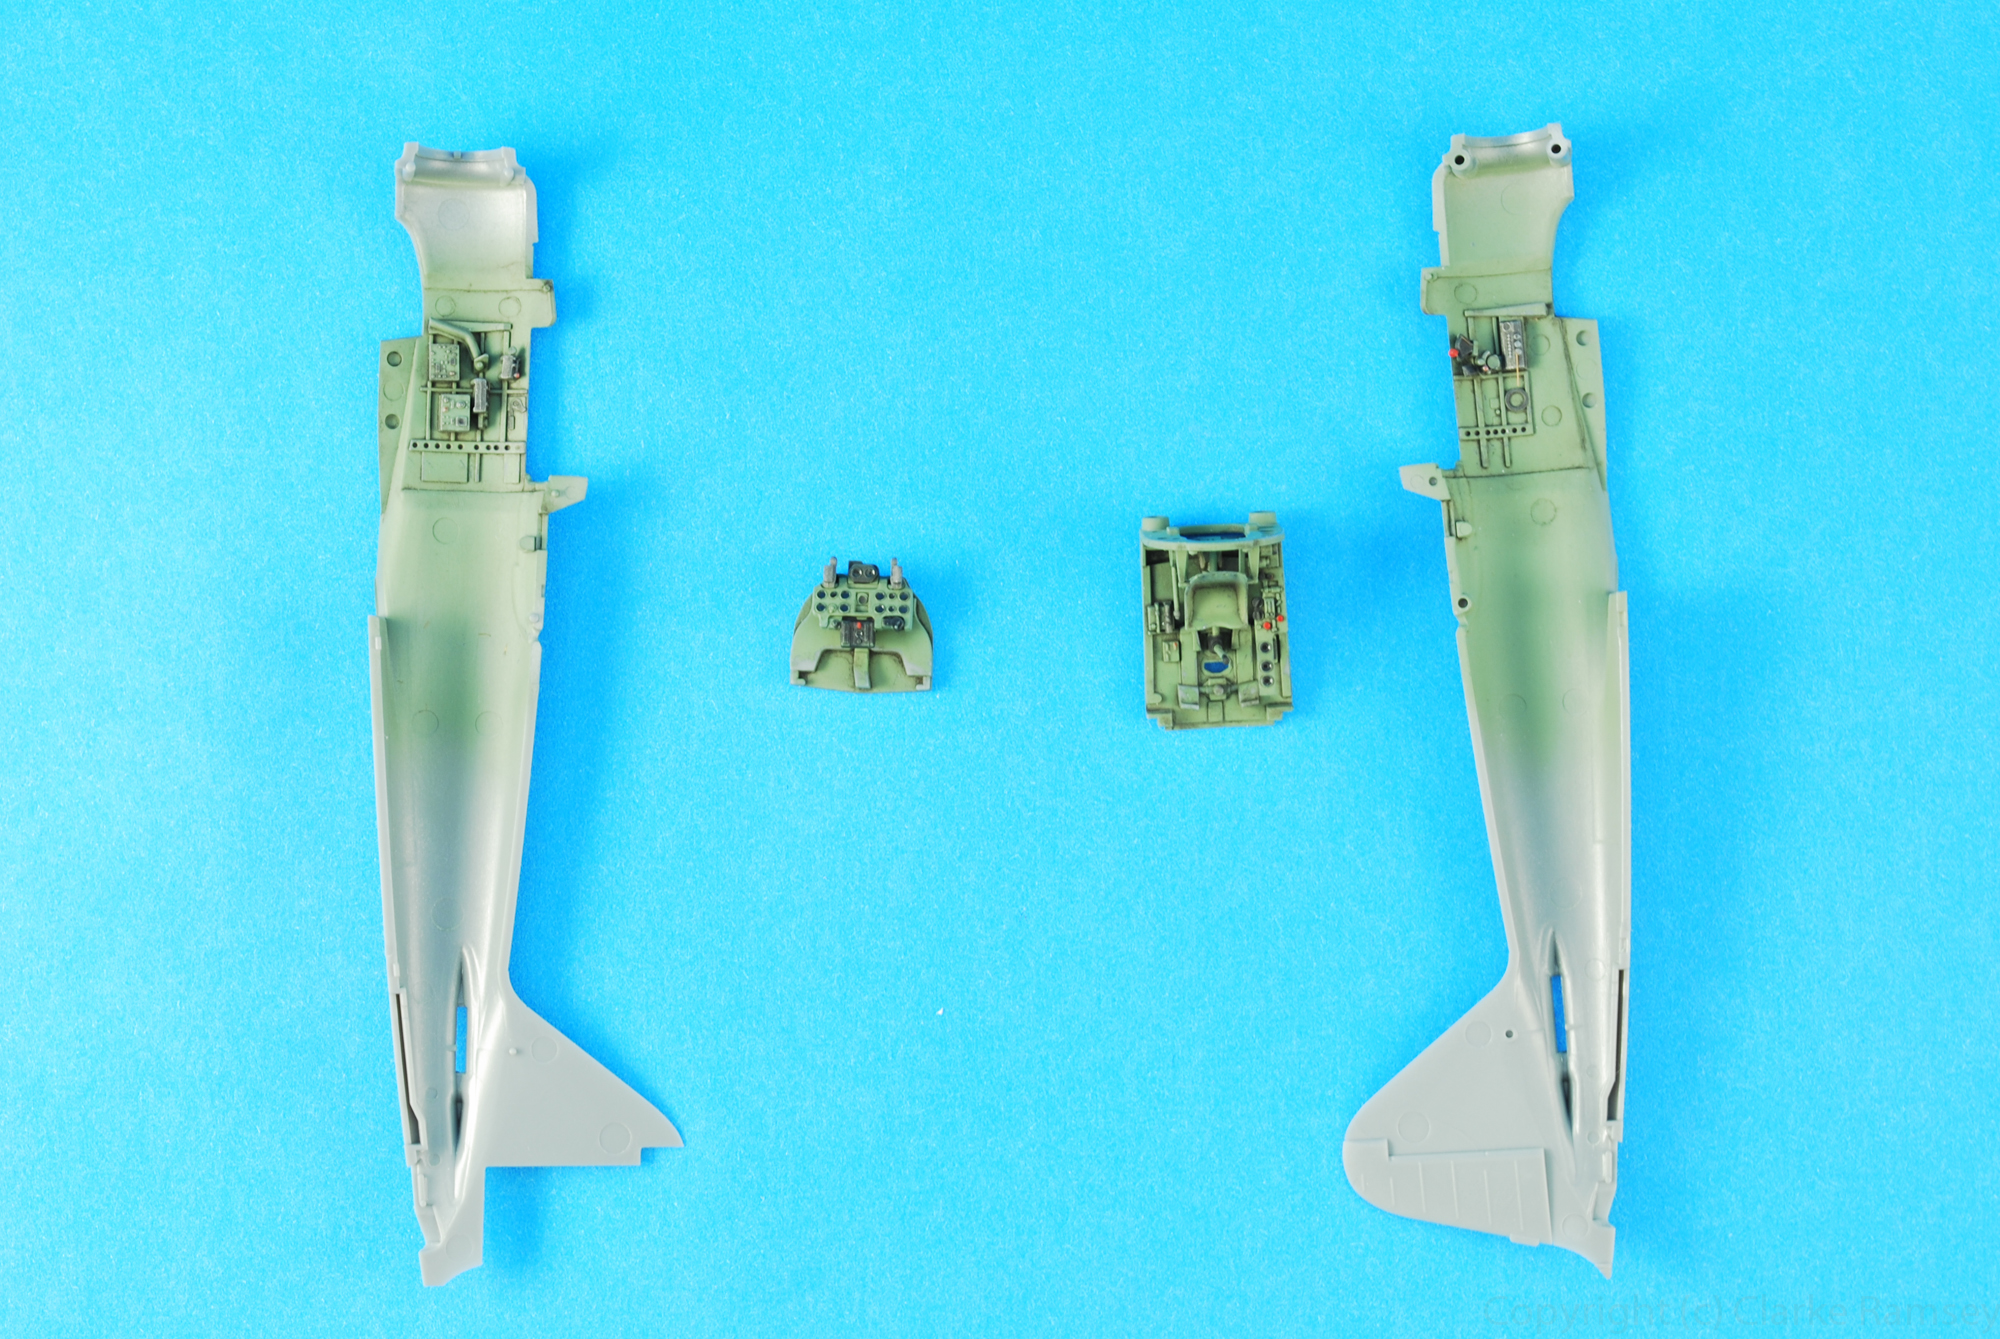
Two weeks and allot of bits and pieces finally painted up. I've made some serious progress of the Mustang build so far. To start off all of the parts were given a coat of Mr Surfacer 1200 thinned with lacquer thinner and leveling thinner. Next would come the interior green mix. I had planned to use Gunze Interior green premixed. Turned out just a drop or two was in the bottle. Tamiya to the rescue, or should I say..."*&(@#&$#)@#()@&#@#_*@# @#*@&#!!!!"
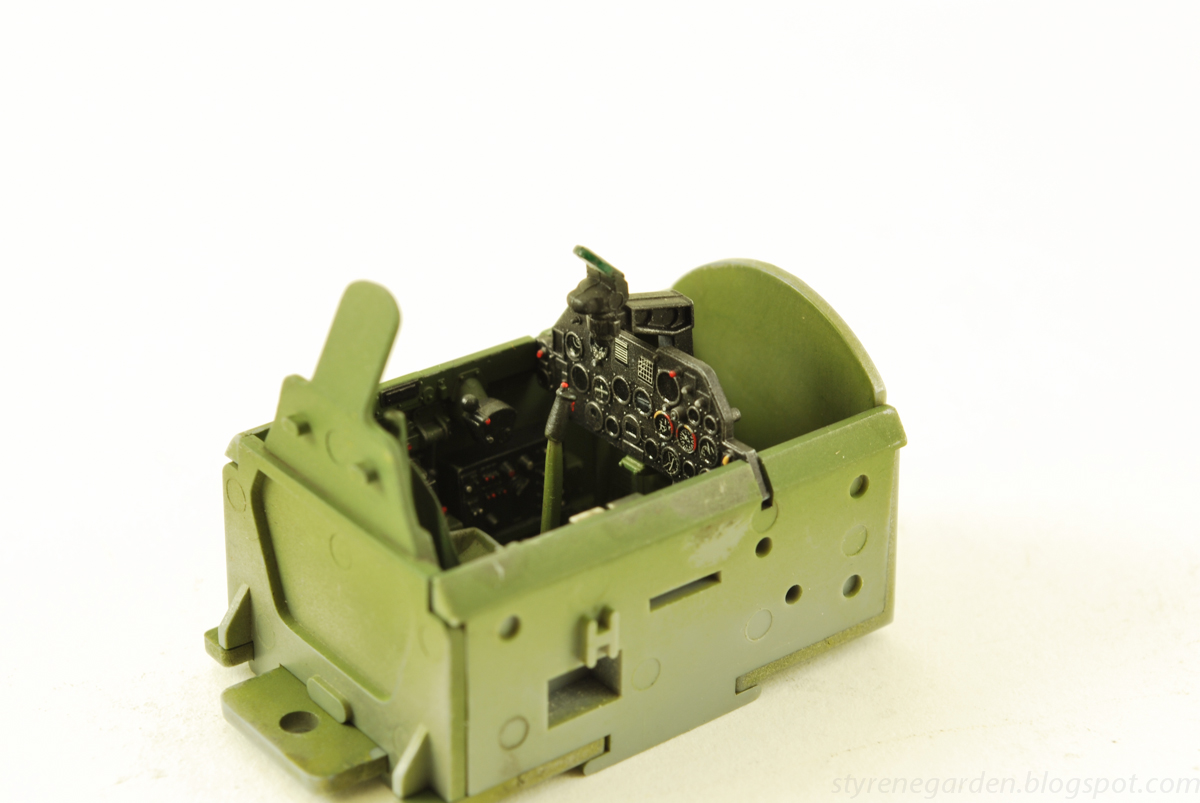
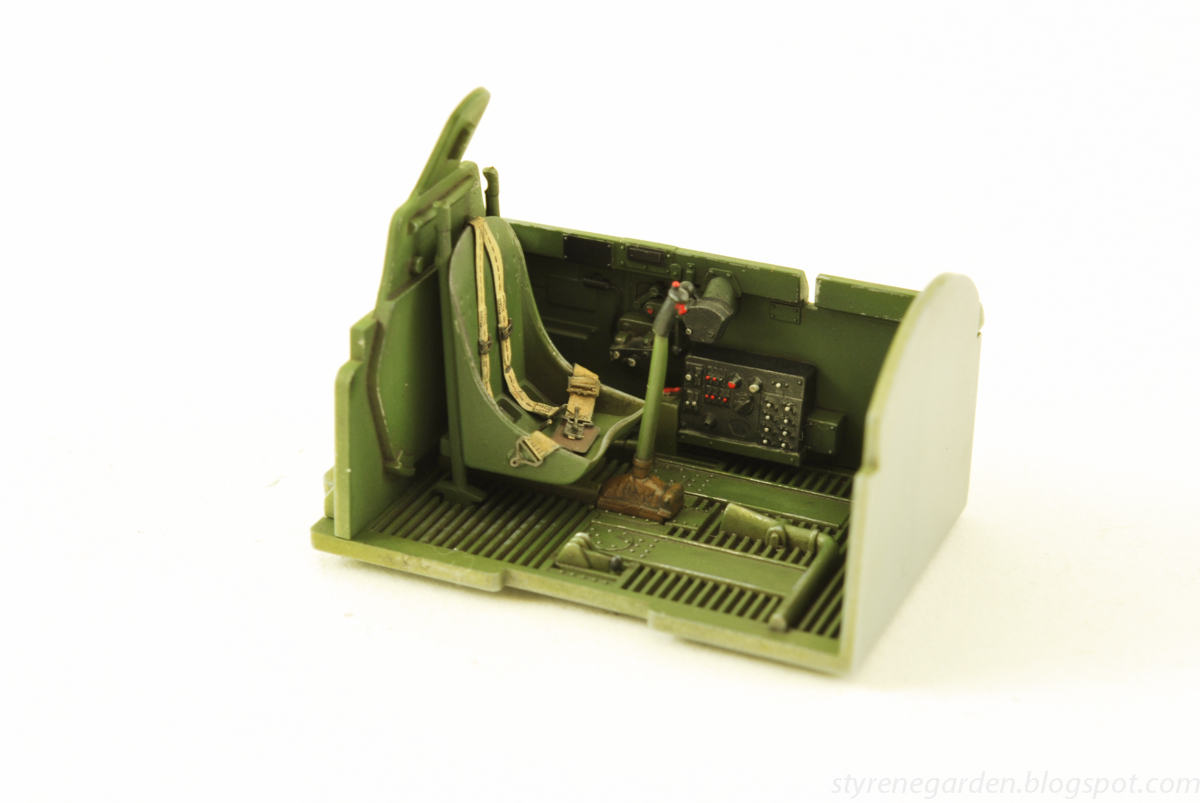
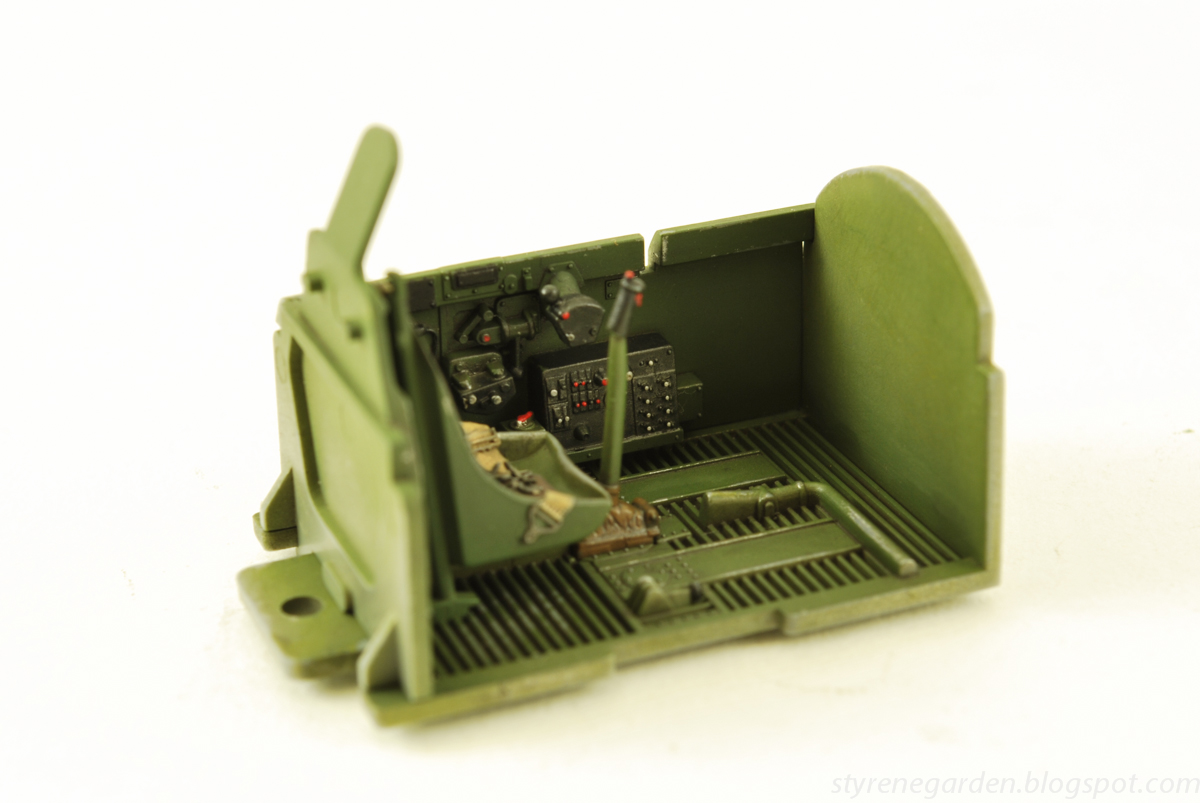
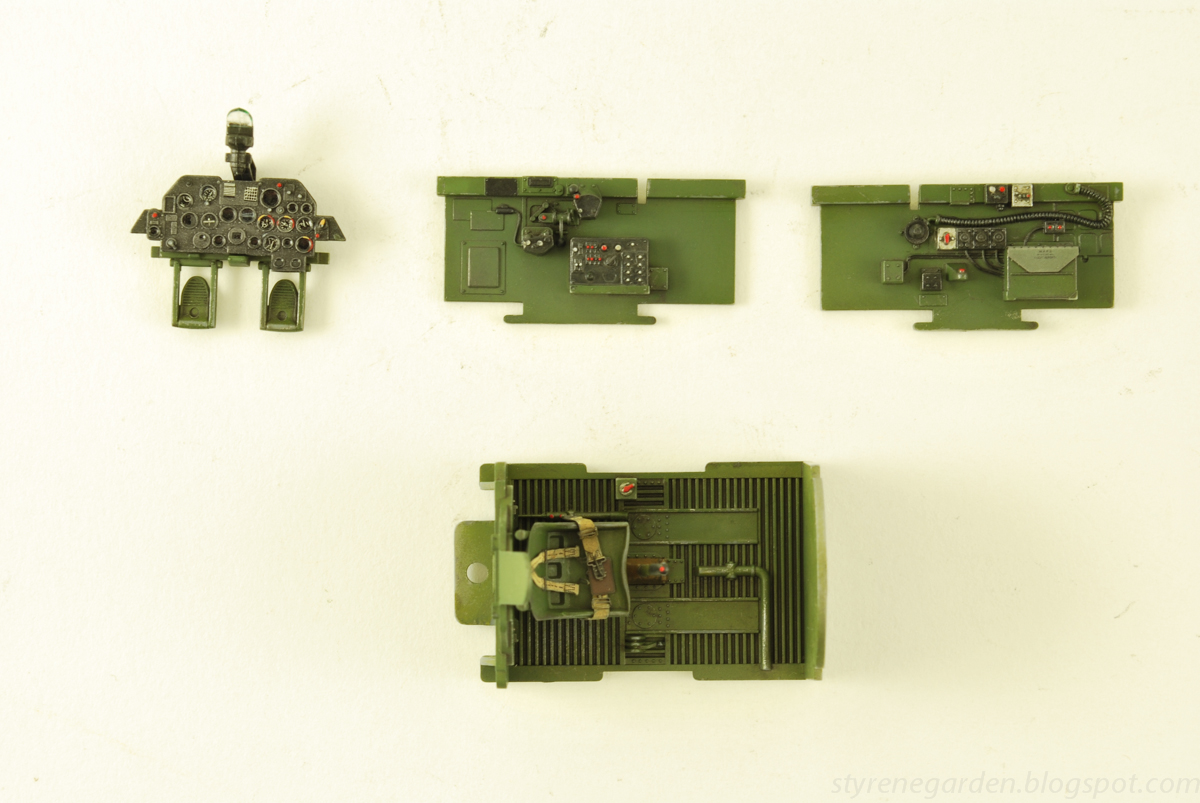
I spent a good two days trying to mix up the correct shade of interior green for the interior parts. The instructions call for XF-3 (2parts) & XF-5 (1part). That looked too bright of a green for me. Long story made short, its a mix of colors from Tamiya. First I airbrushed the front engine mount with Alclad II Aluminum, masked with tape then sprayed the interior yellow. The details were painted with Vallejo colors and the kit cooling pipes sprayed with various mixed shades of Alclad.
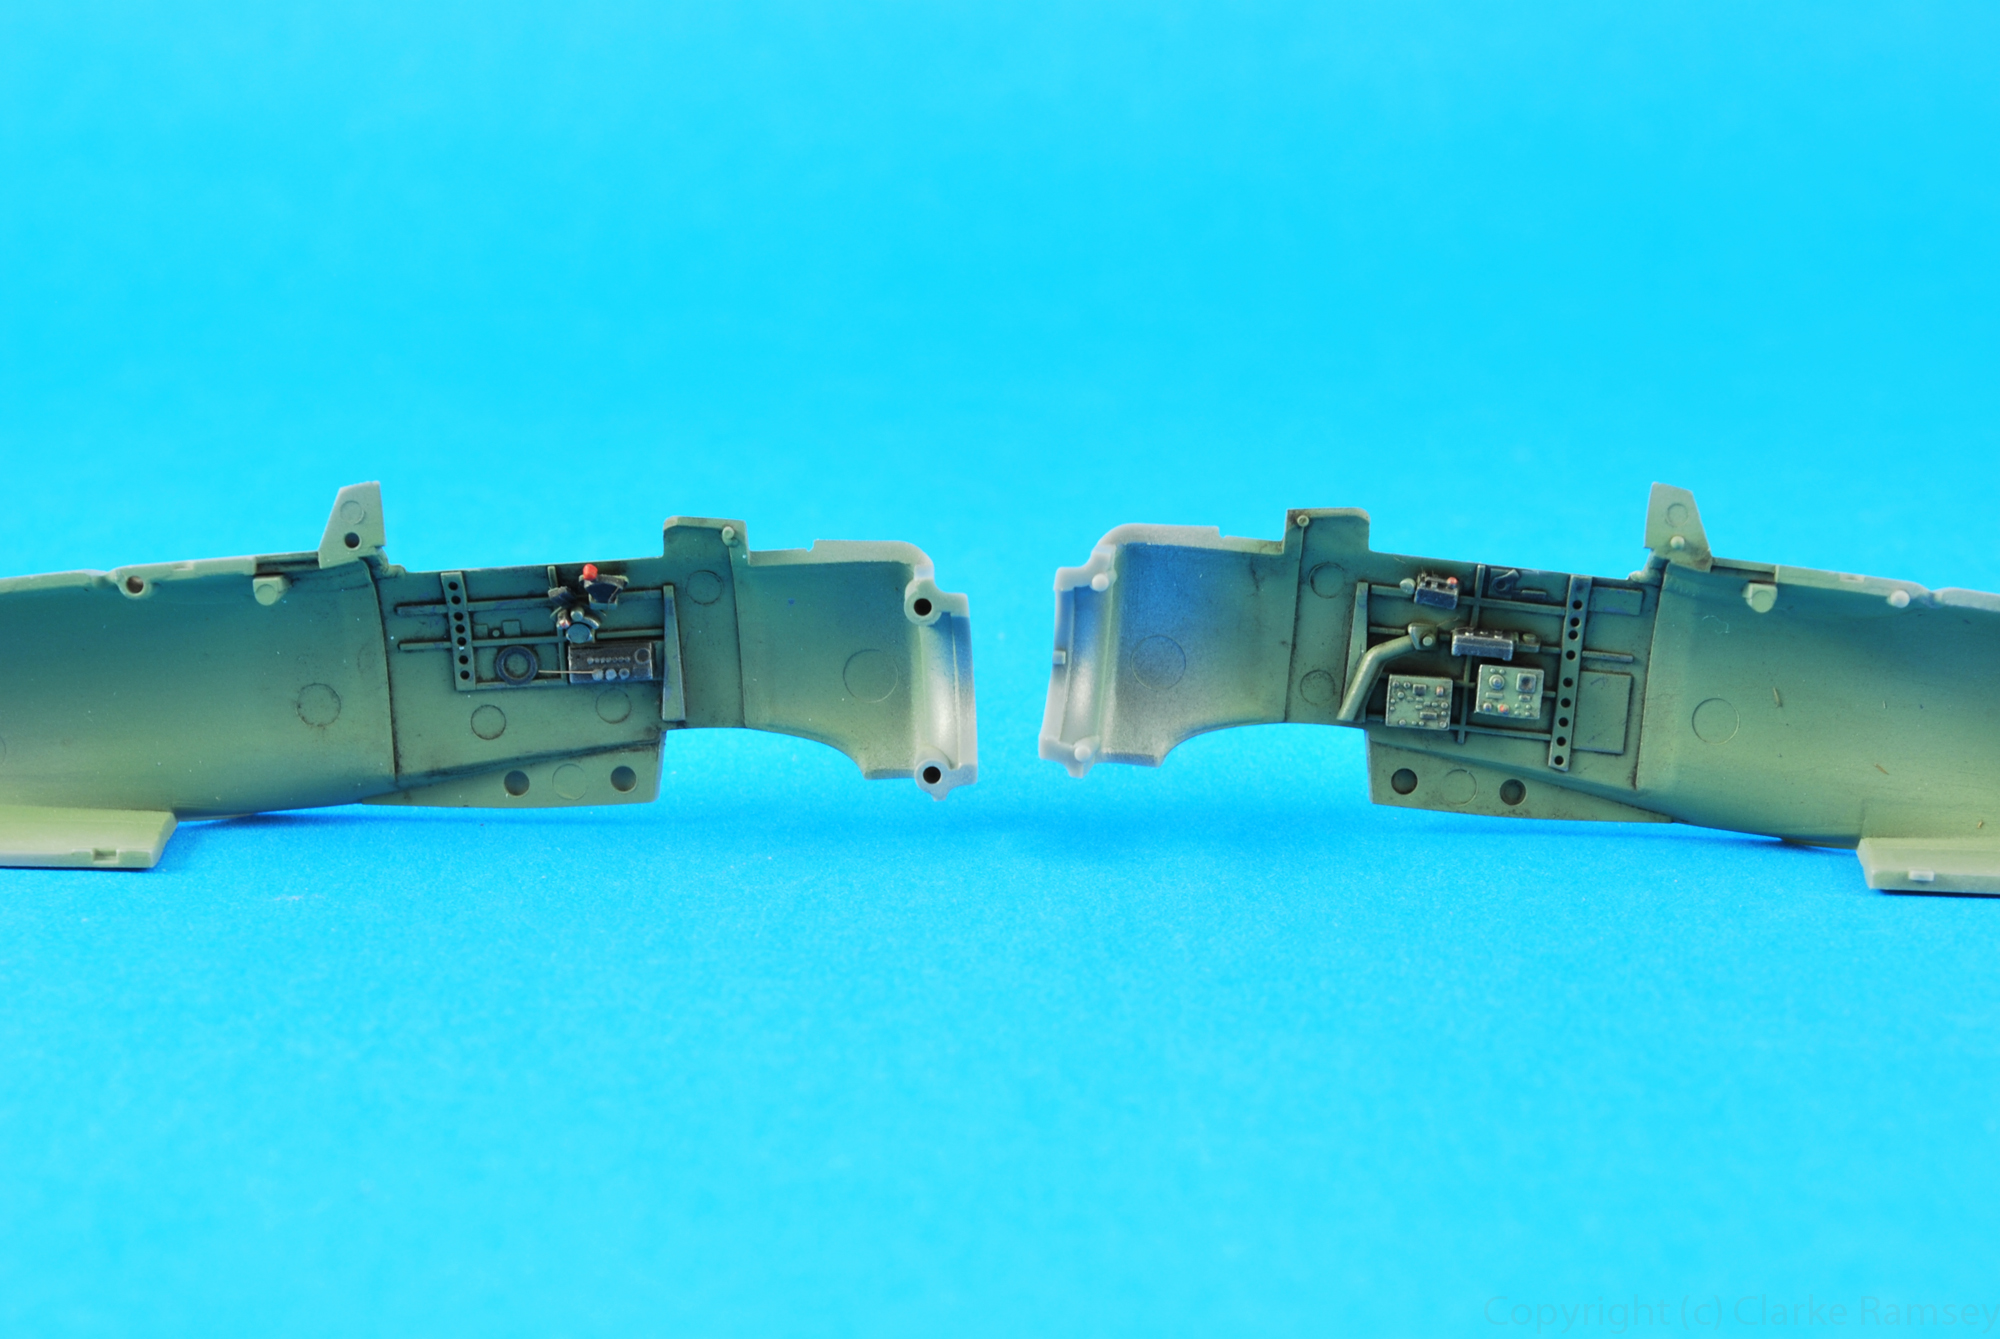
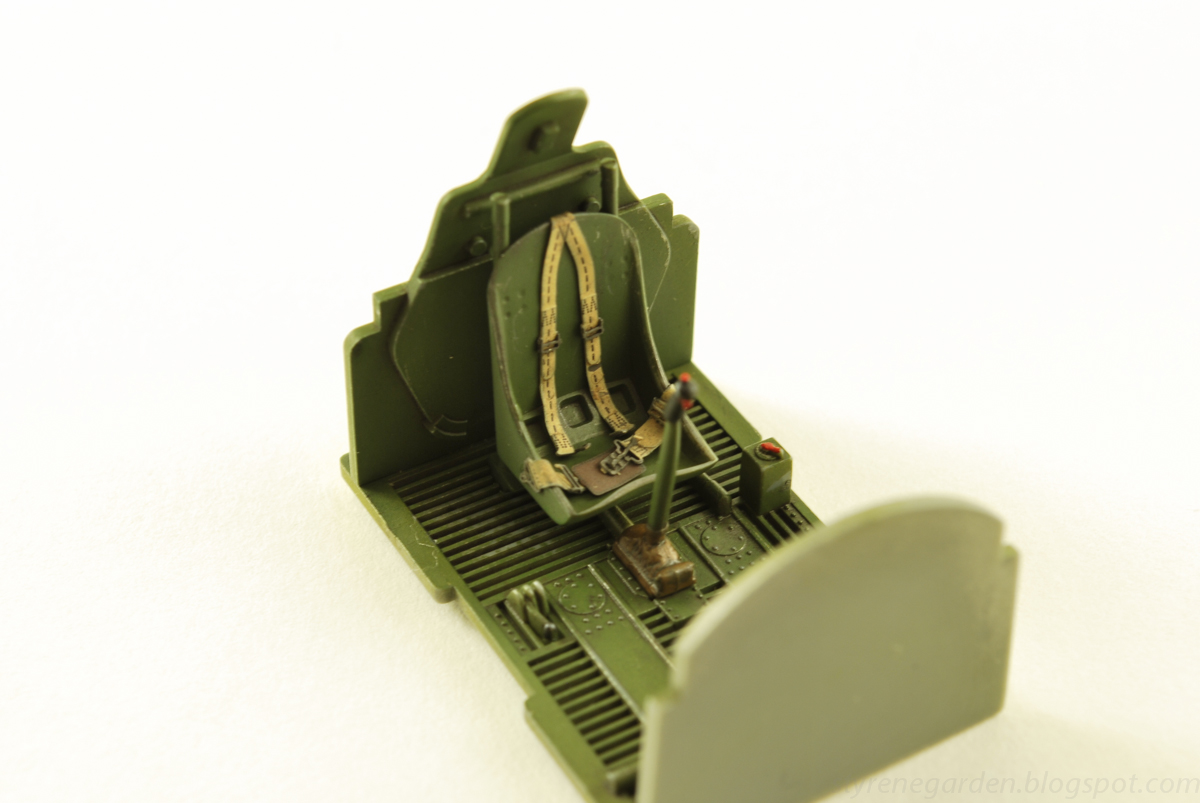
I decided to replicate the plywood floor of the cockpit without the black anti skid textured paint. Some did not have the paint and had some paint just were the pilots boots would meet the floor. A little artistic license is used with the floor make the cockpit look interesting. I started with Tamiya Wooden Deck Tan and then "paint" some oils onto the surface. I usually let the oils dry a hour or two and then use a brush moistened with spirits to remove the excess and make the grain visible. Sealed with Testors Flat cote, then masking of the appropriate areas for the the black and green sections.
The cockpit with painted with my mix of Tamiya Interior Green with details painted in Vallejo and then given a satin cote followed by the interior place-card water slide decals. I've never worked with decals of this size. Extremely thin and virtually no flash or edge visible. I was to use Walters setting solution but that seem too take forever & too much product to work. Micro Set/Sol Setting Solution work much better with these. I usually use a enamel dry-brushing technique, this time I used a acrylic Vallejo dark gray for dry-brushing. In this scale it looks like worn edges but not reflective.
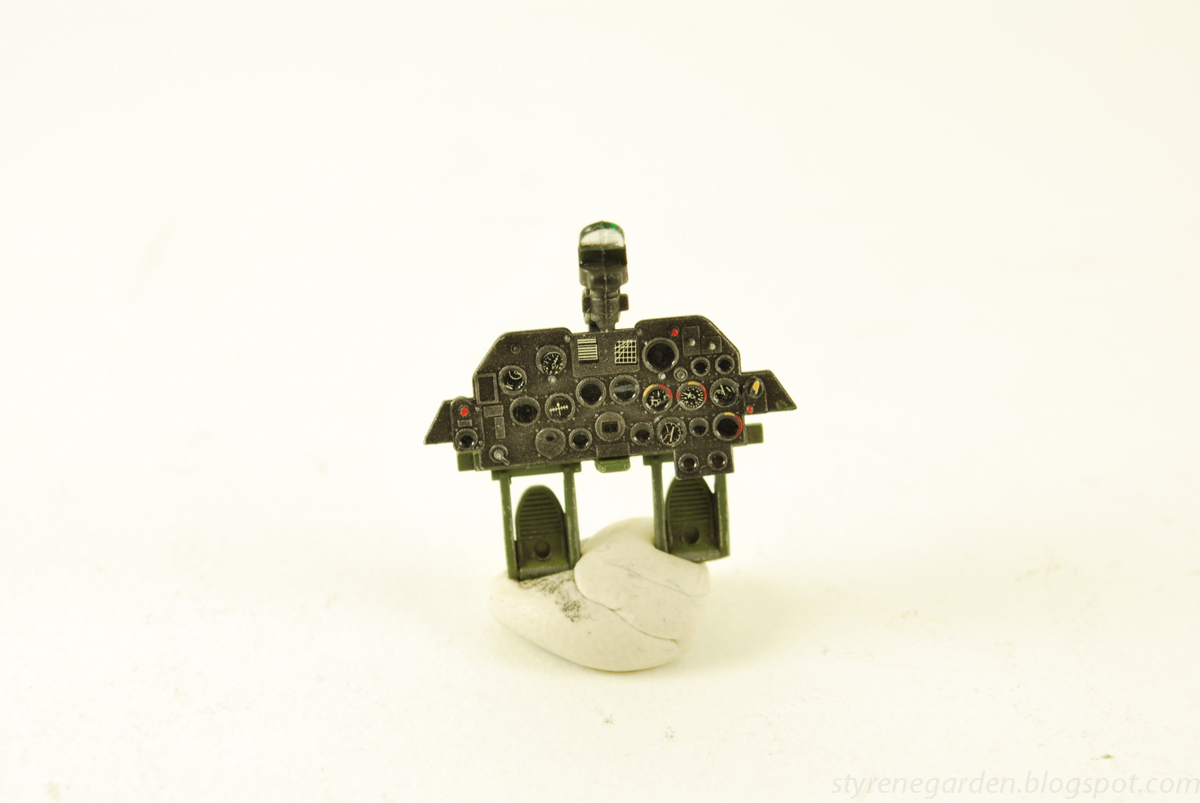
Next was the instrument panel. I used Tamiya Semi Gloss black with did not spray good, just way too thick. To be honest I don't know what went wrong. Stripped and repainted with a mix that "laid down" smoother. I should have removed some of the raised bit on the lower bit of the panel for the decals to go around "not to self for next build." Before I airbrushed the interior green onto the forward read section I used Testors aluminum plate, sprayed green and scratch it a bit with water, brush and a blunt plastic tool for the scratching on the rudder pedals. An mix of AK Interactive enamel washes of dirty brown/grey.
All of the bits n' pieces minus my custom wire O2 hose ( "MIA" ) were painted on toothpicks and weathered lightly just with a Vallejo dry brushing. The pipes and wire are a mix of different size lead fly tying fishing wire and hard wire.
I wasn't happy with the ignition rails I made for the V12. Wire kept popping off and the paint was too thick in places. Remade and I'm still not happy. Just a bit too thick. Most will not even been seen once the exhaust is fitted. I think I'm gonna invest in some more stock styrene and metal for scratch building.
The engine it's self was repainted no less then 5 times. First I tried using straight Tamiya Semi-Gloss black. That looked to glossy. Then a goggle of mixes later, I ended up with a mix of semigloss black and flat black. A very light dry brush of gray and a wash with AK grey/brown mix. I'll add some specific heavy oil stains once the engine is mounted.
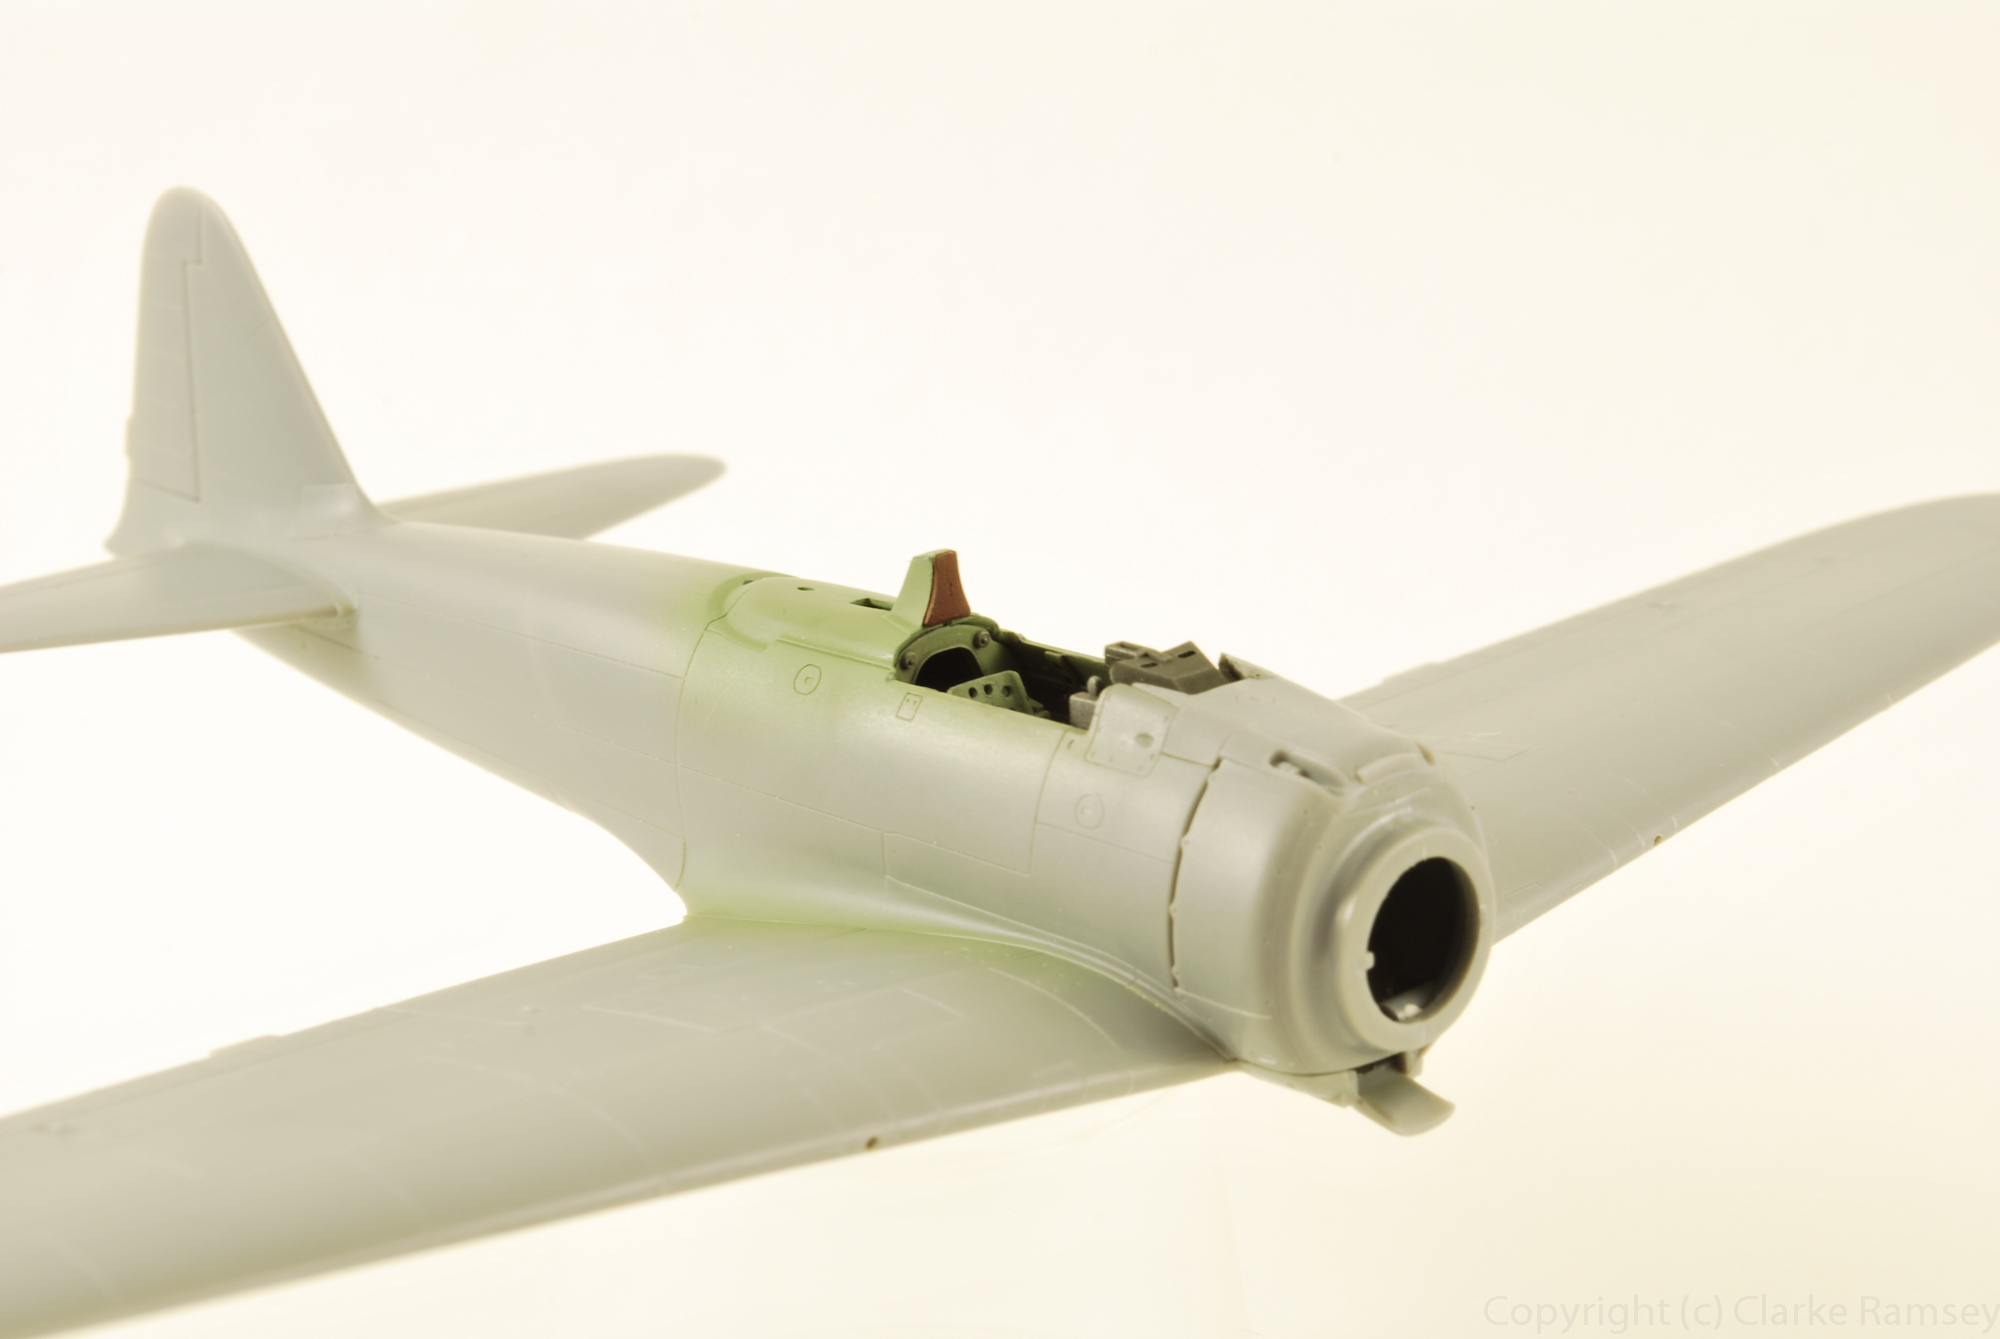
My favorite part of this build so far is the forward oil tank and firewall. The return line was made from thick solder wire bent to shape with a pipe connector made from tape strips, over coated with superglue to keep it down. The overfill line is lead wire with connectors made from tape and bent to a "U" shape. Primed in Mr Surfacer 1200, then a cote of Alclad Aluminum. I masked the metal supports and then sprayed Tamiyas' Yellow Green. A was of a mix of AK washes of grey/brown color. I'll add heaver oil drips and spatters once most of the engine bay is filled up with the goodies.
For the pilots seat I sprayed a cote of Metalizer Aluminum Plate followed by my mix of Interior green. Scratched up the usual method and then a very light pin wash of AK enamels.
The seat belts took me some time to figure out how they are constructed. There are no directions, just a final picture on how they are to look. No real issues just take your time. I used a tiny bit of CA glue to secure the ends. These belts are much better than the PE Eduard offering, or rather the kits offering as well. Bending them around the frame allows for a more natural look. The two lap belts were glued into their final positions, while the shoulder belts were left unfixed to position them later when everything done or my make up my mind. I did dirty up the white belts with a bit of sand colored pigment, for a used look.
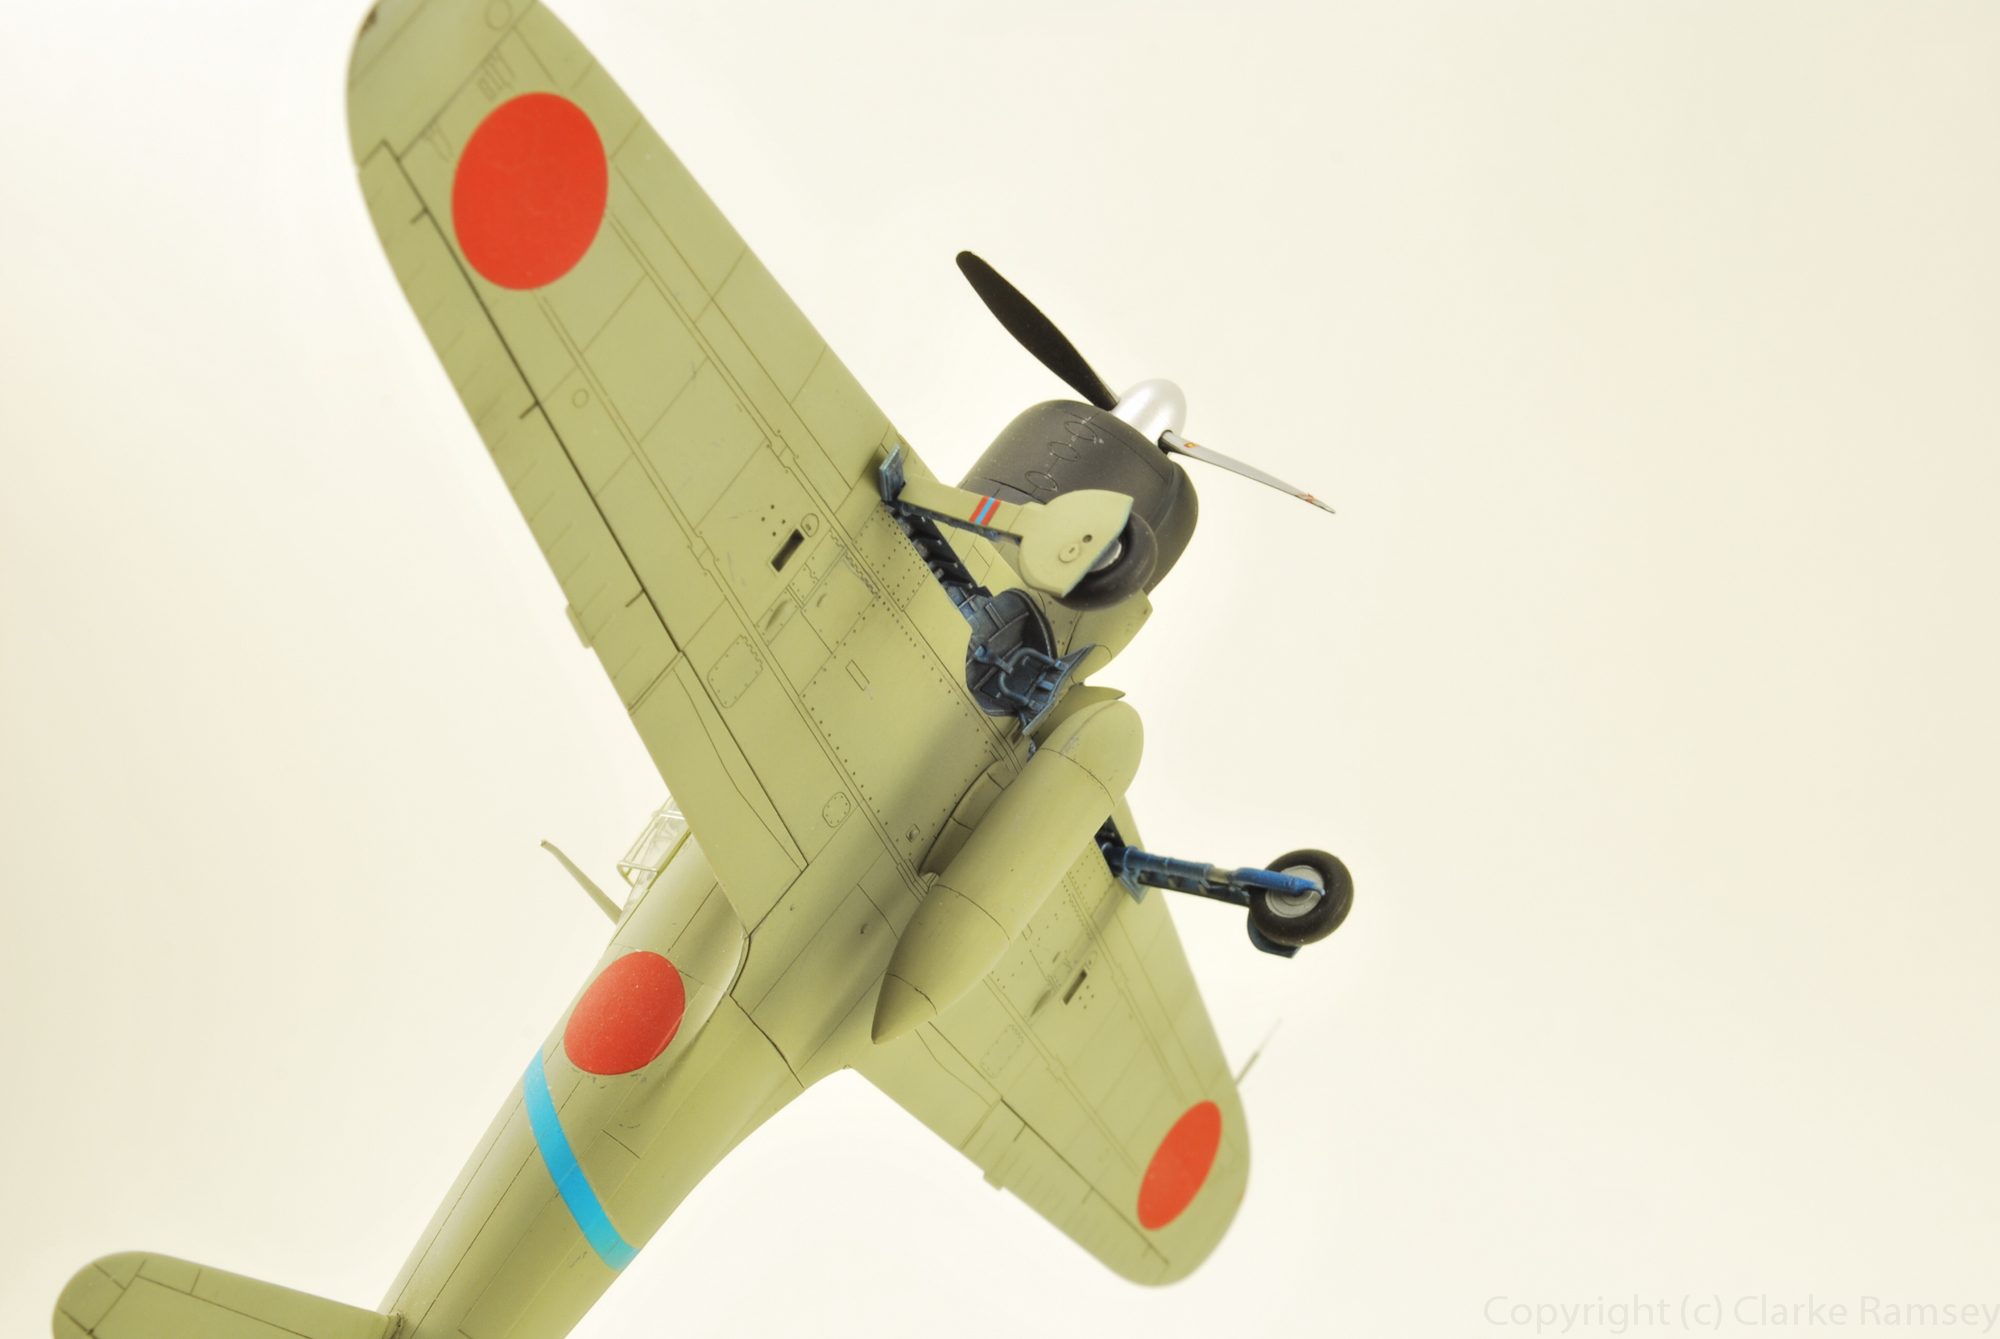
Next will be to test fit all of the interior and engine parts to check for any issues, I don't anticipate any. For now on to the exhaust and upper cowling and rear radiator.