Sunday, May 03, 2015

"Sandy" Tamiya A-1J Skyraider

One of my favorite aircraft and models. This one has been sitting half assembled for years. Lately I decided to finish it. I removed the upper spine antennas to aid in getting a clean join along the top. I'll replace those antenna with aftermarket replacements from Quick-boost. I added a resin seat replacement from True Details. The fit is a bit tight. Some chopping and heavy sanding is needed.

The engine was OOTB painted with Metalizers and Vallejo/Tamiya paints. The landing gear were modified and enhanced with hydraulic lines (lead wire) and tape.

All details were left off for ease of painting. Note to self. Leave antennas off next time! I just about broke all of them while handing. New ones set aside for last minute attachment.

Mr Surfacer 1200 and painted with Tamiya paints. I used leveling thinner from Gunze for a smooth finish. I didn't want to overcoat the entire model with gloss. I can never get gloss to look right. For the camouflage pattern I used a custom vinyl mask for outlining the sections. Next weapons and weathering.

Full Photo-set: https://www.flickr.com/photos/cramsey/sets/72157652338996145/


Sunday, November 23, 2014

Annother Thunderbolt!

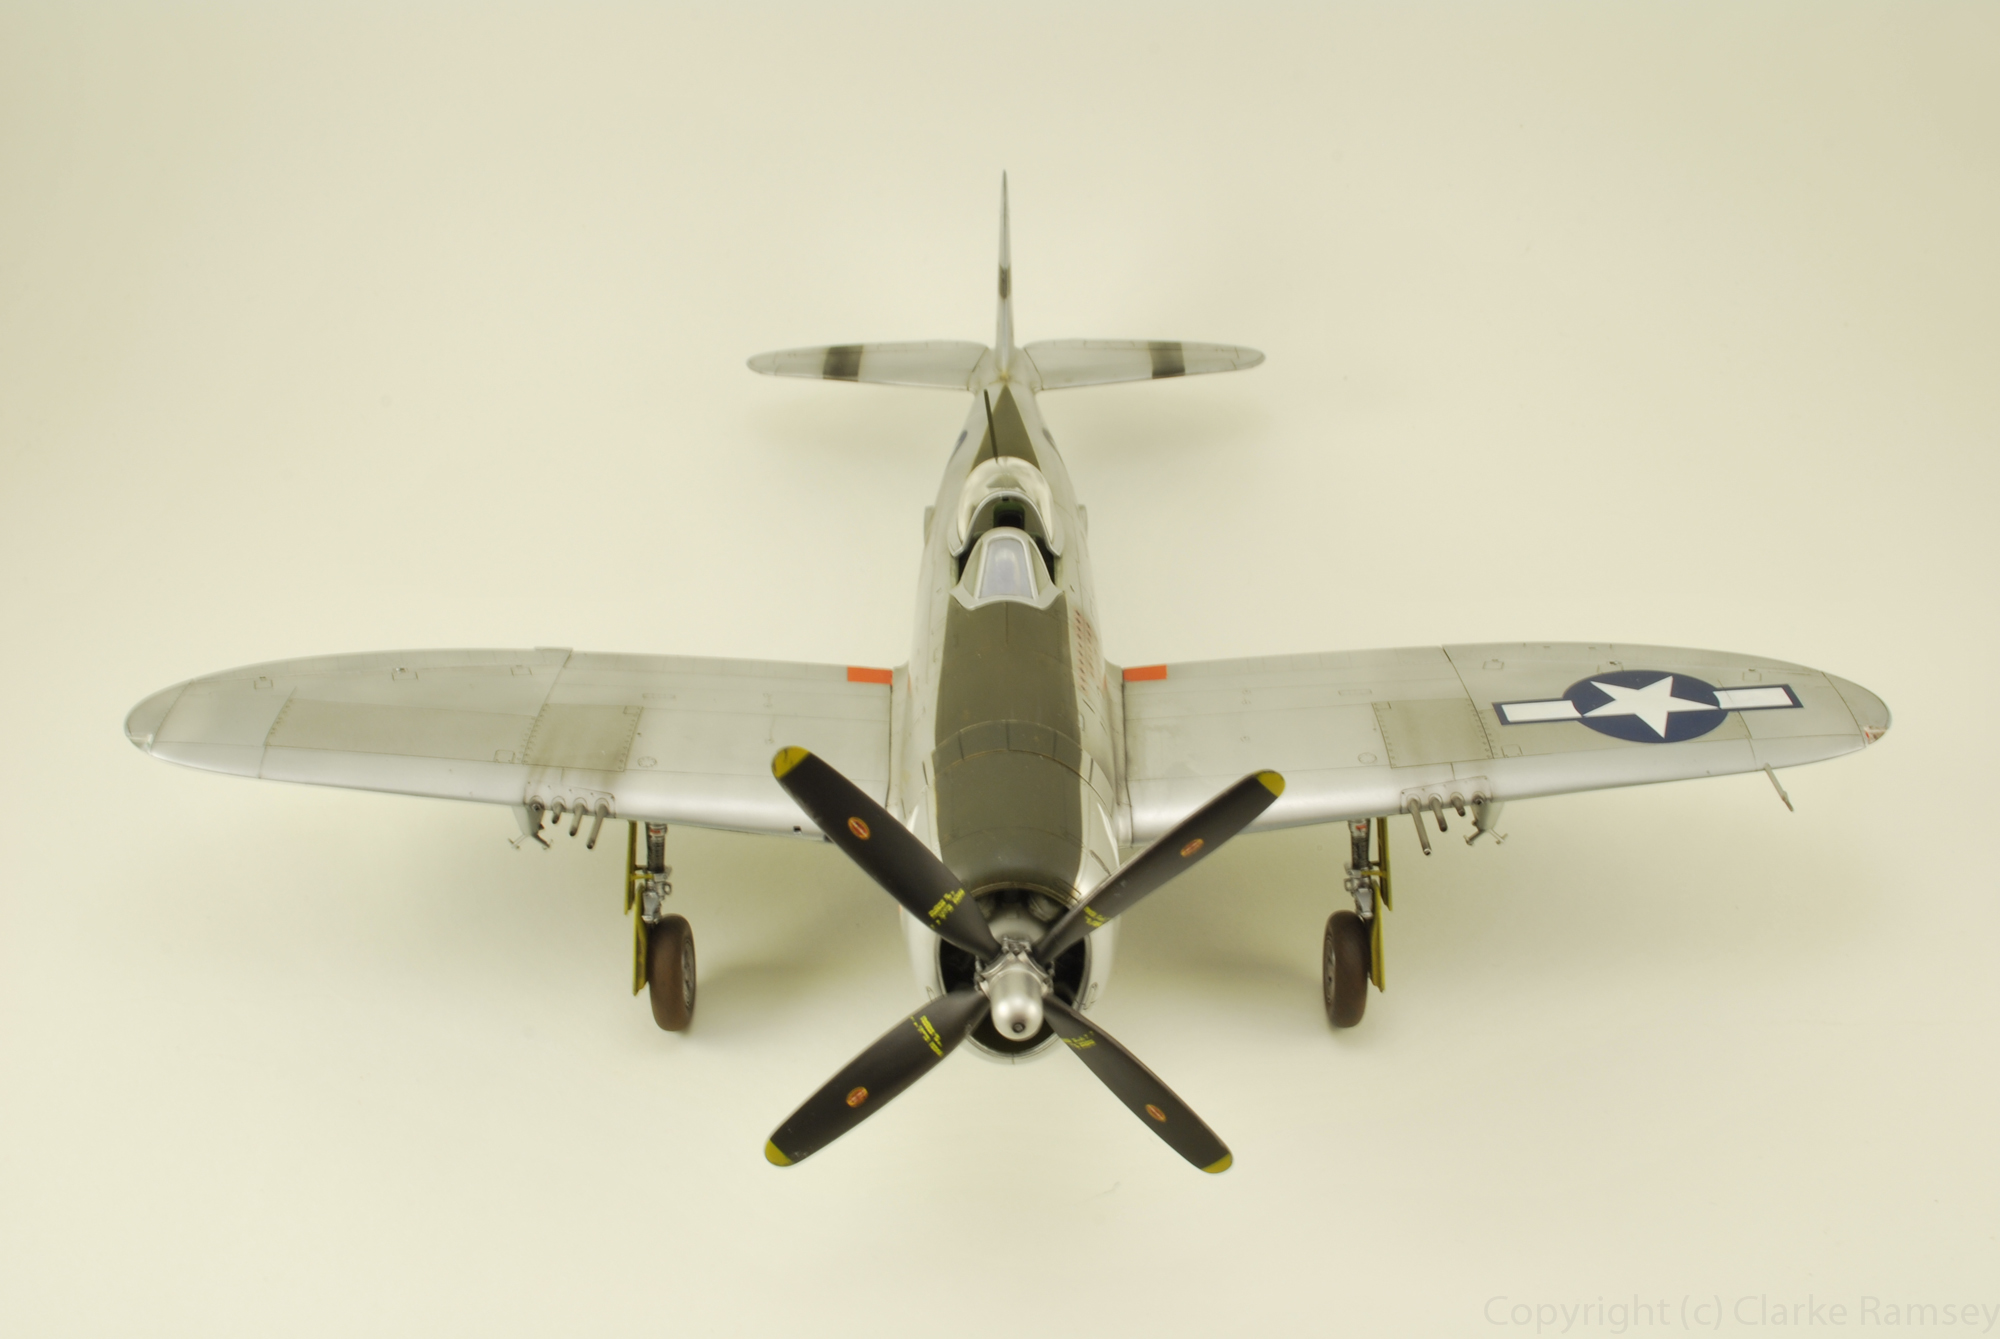
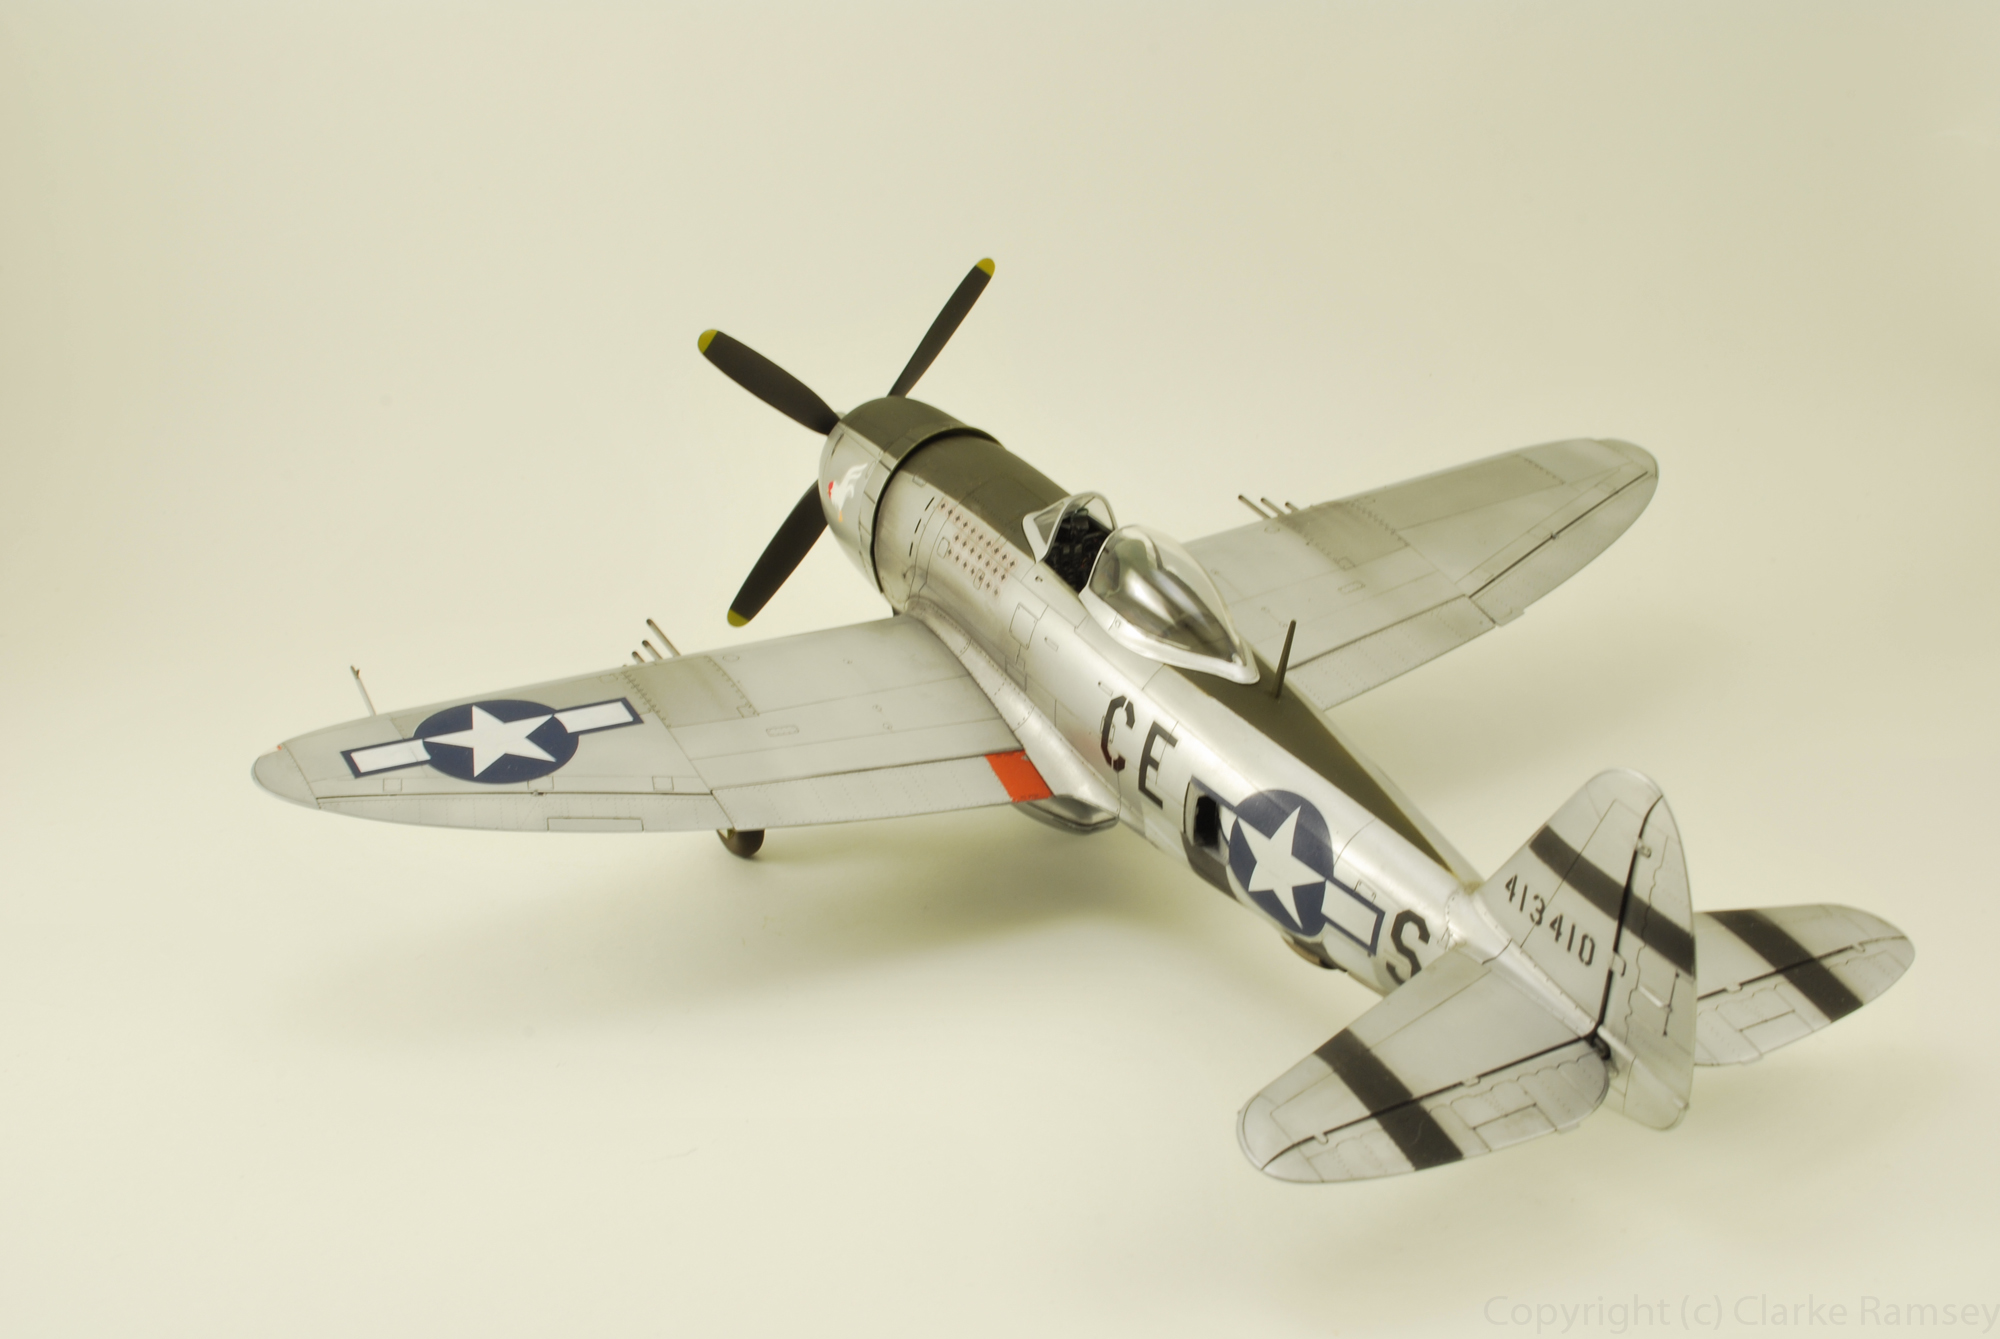
Republic Aviation's P-47 Thunderbolt, also known as the "Jug", was the largest, heaviest, and most expensive fighter aircraft in history to be powered by a single reciprocating engine. It was one of the main United States Army Air Forces (USAAF) fighters of World War II, and served with other Allied air forces. The P-47 was very effective in air combat but proved especially adept at ground attack. It had eight .50-caliber machine guns, four per wing. When fully loaded the P-47 could weigh up to eight tons. A modern-day counterpart in that role, the A-10 Thunderbolt II, takes its name from the P-47.

I 
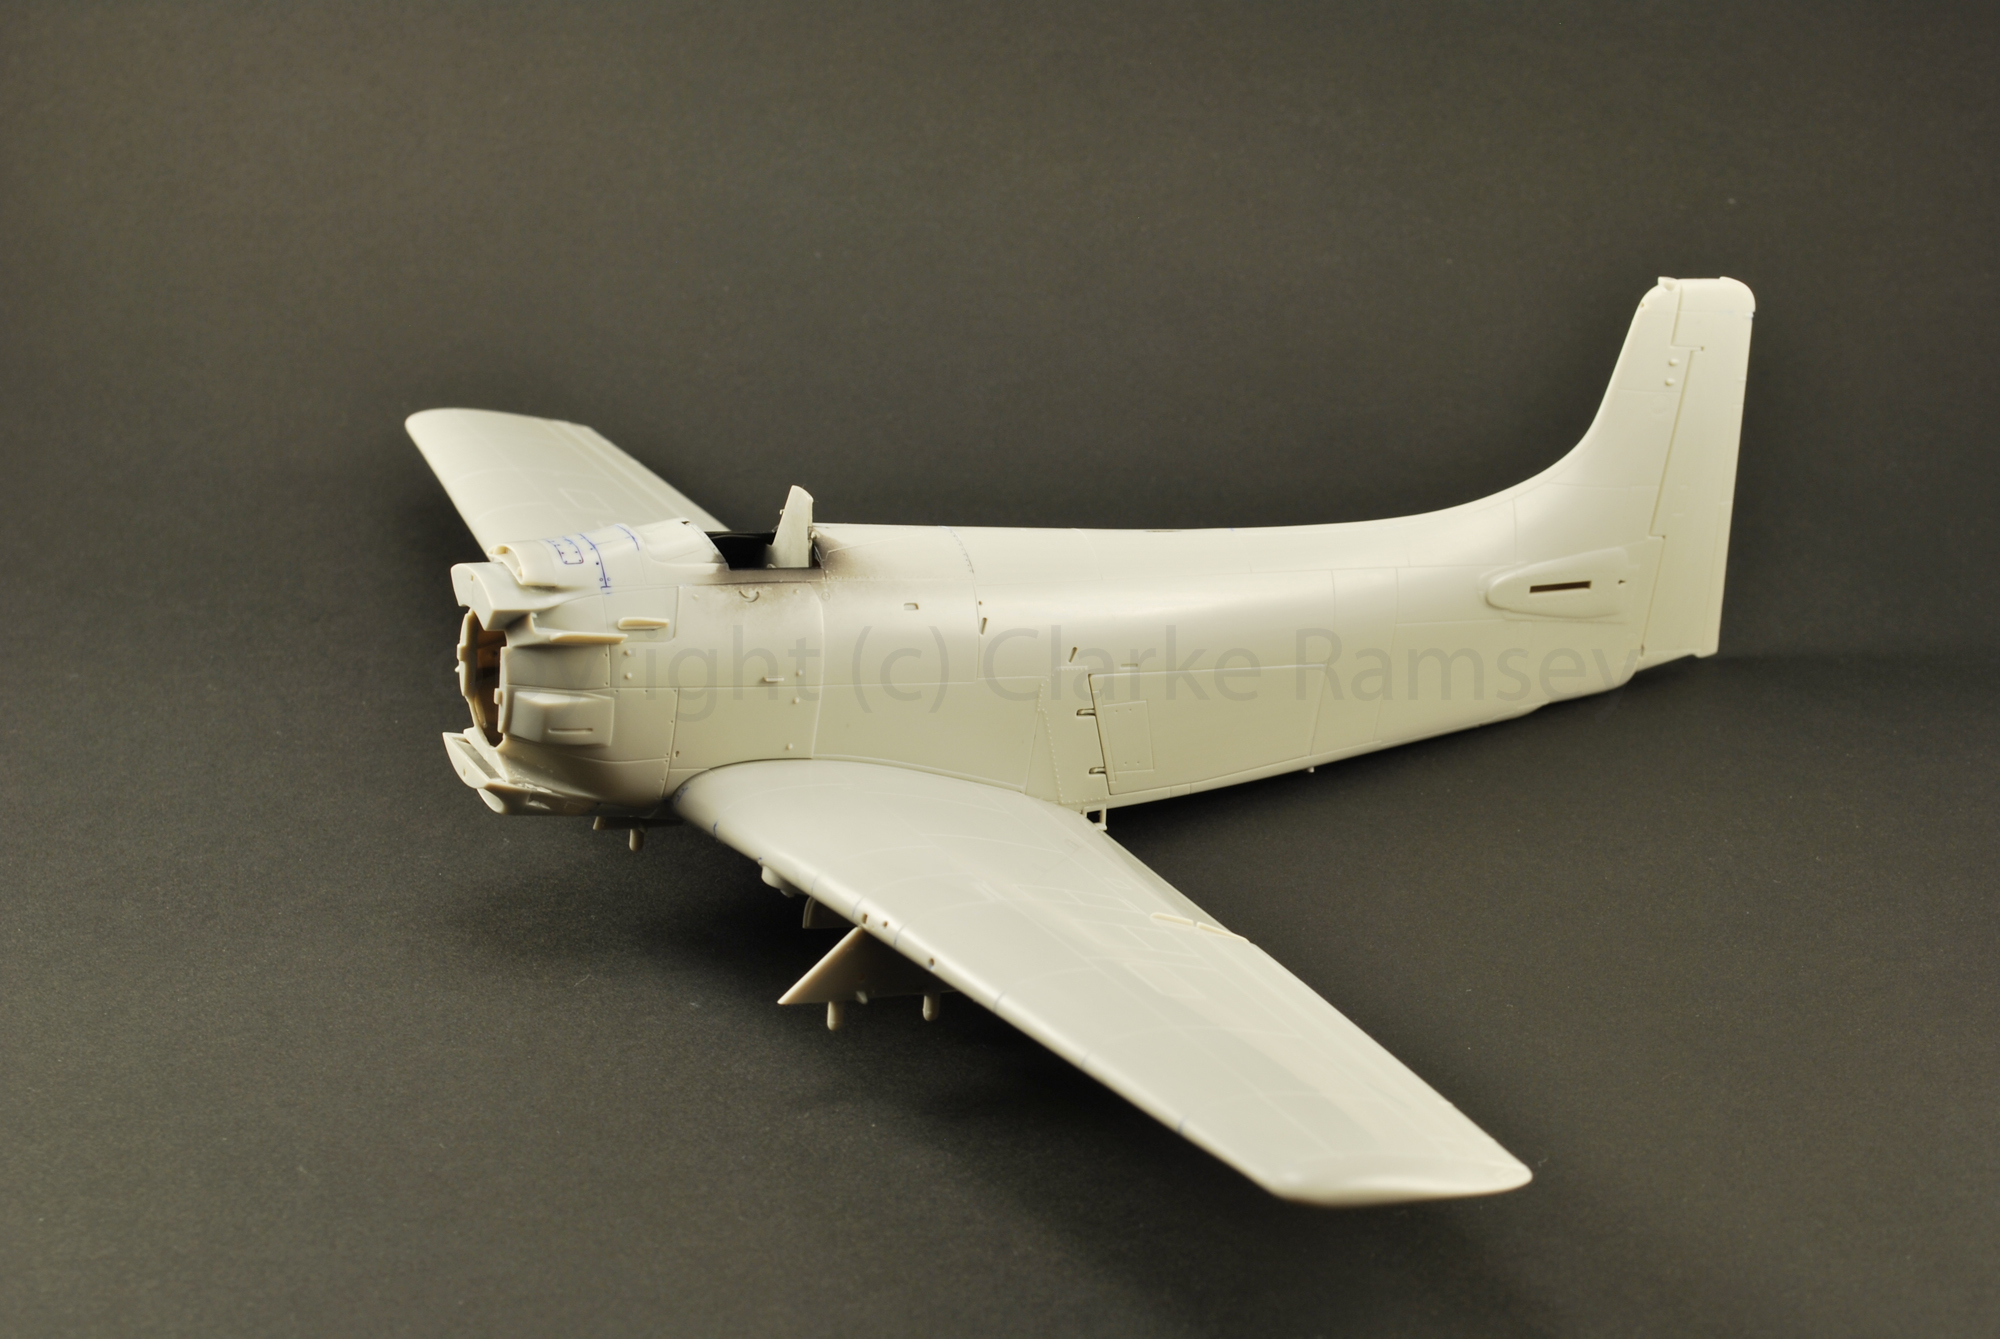
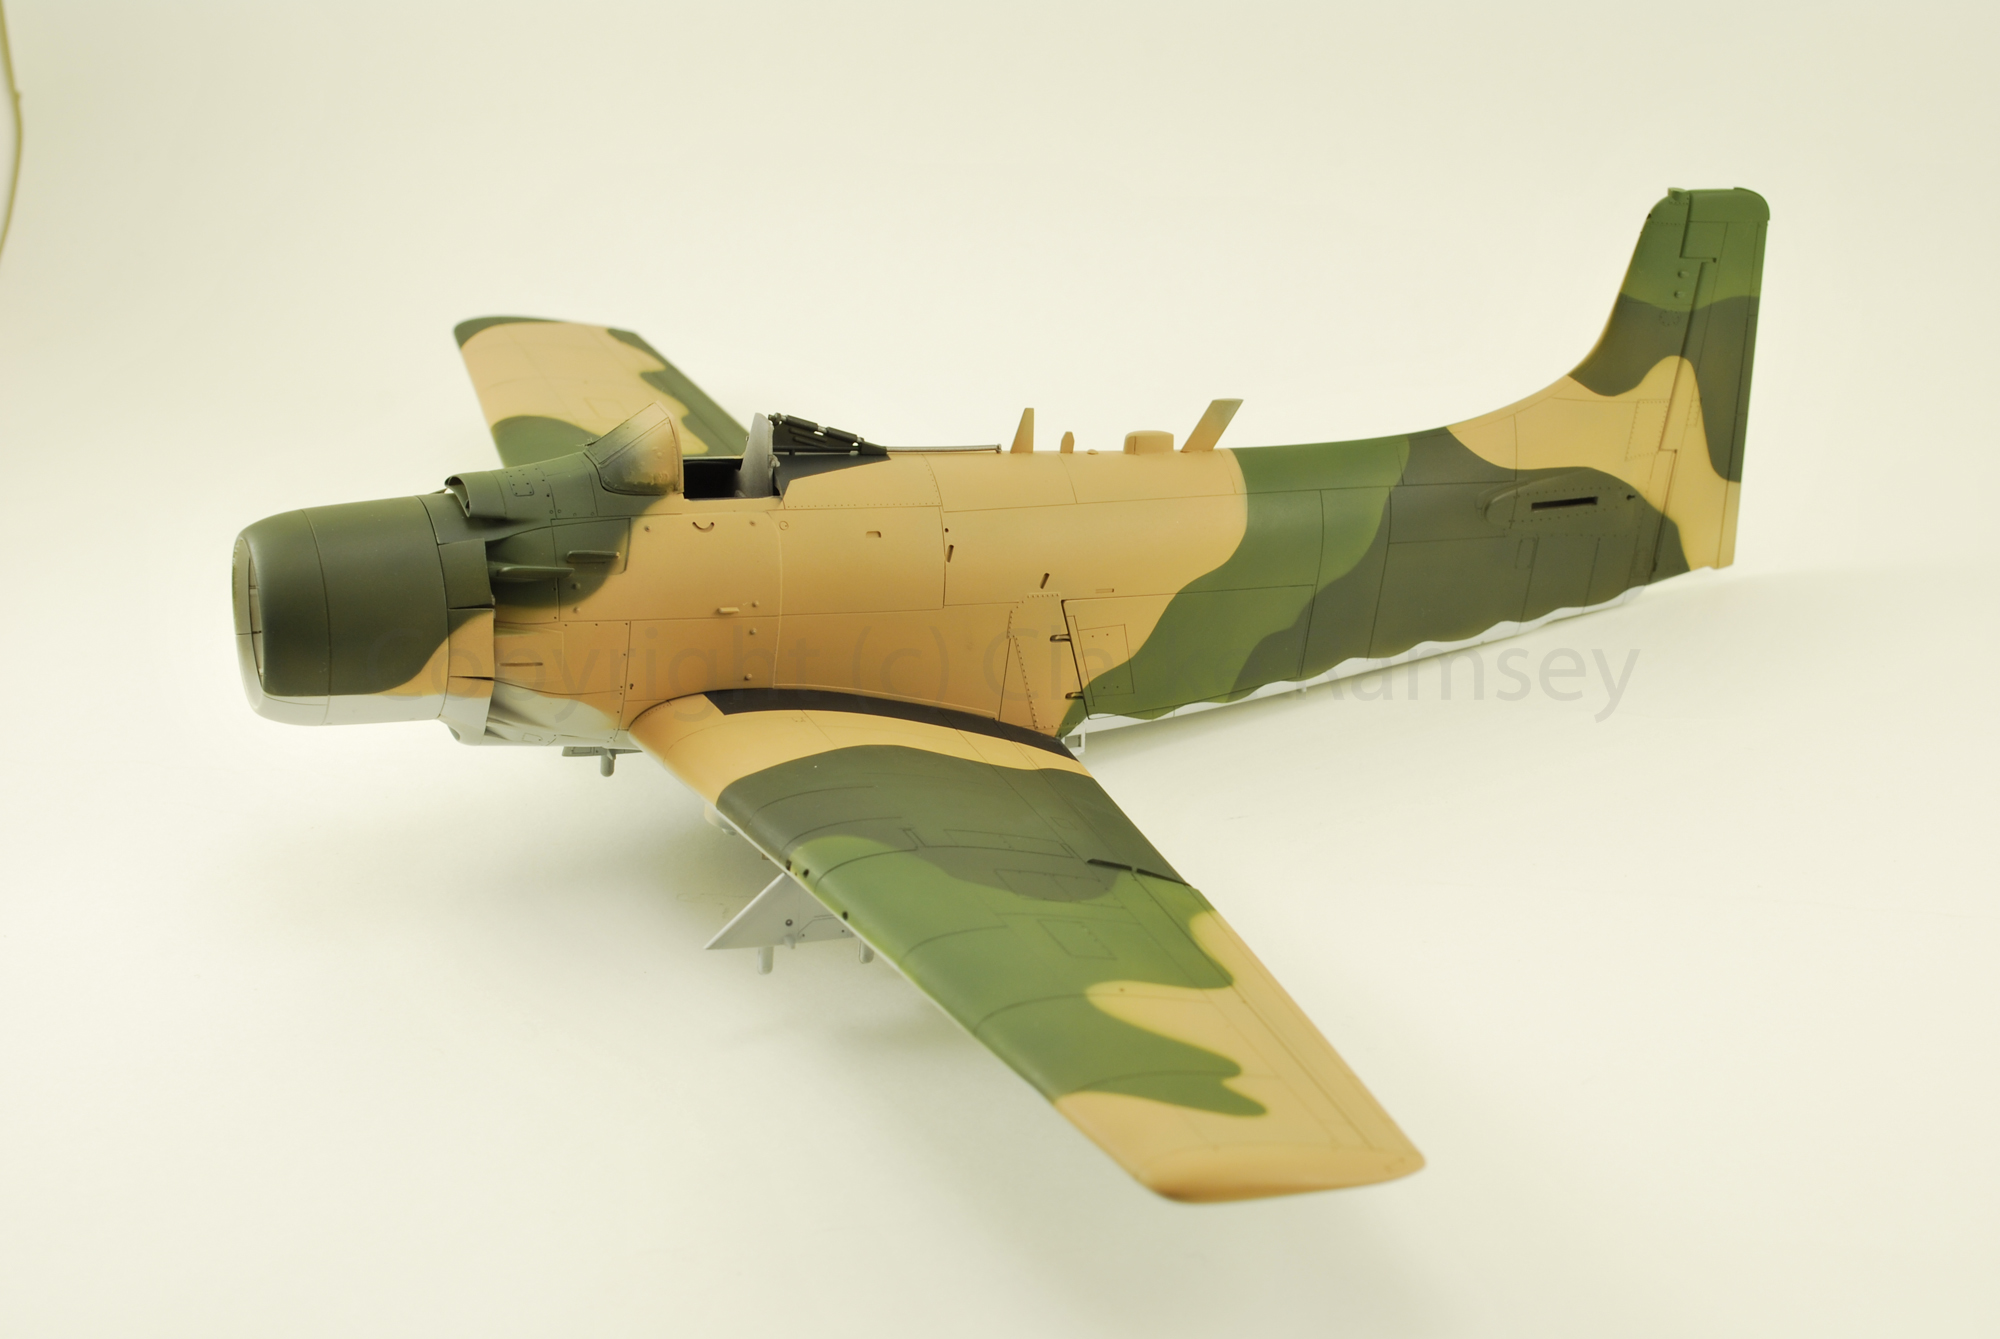
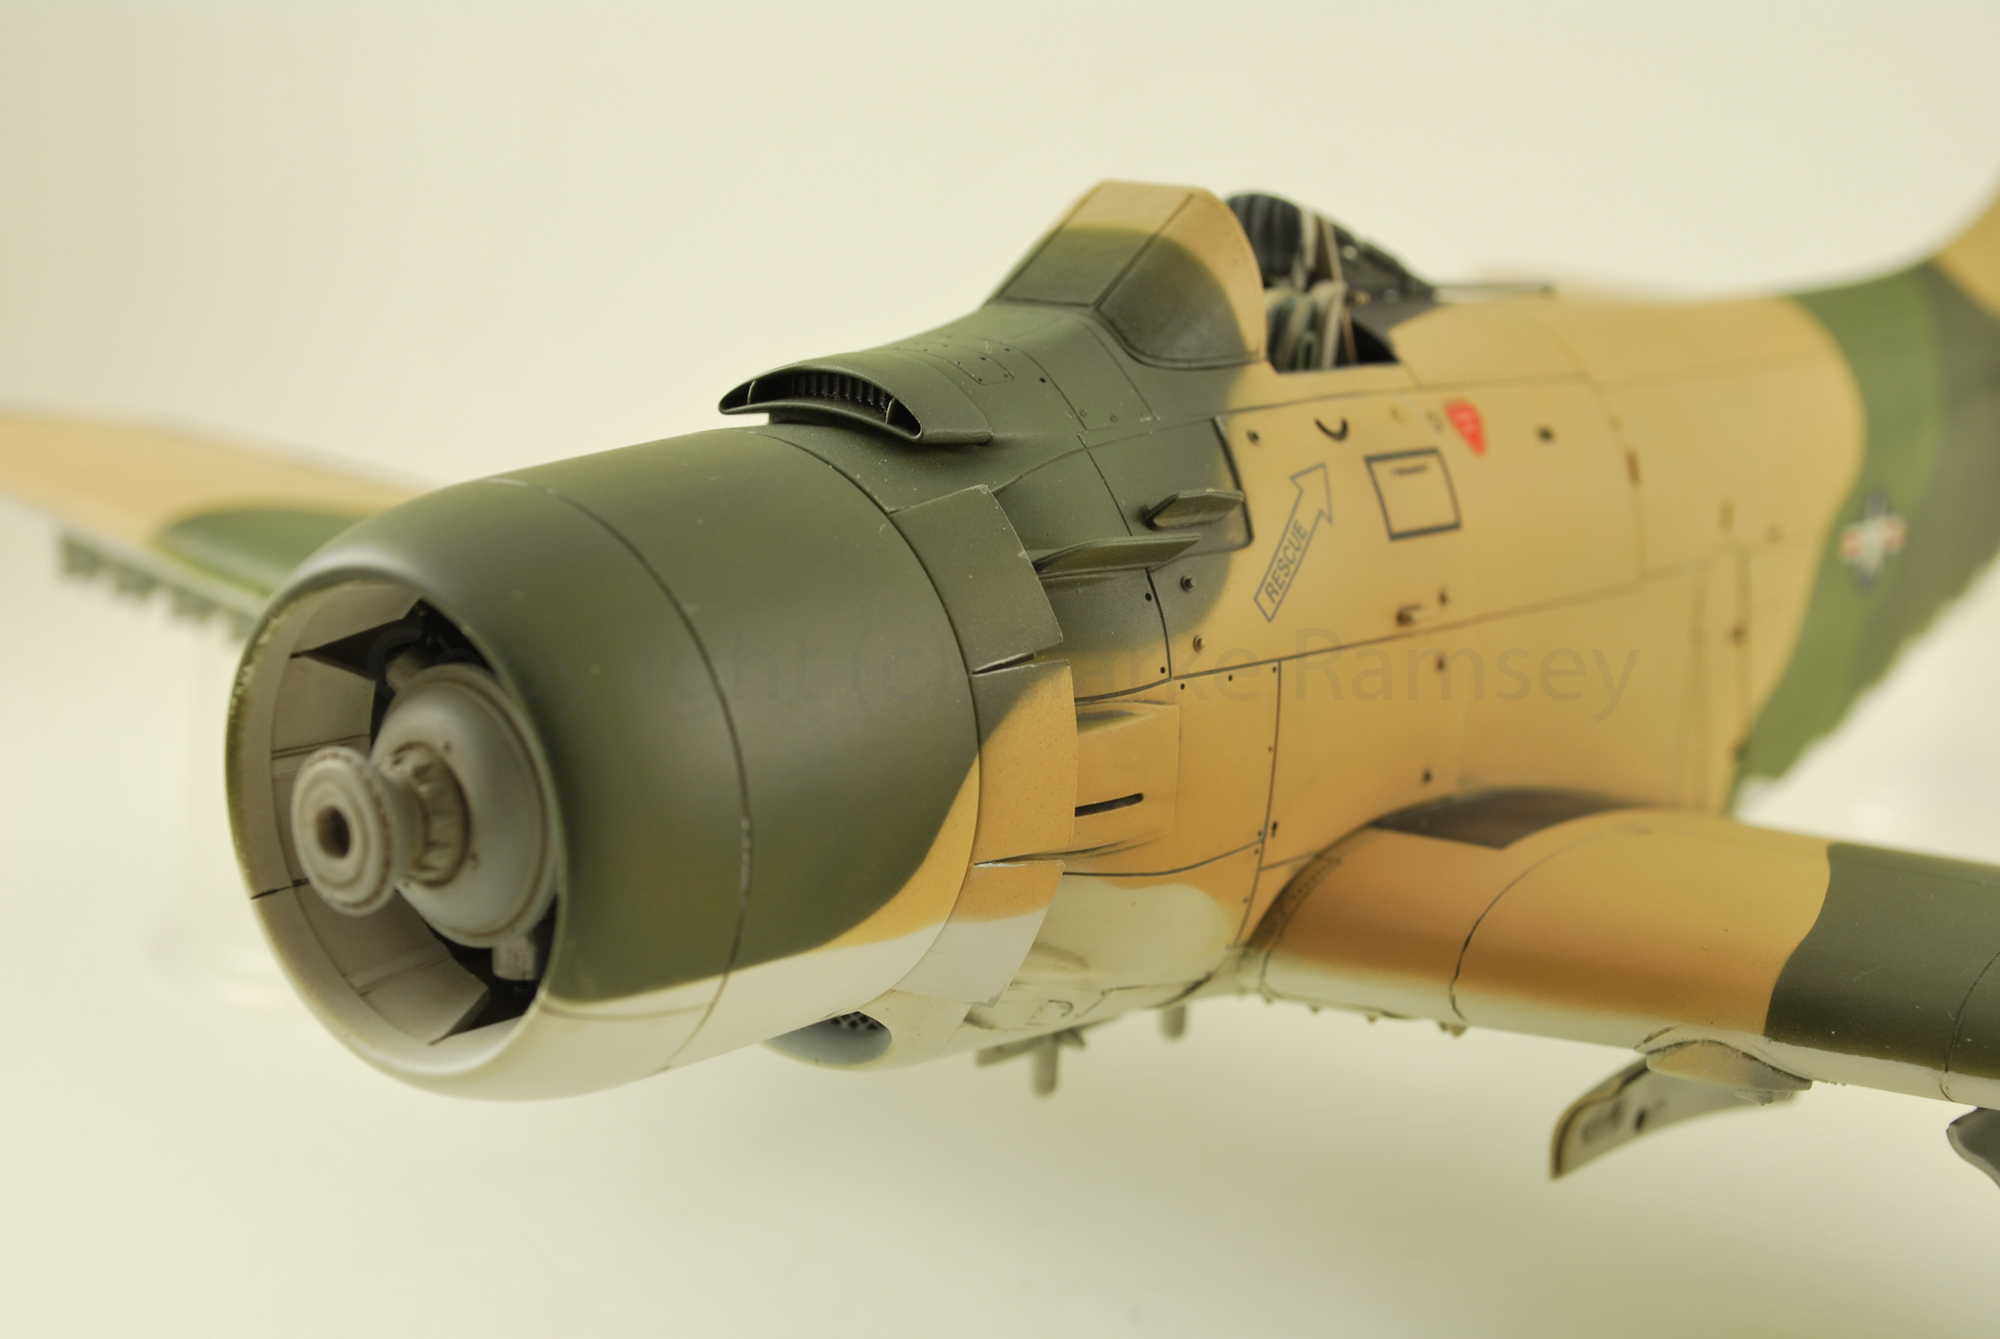
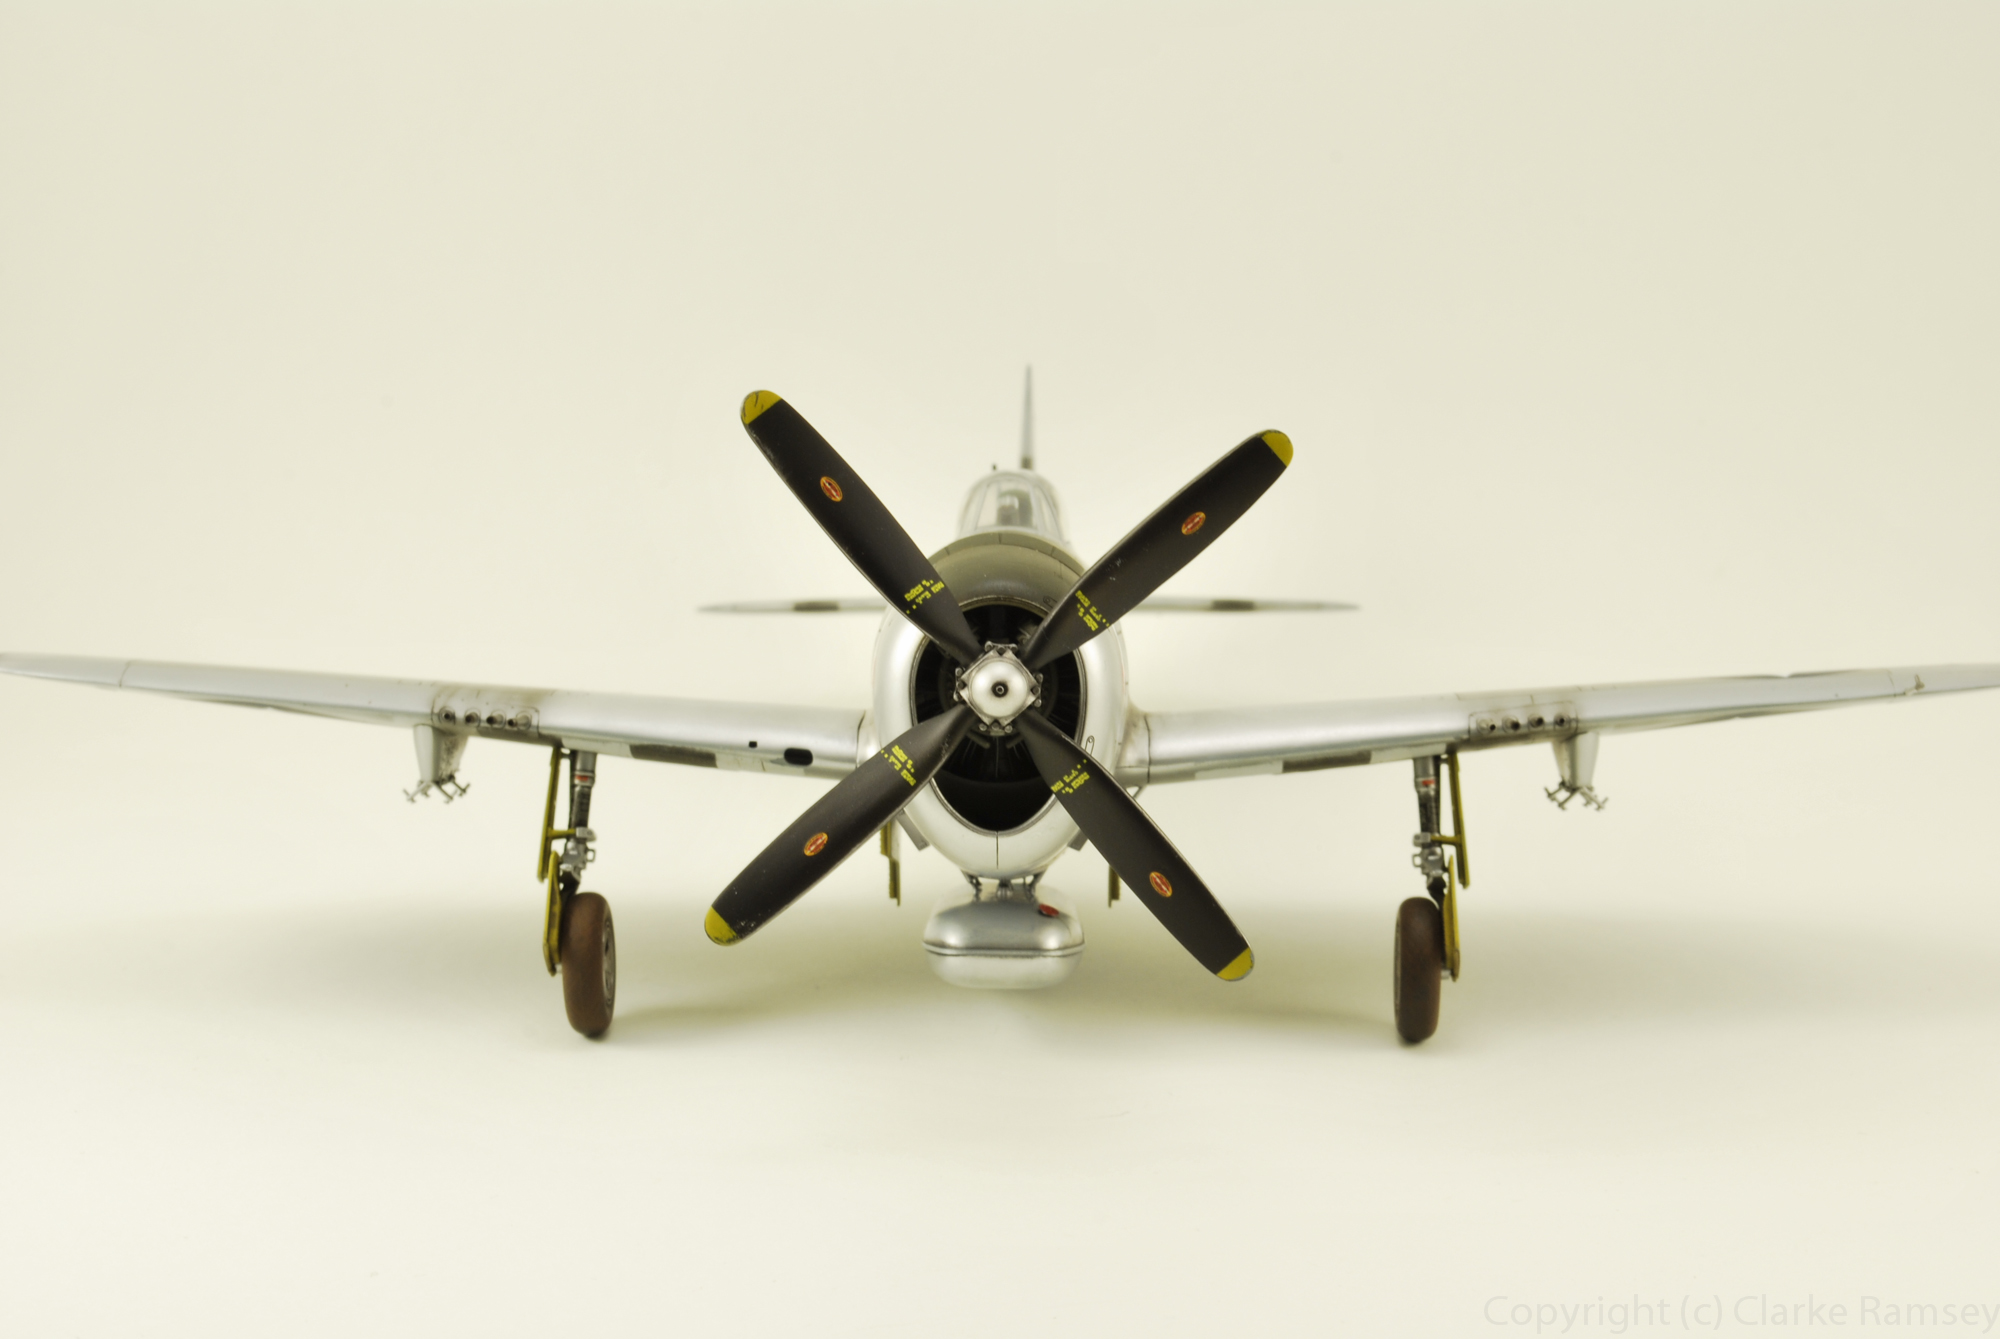
needed another break from the last P-47D. So another P-47D would cure that empty space on the workbench. lol. Tamiya's Jug is just about one of the best fitting kits in 1/48th. No fit issues so far. I started with 
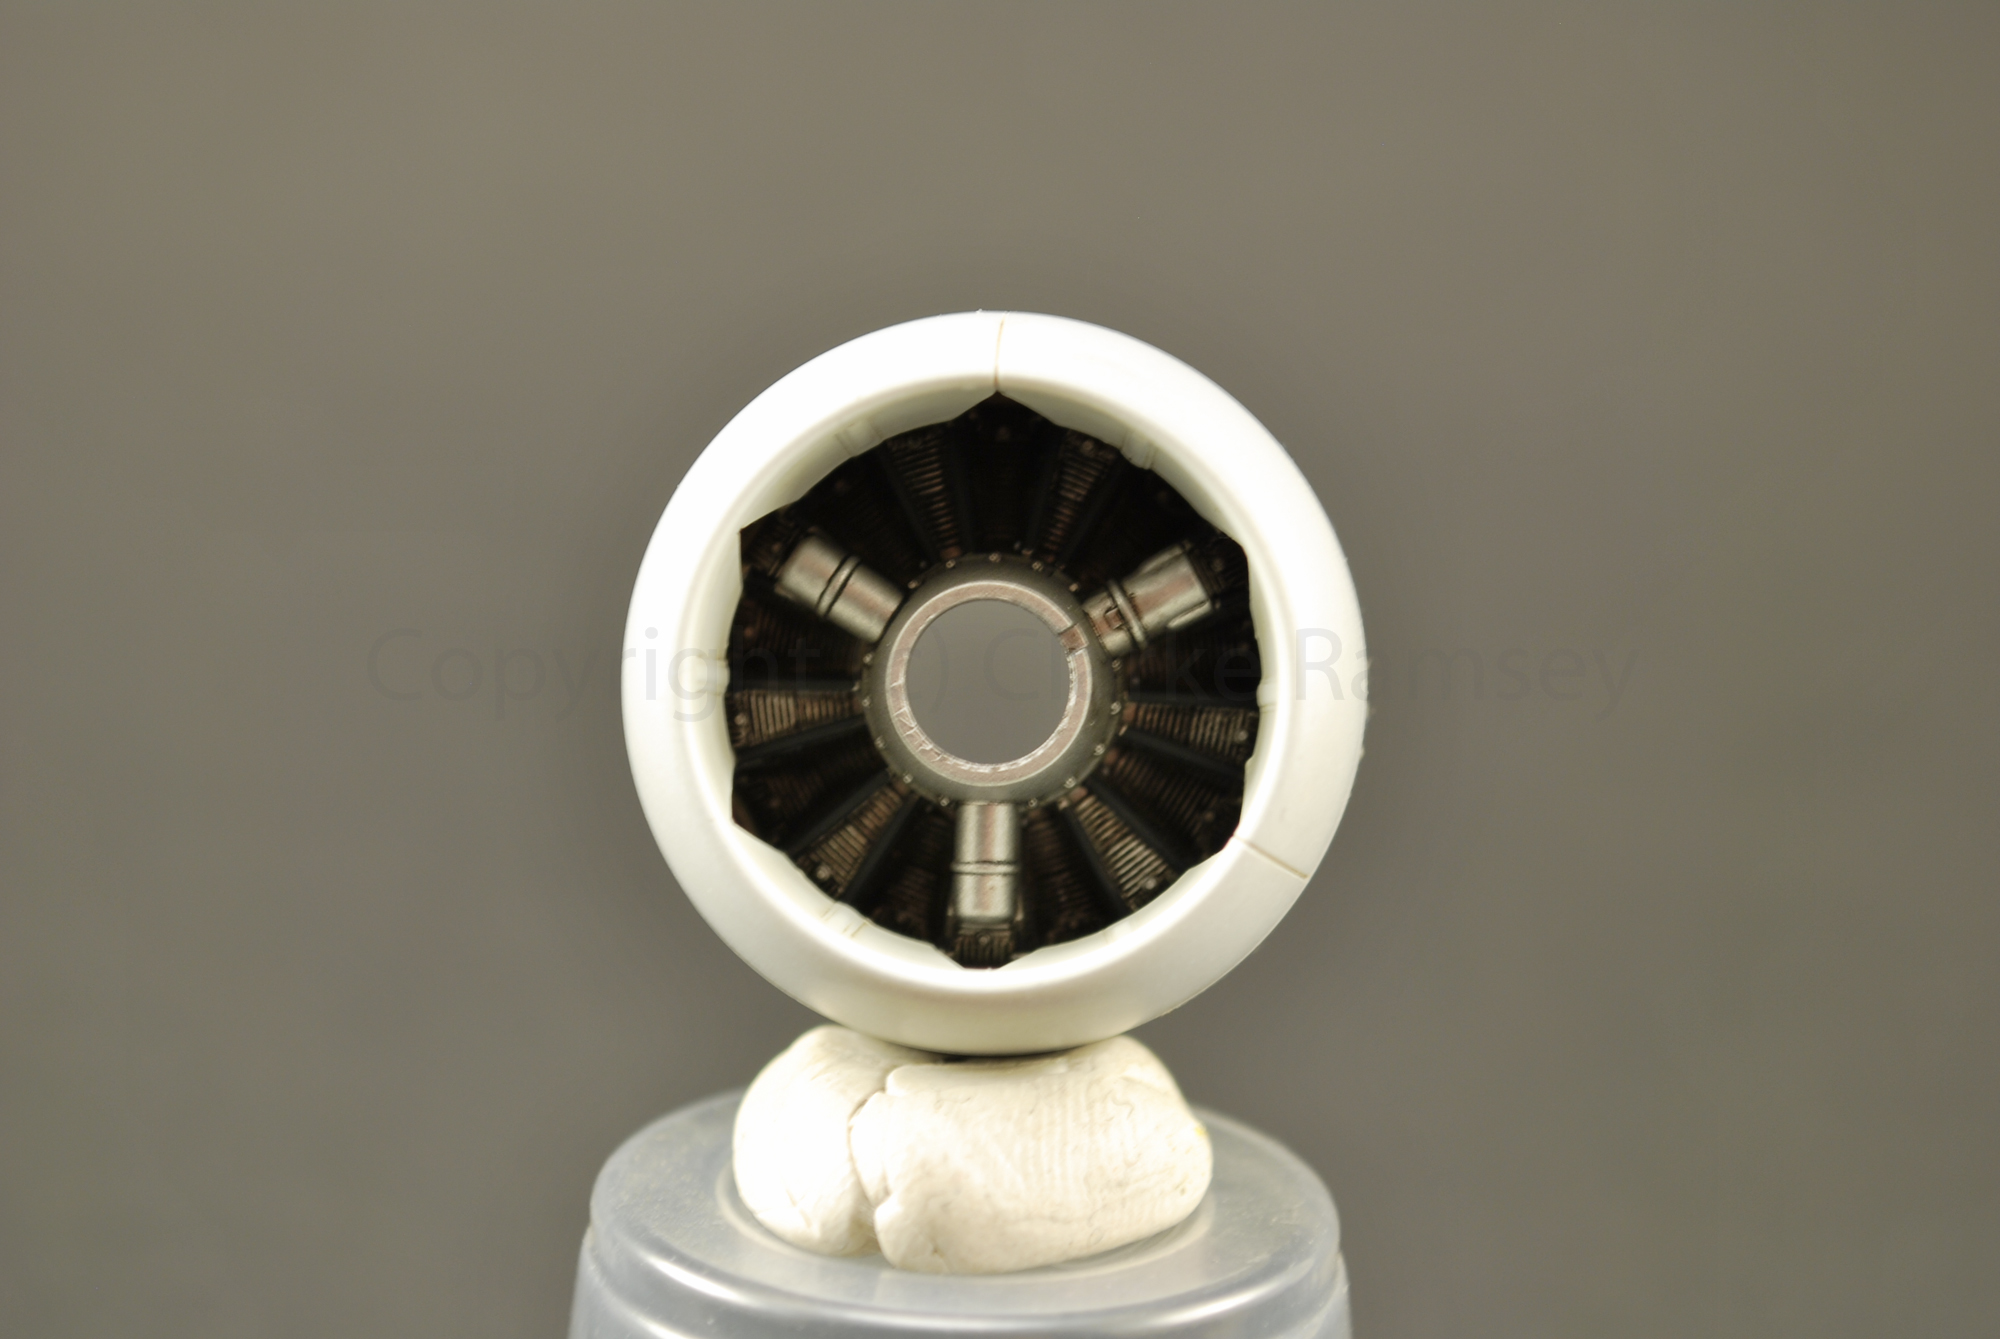
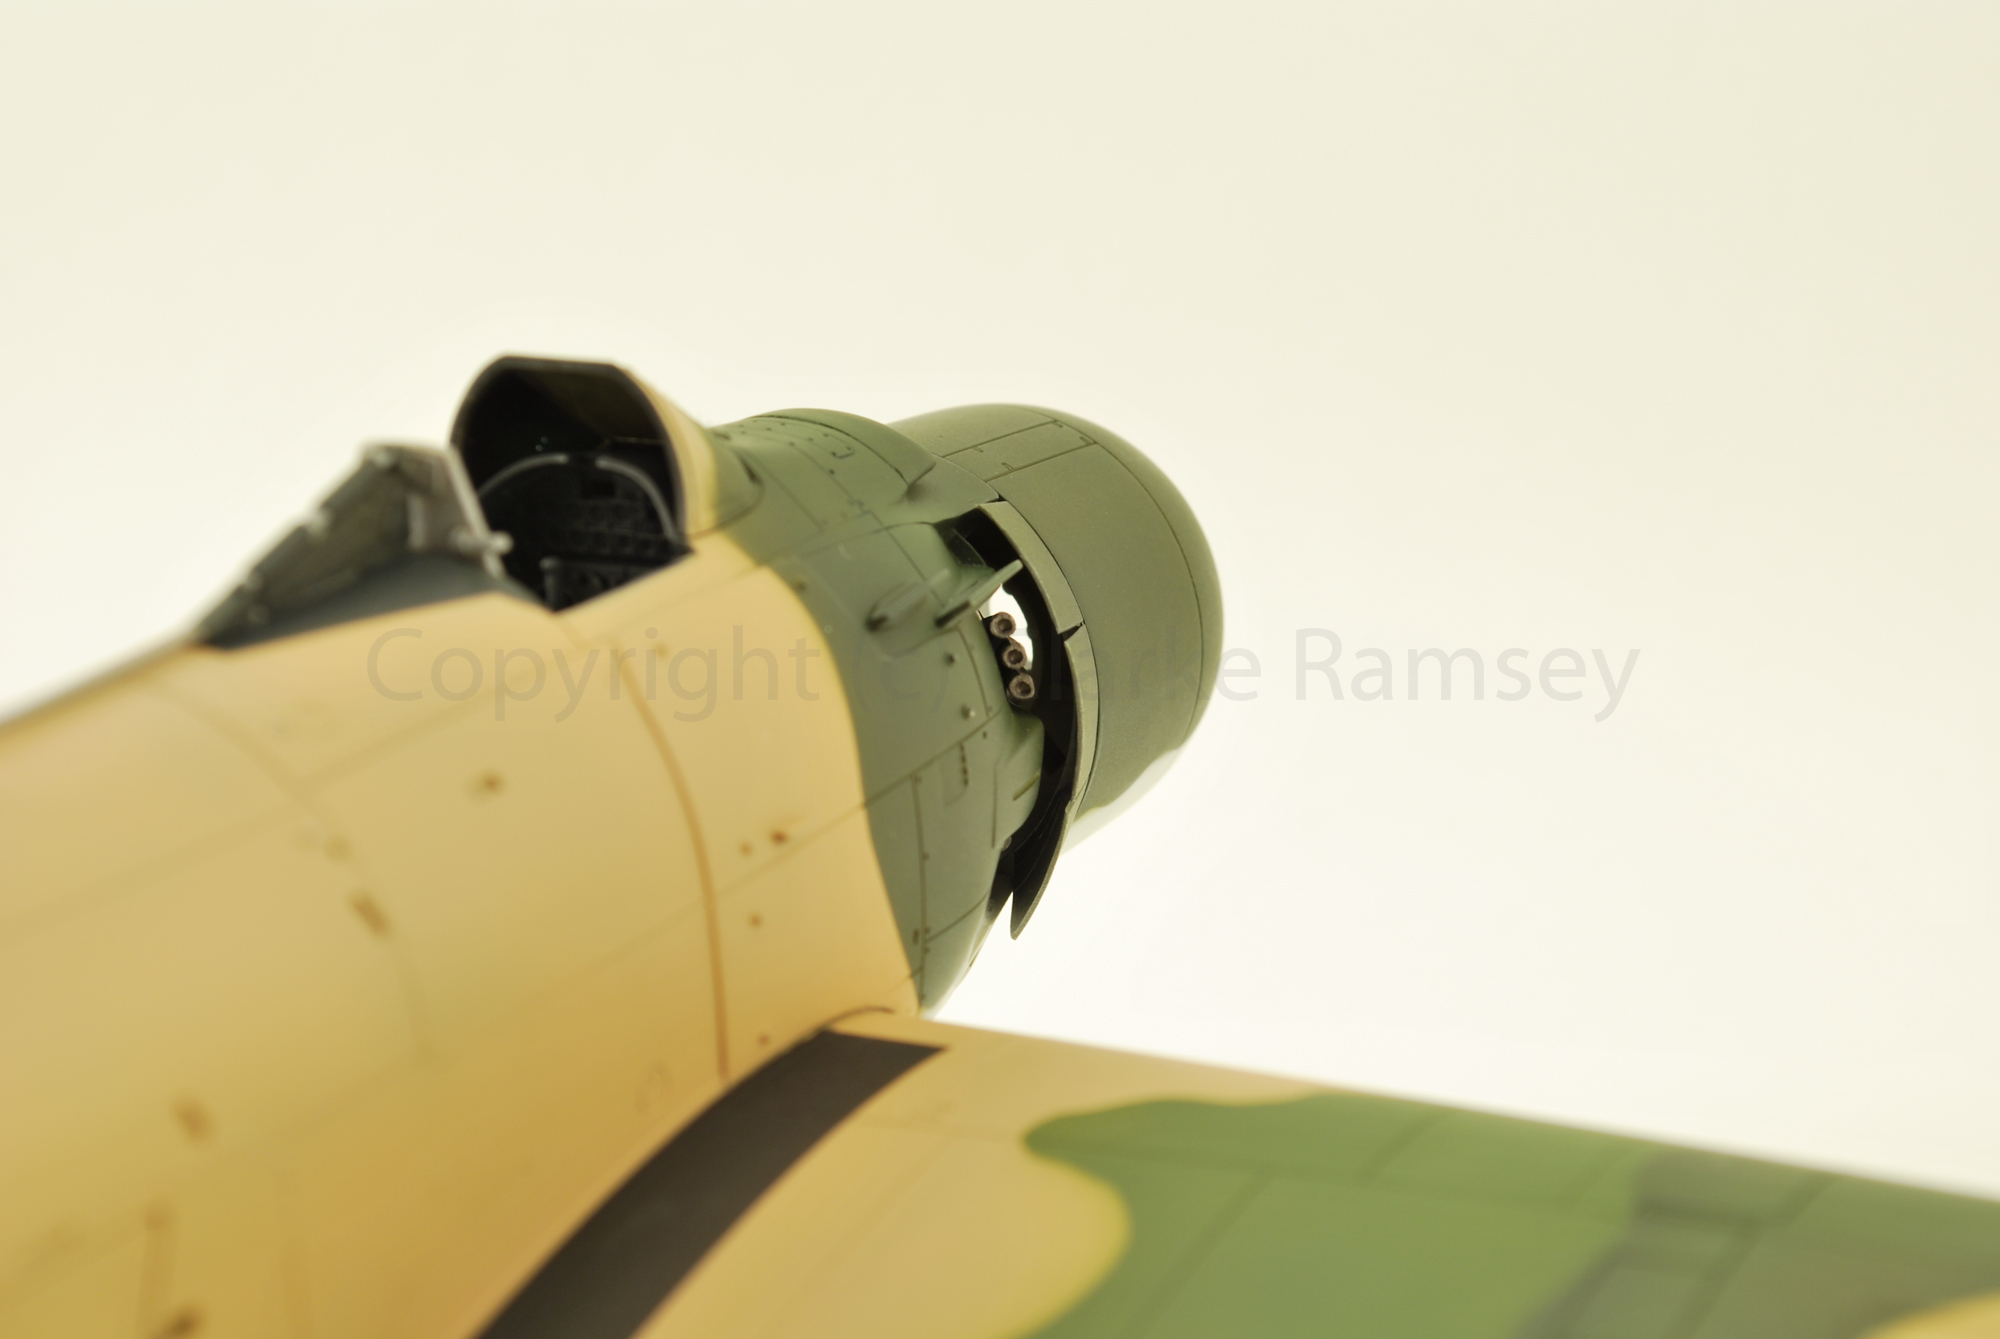
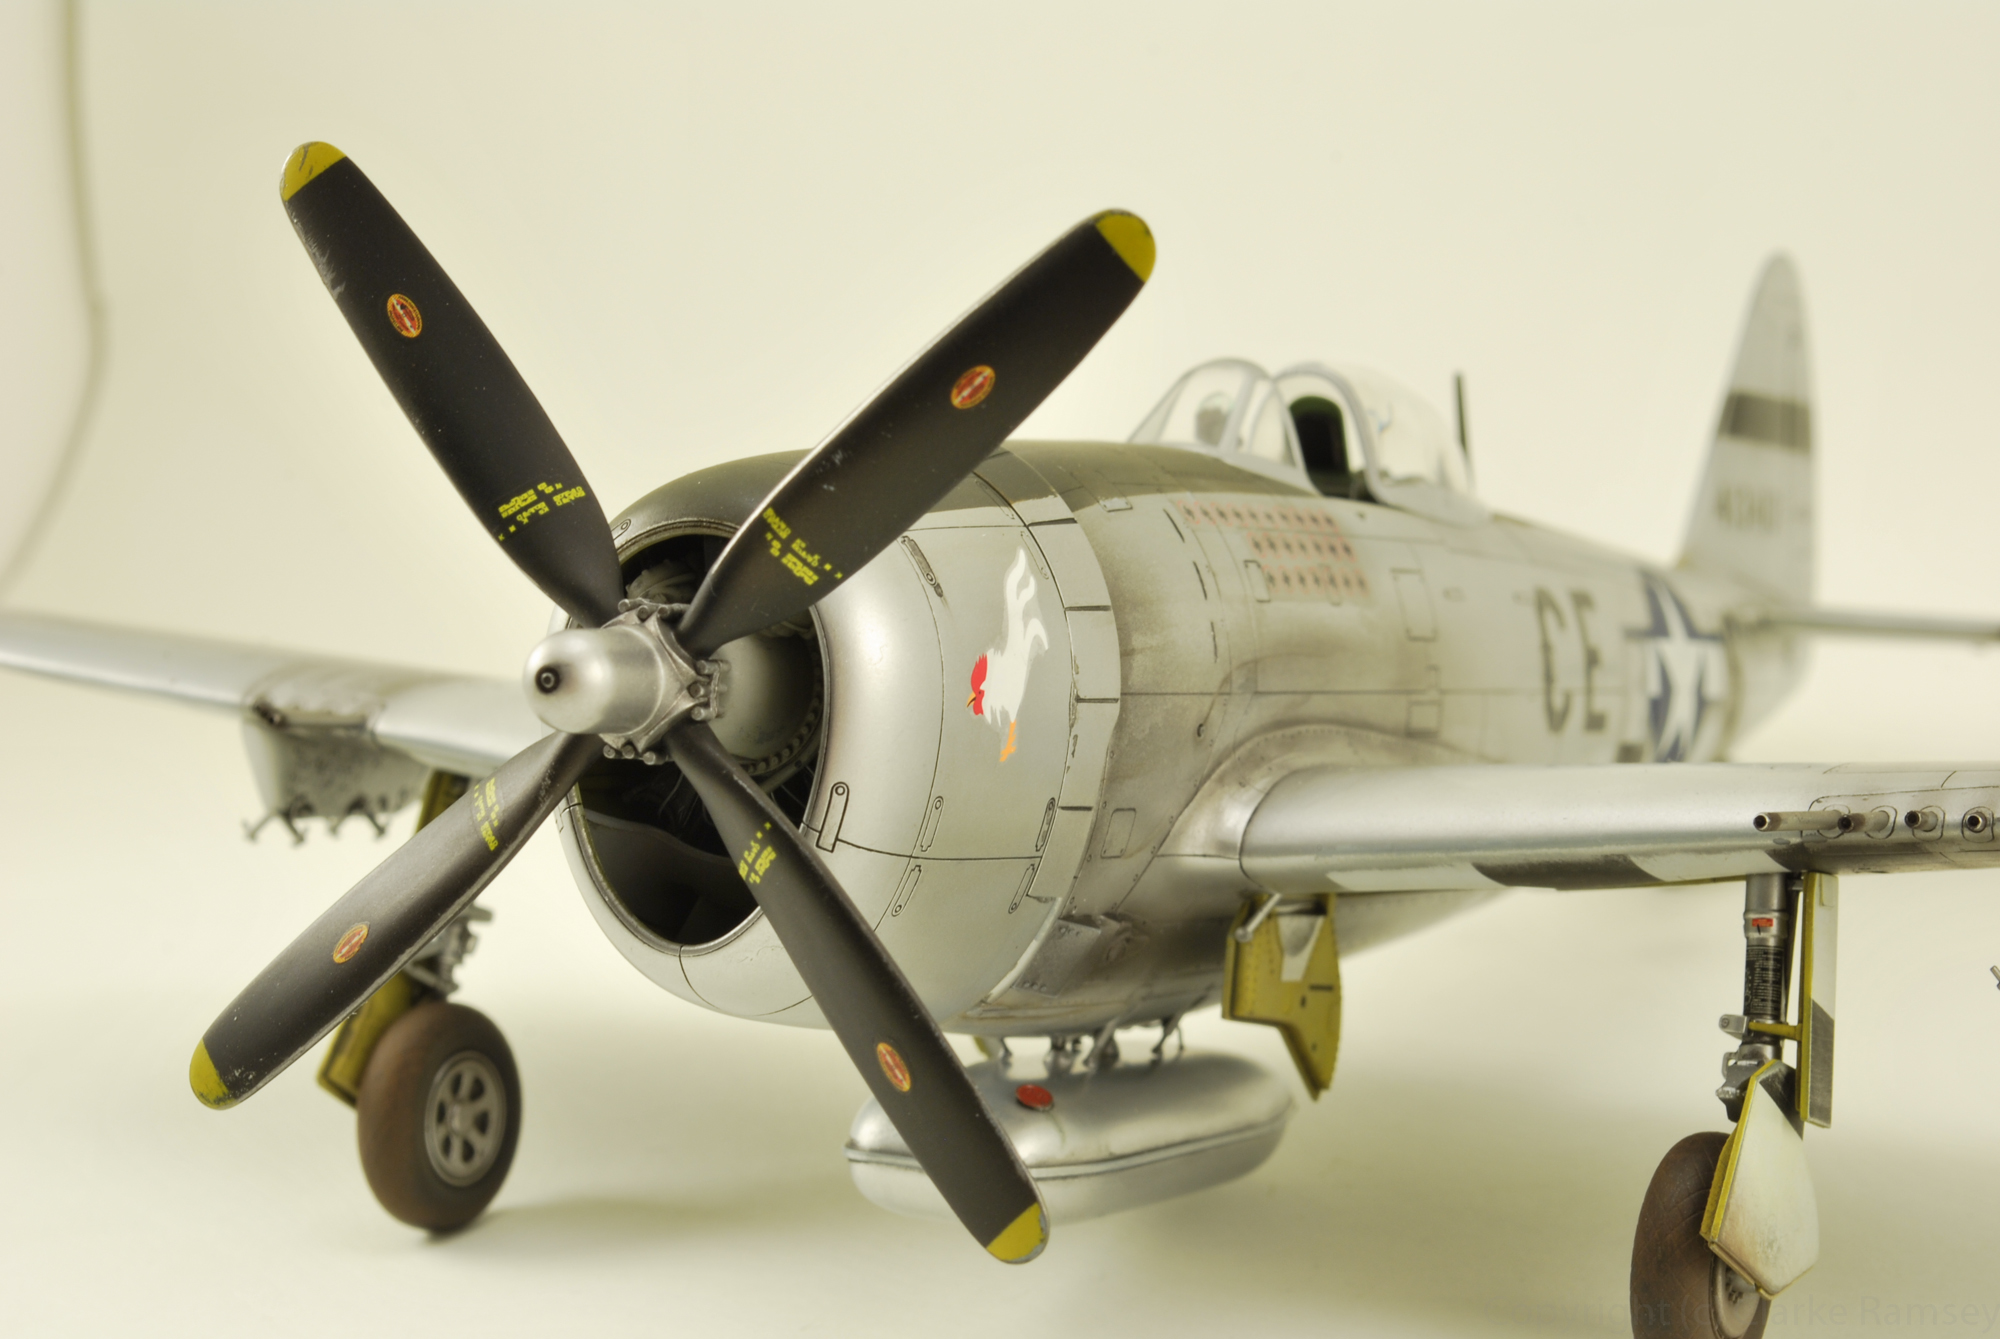
the power-plant, the Pratt & Whitney R-2800 painted in Alclad II Aluminum with details painted with Vallejo paints as well a acrylic wash. The ignition harness wires are .010 and .015 lead wire painted black, lastly I fitted a Pratt & Whitney photo-etch logo on the bottom of the case.

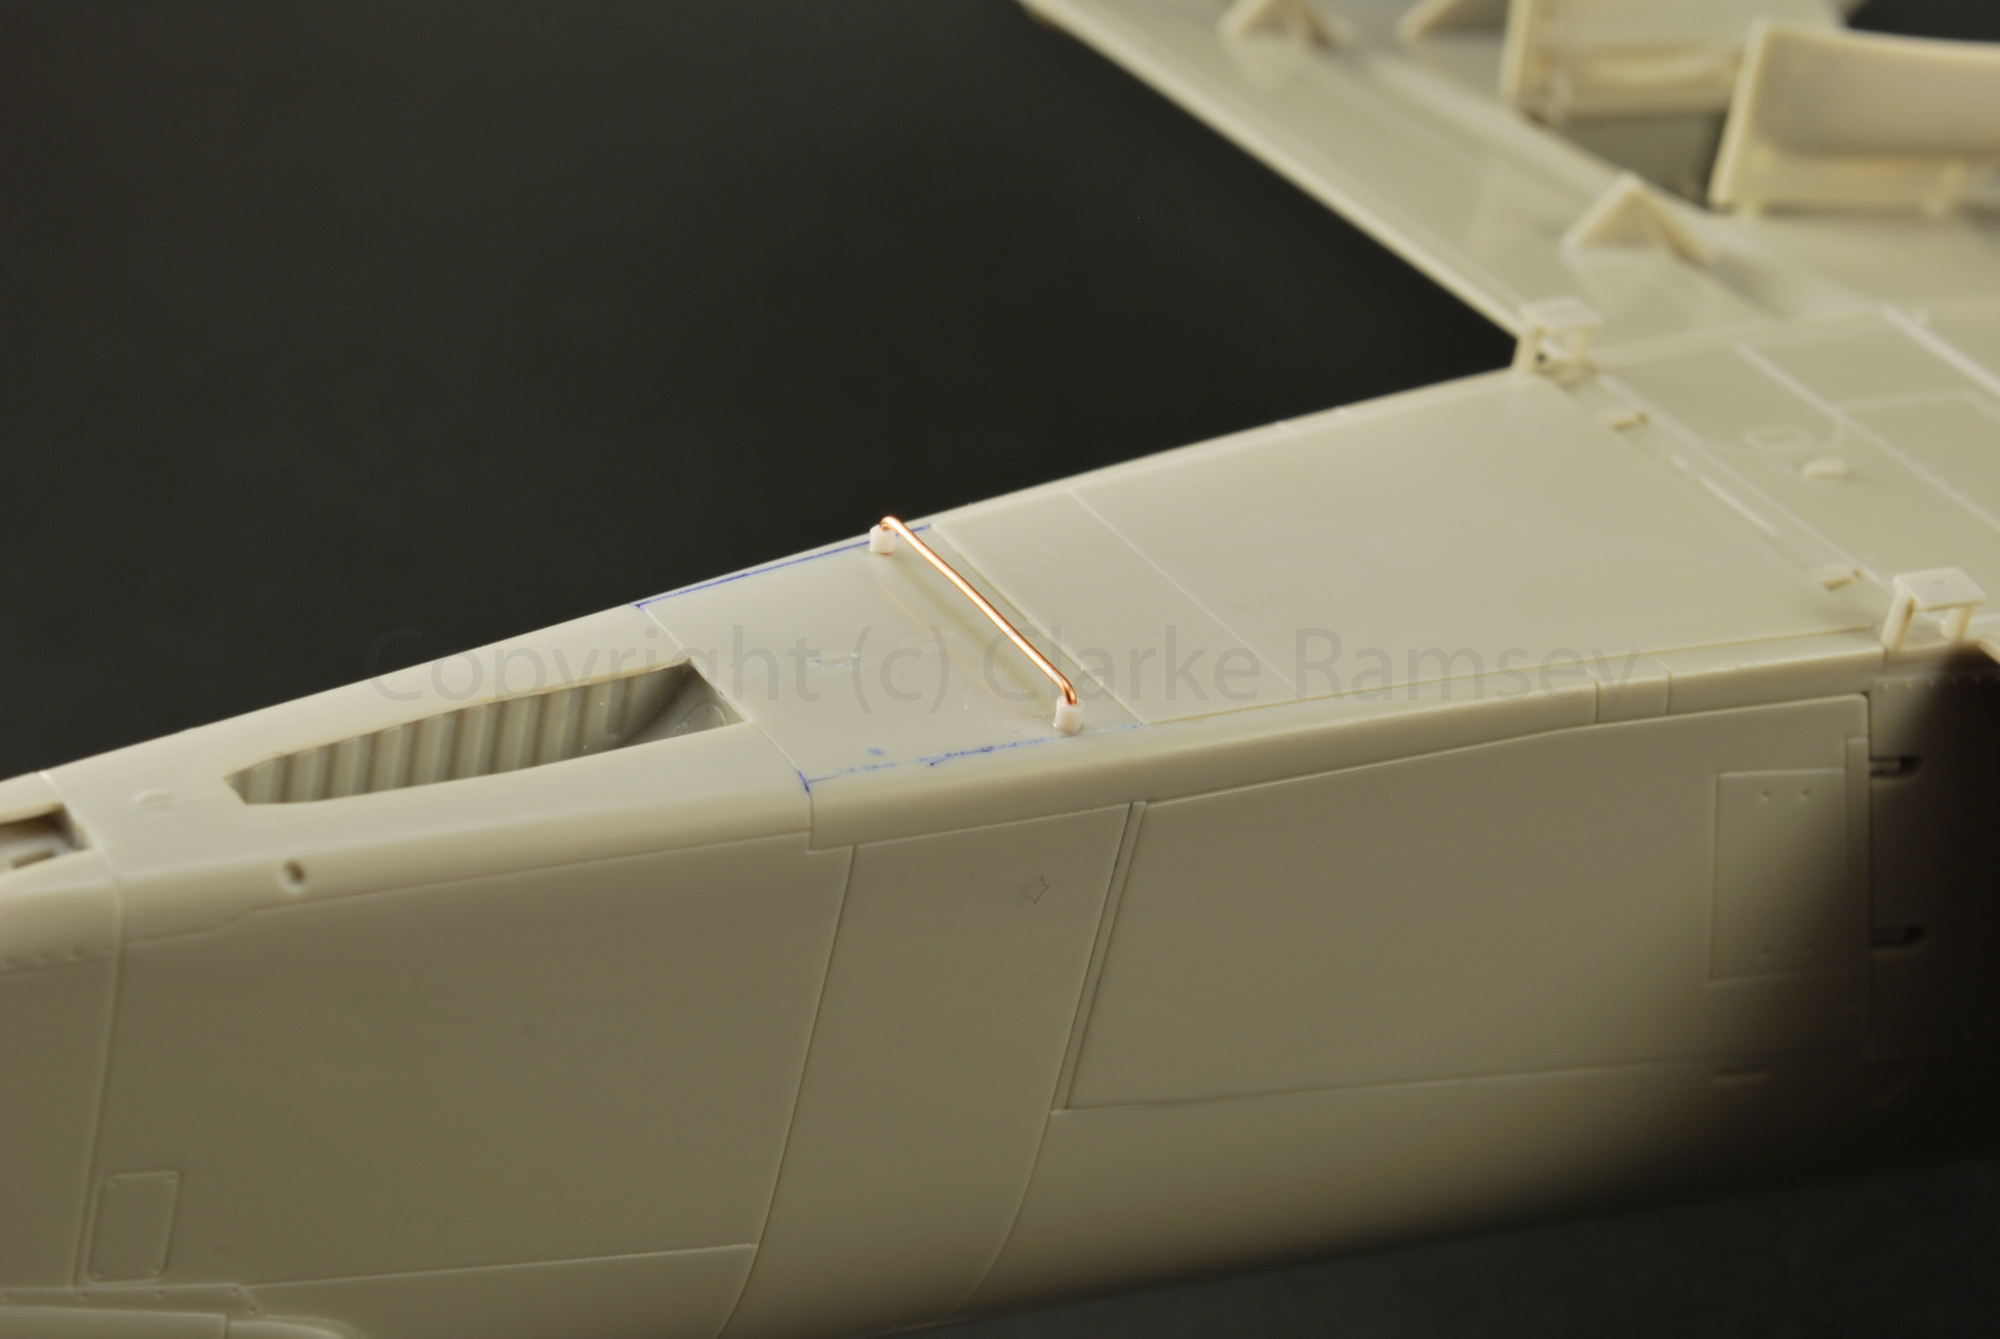
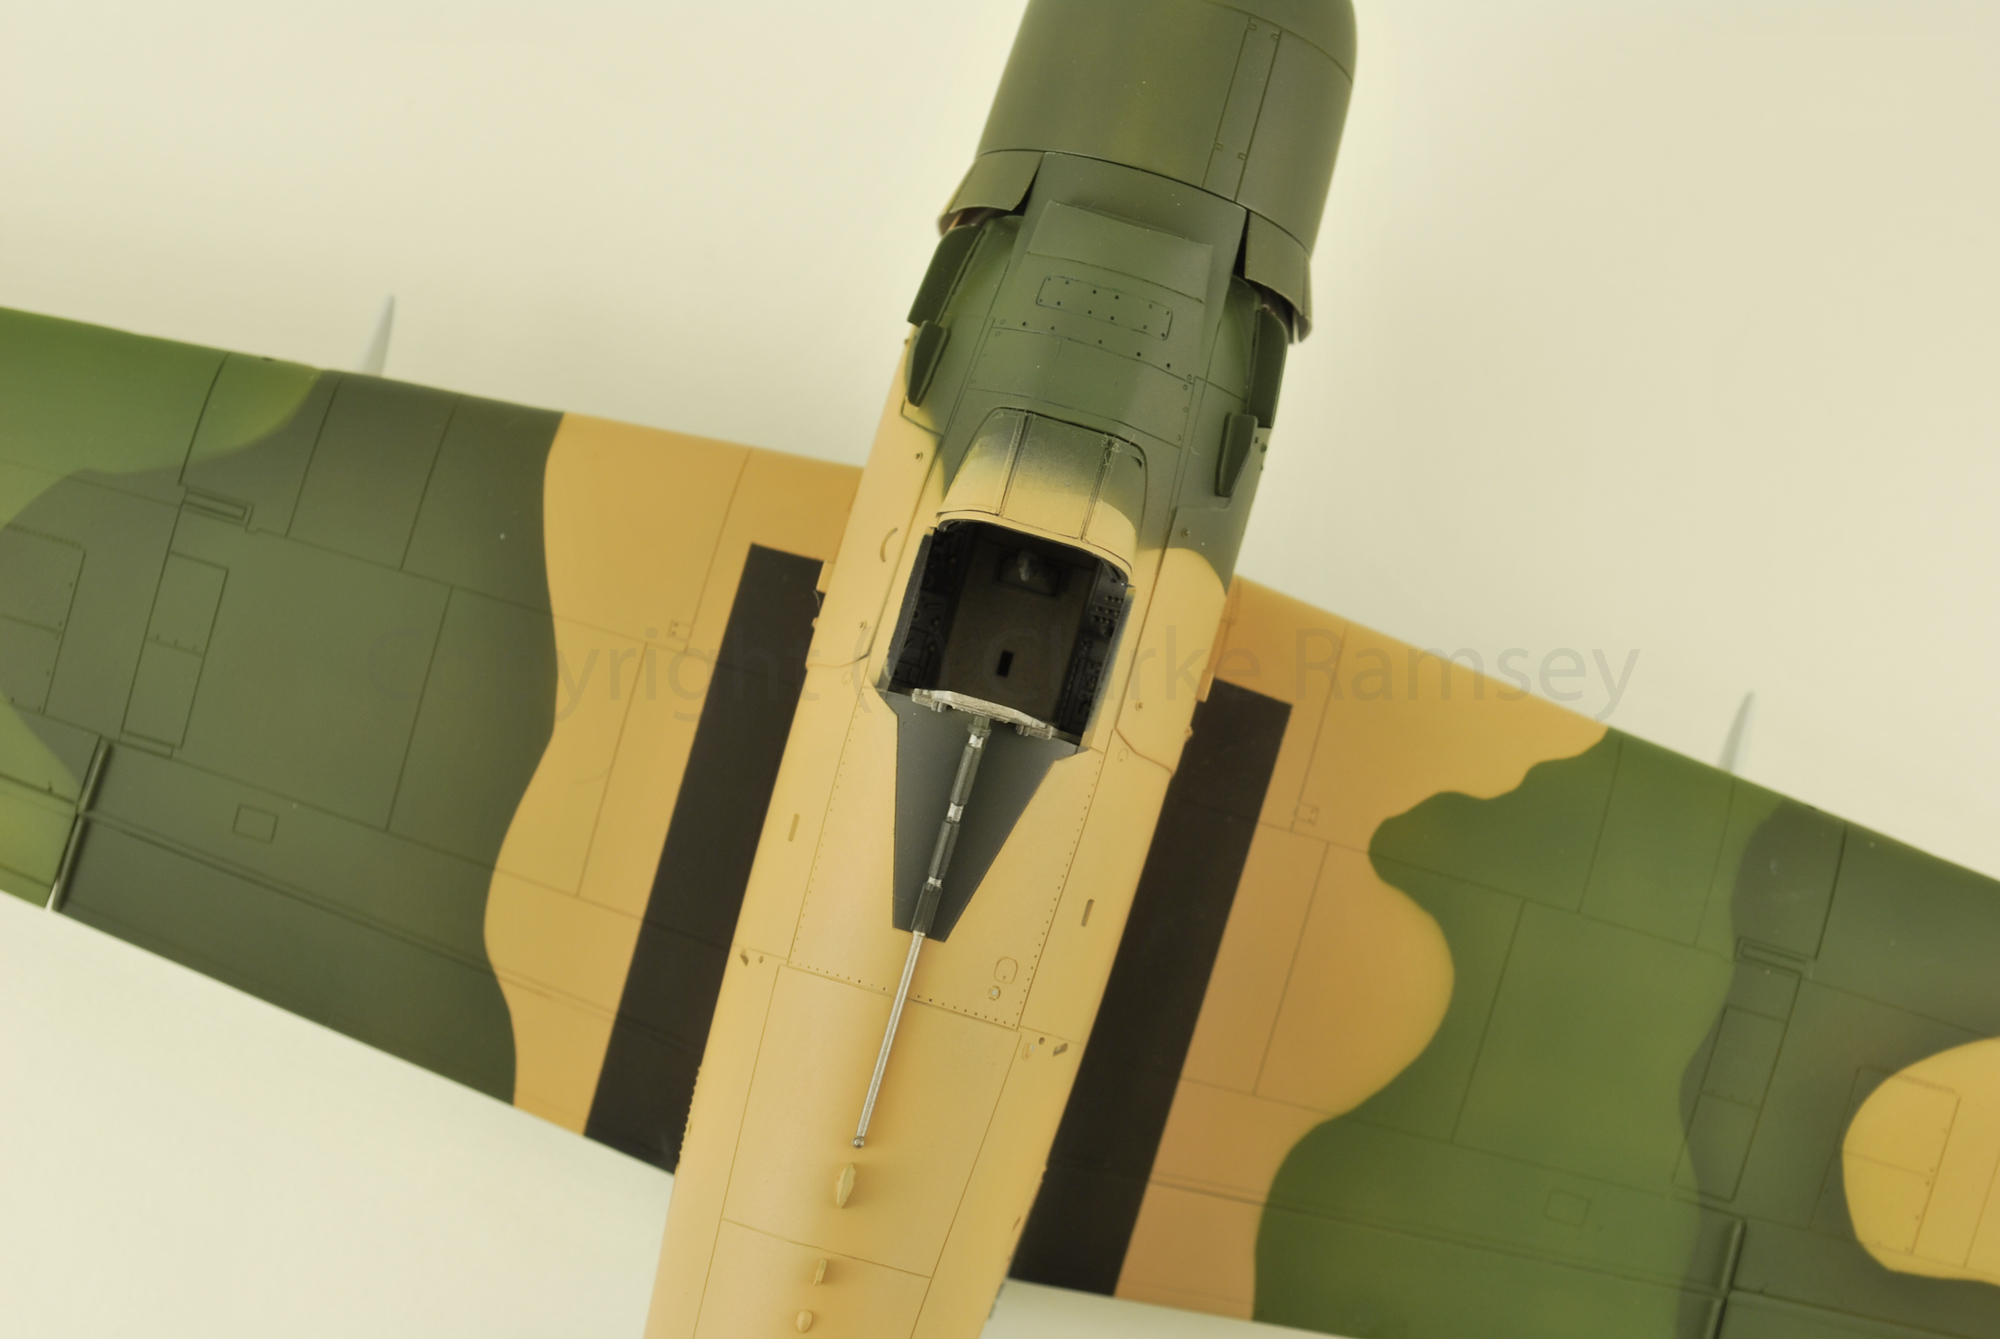
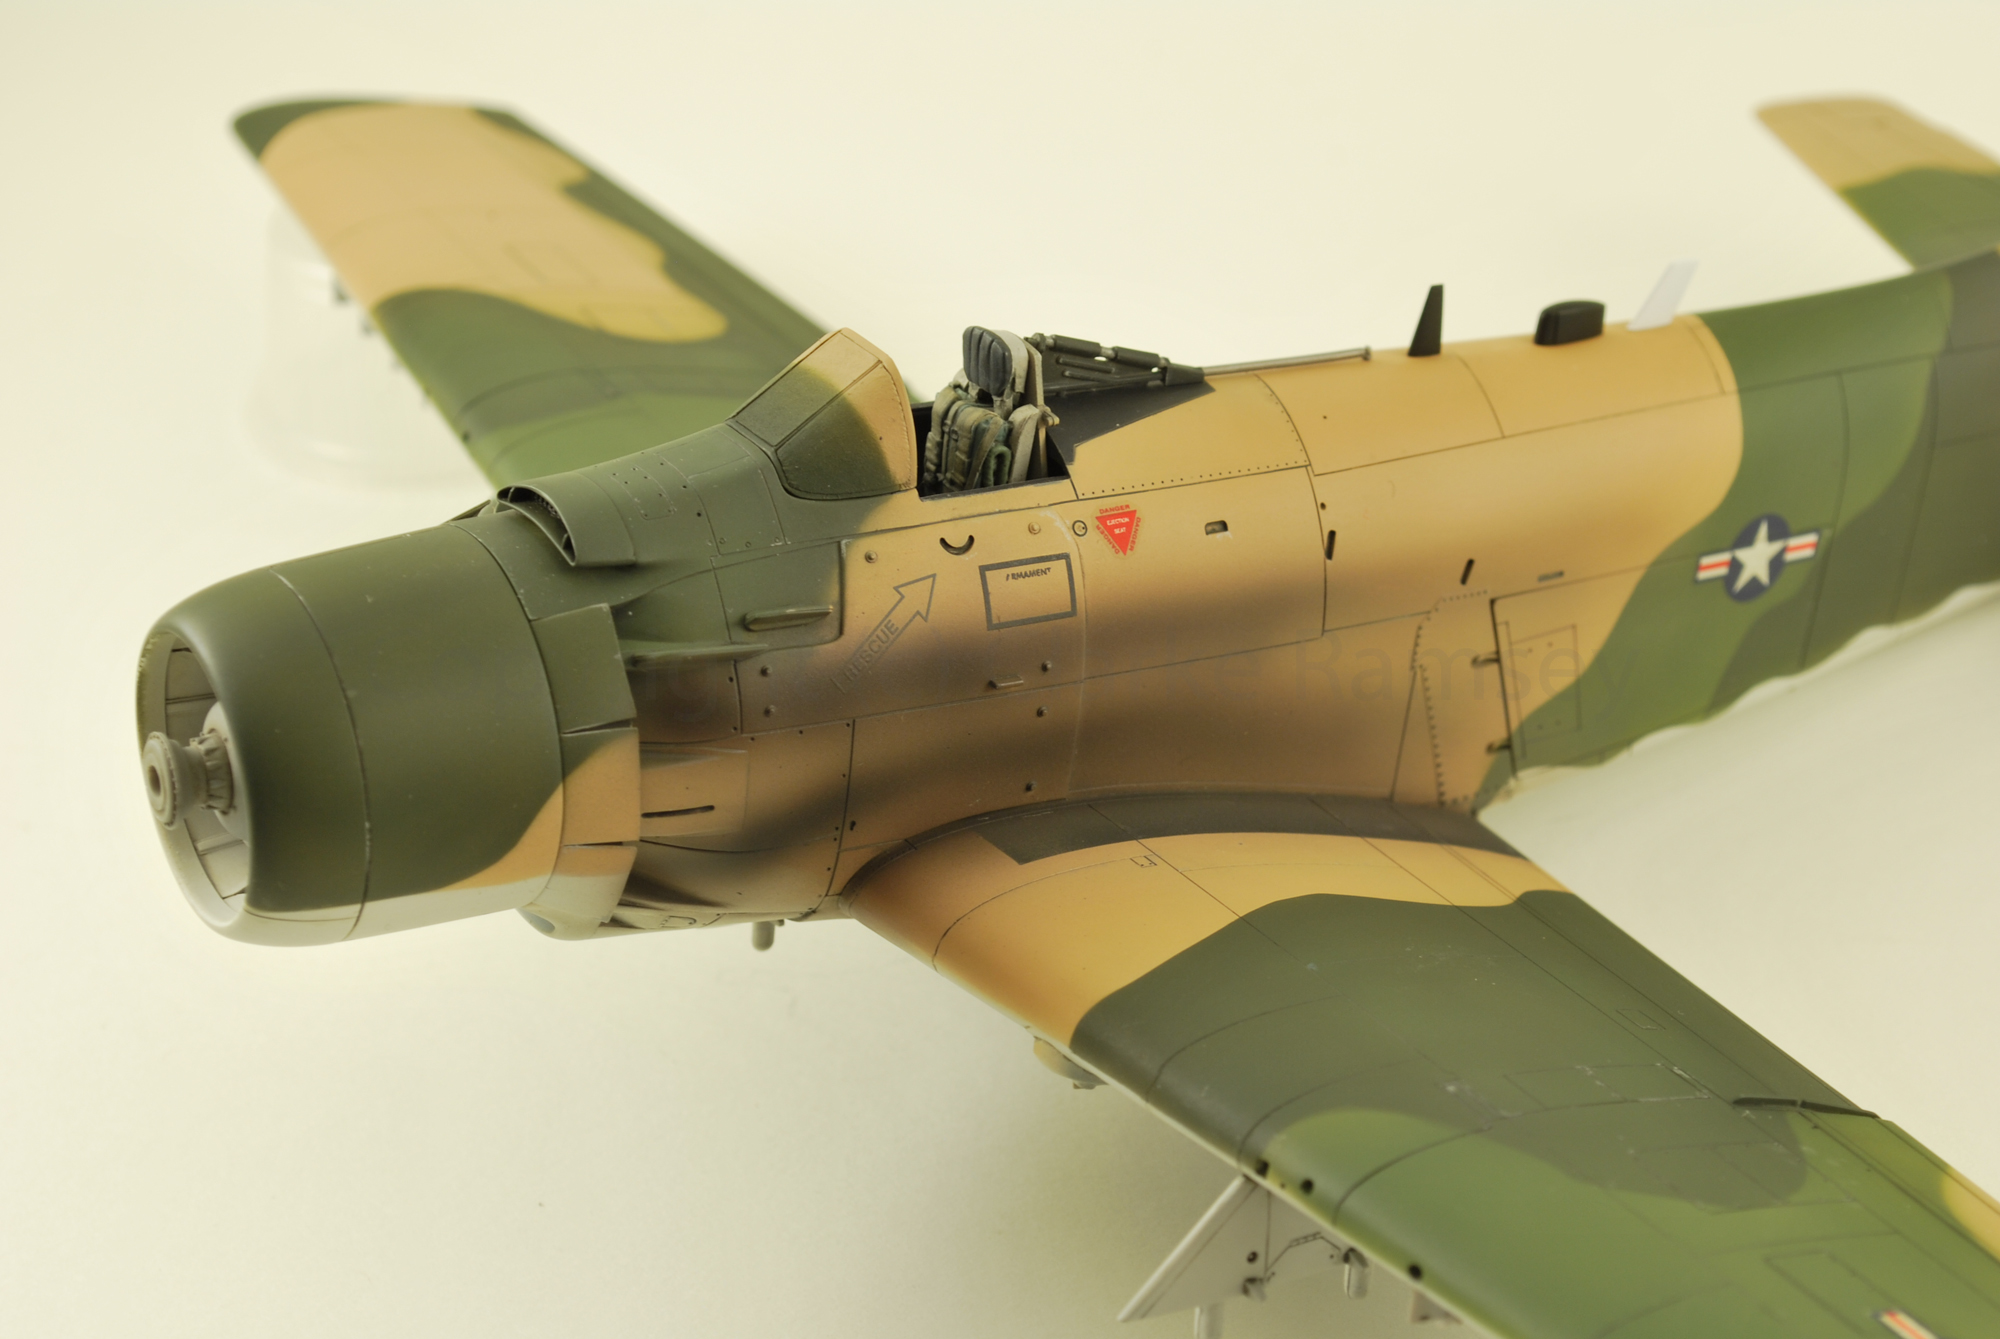
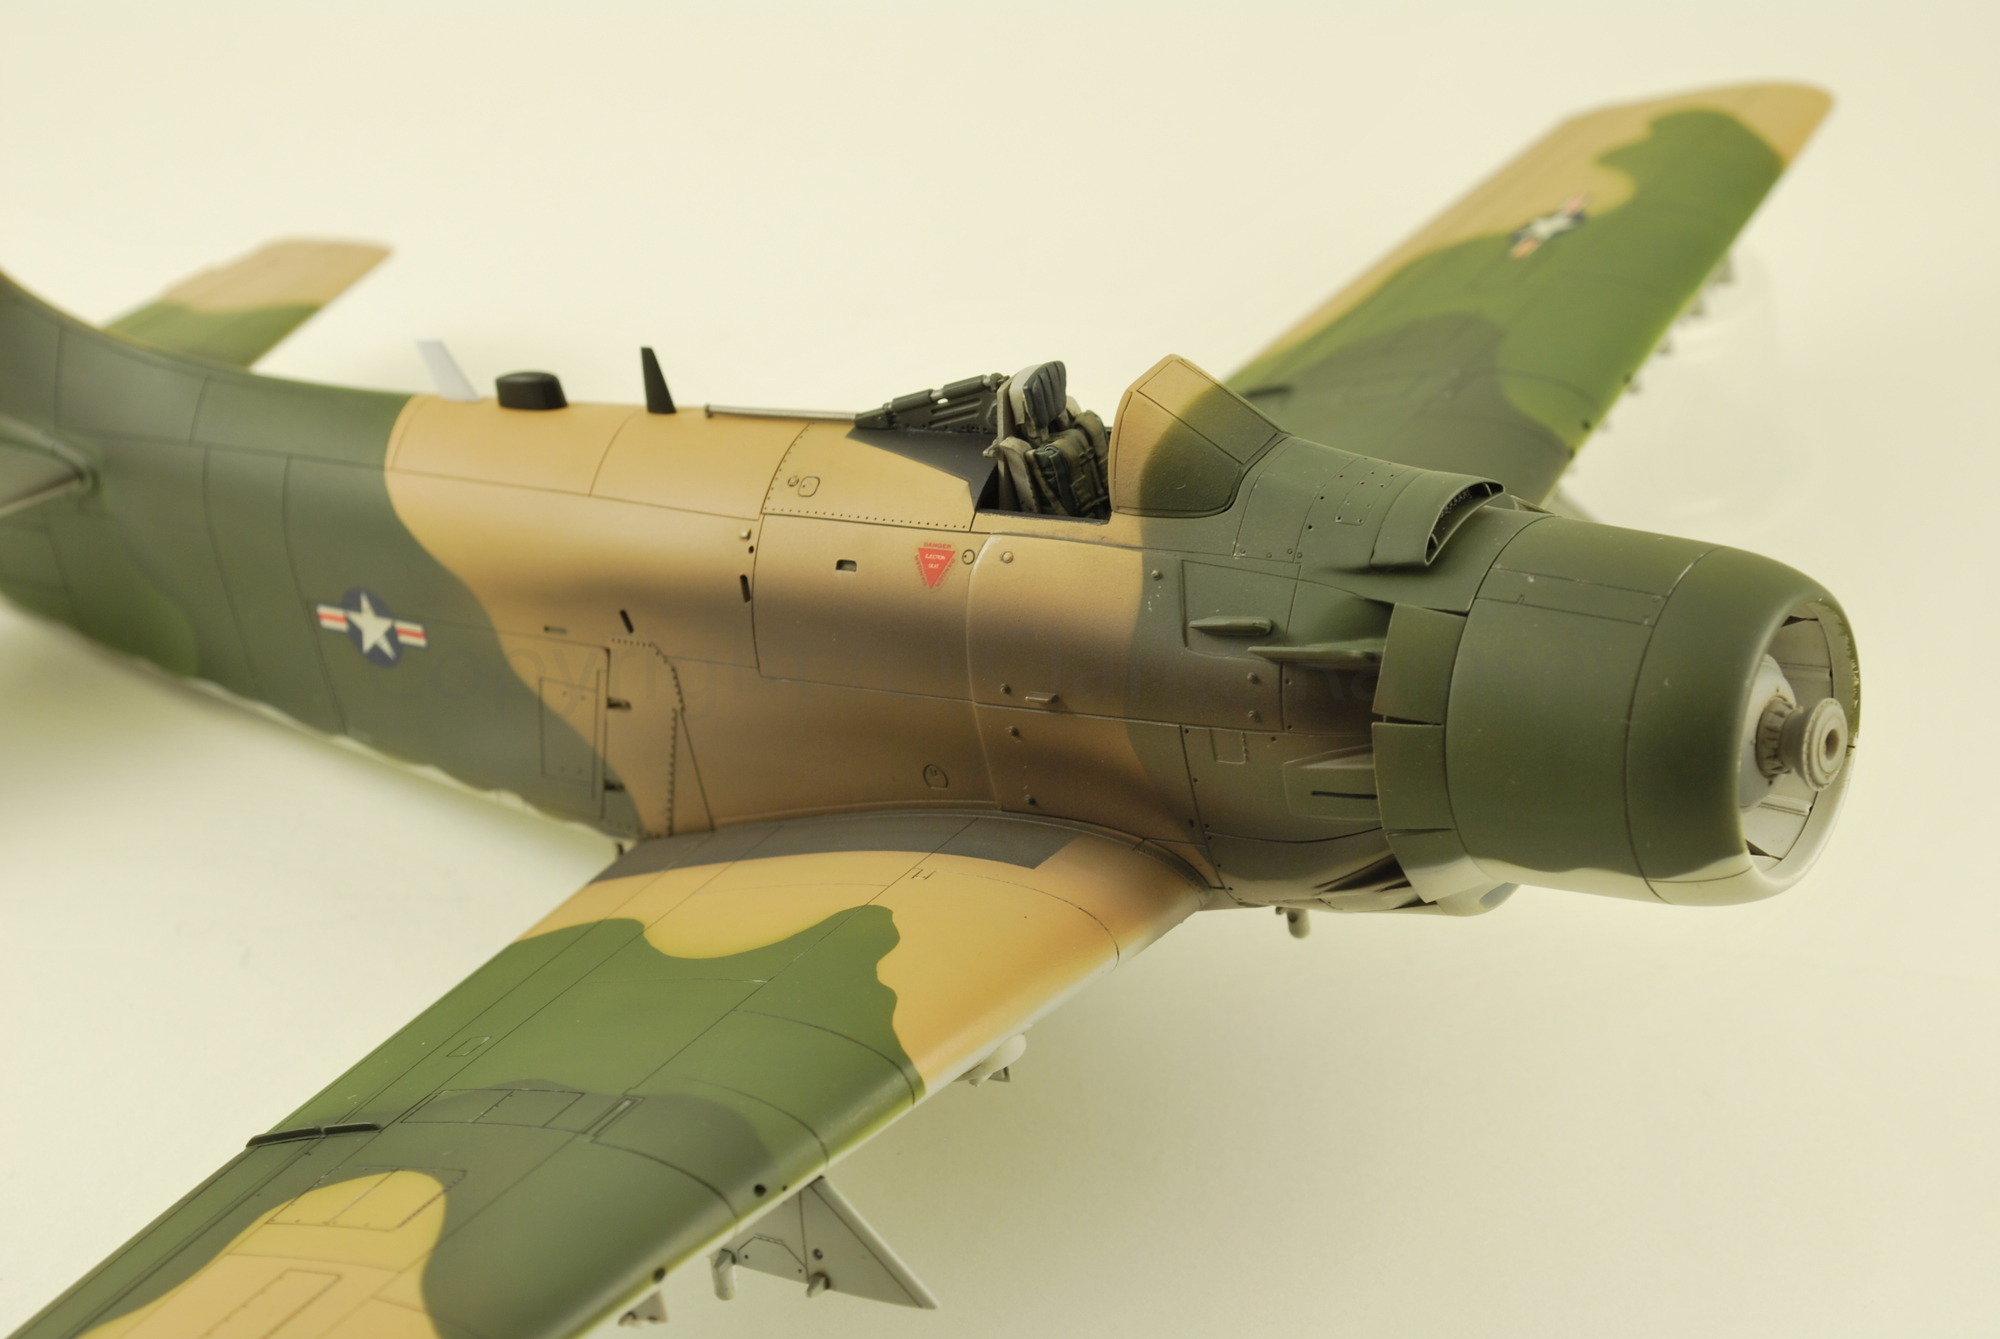
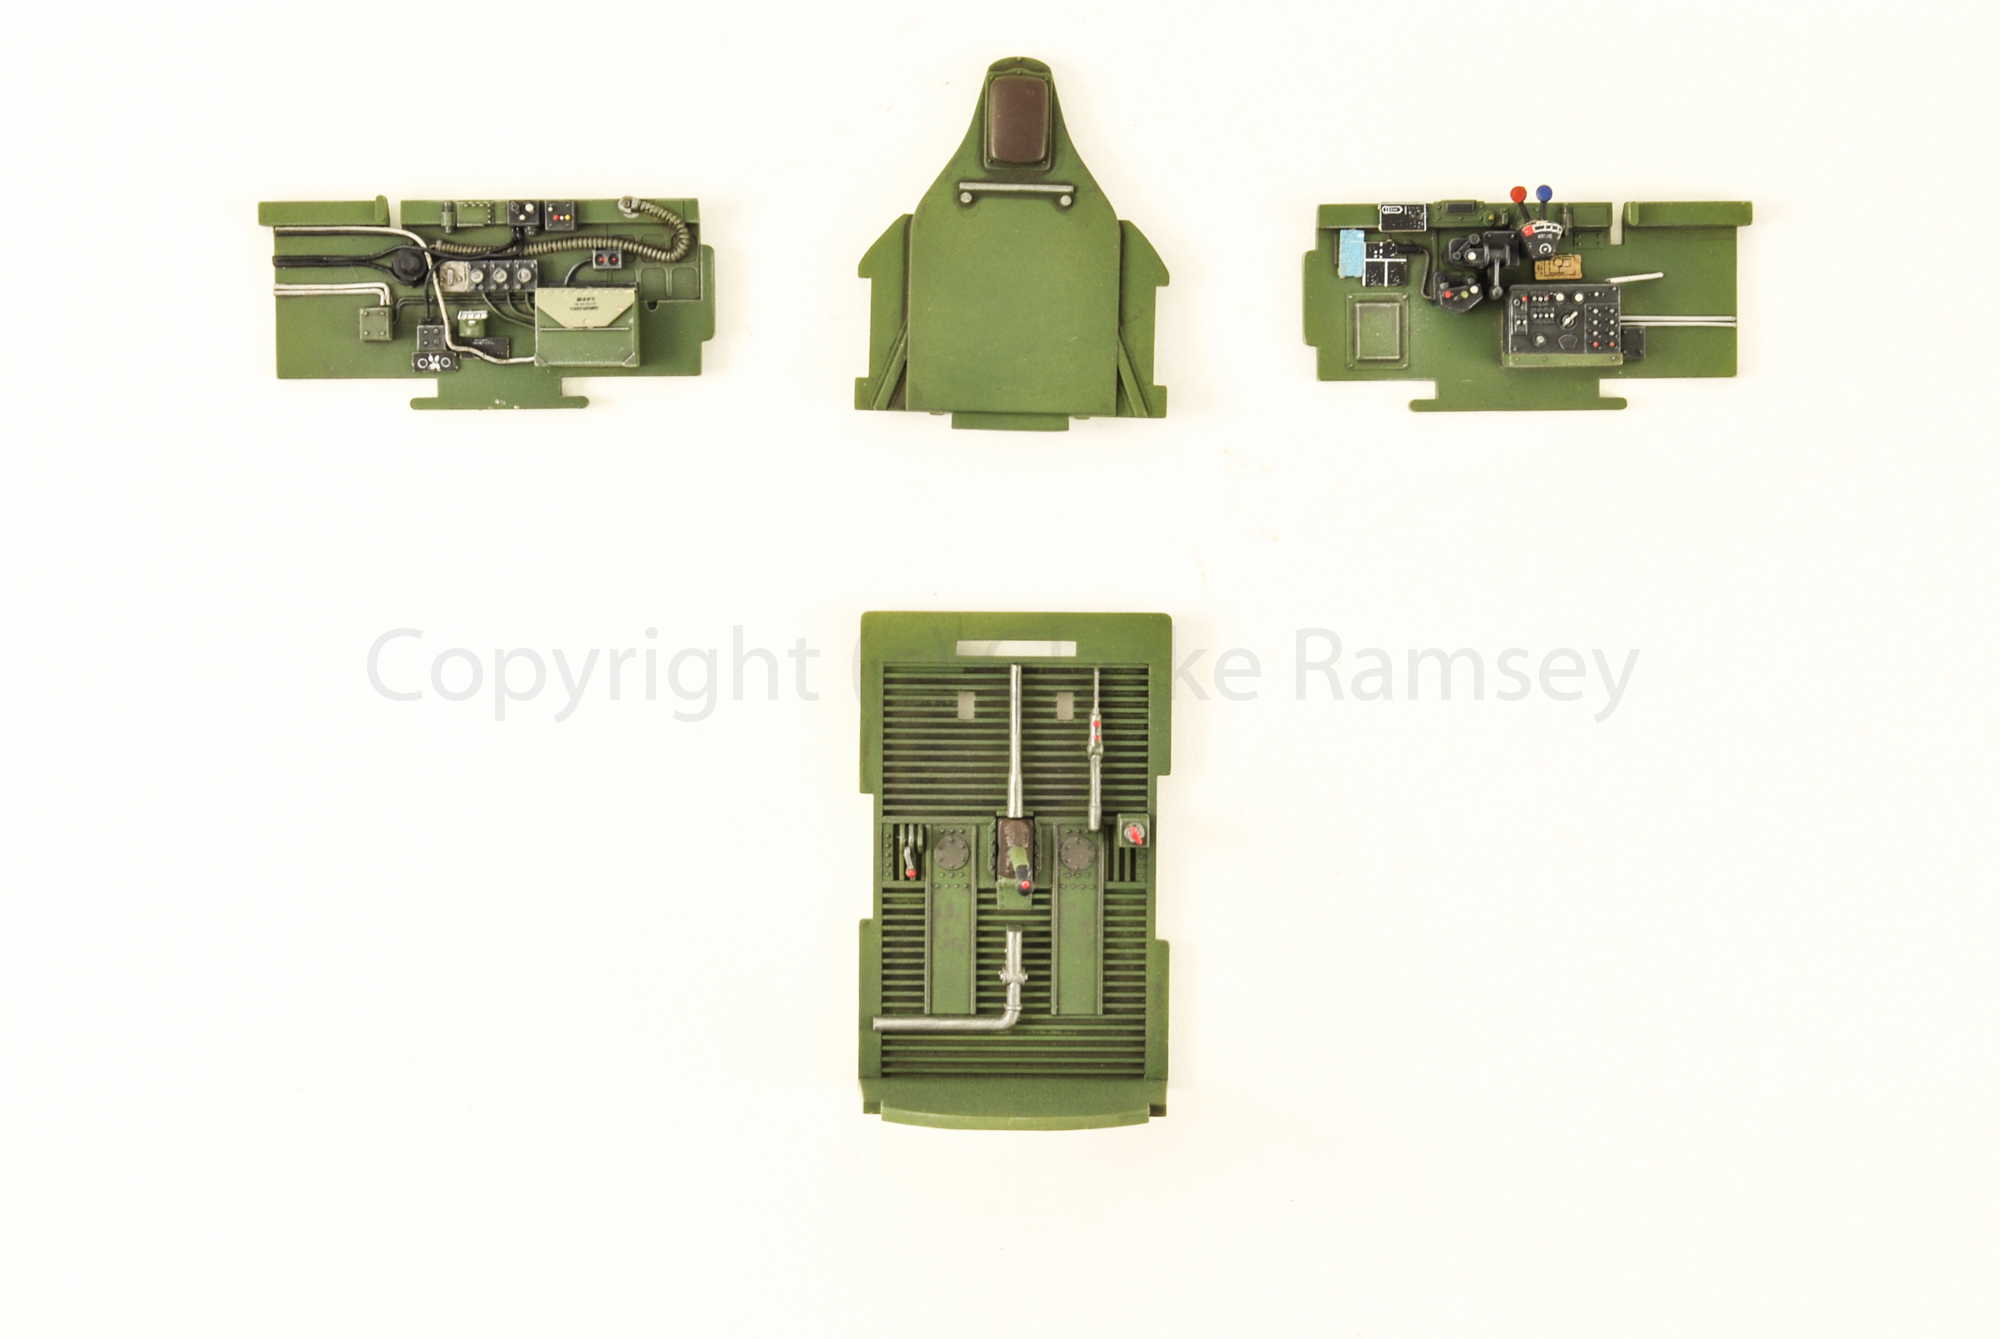
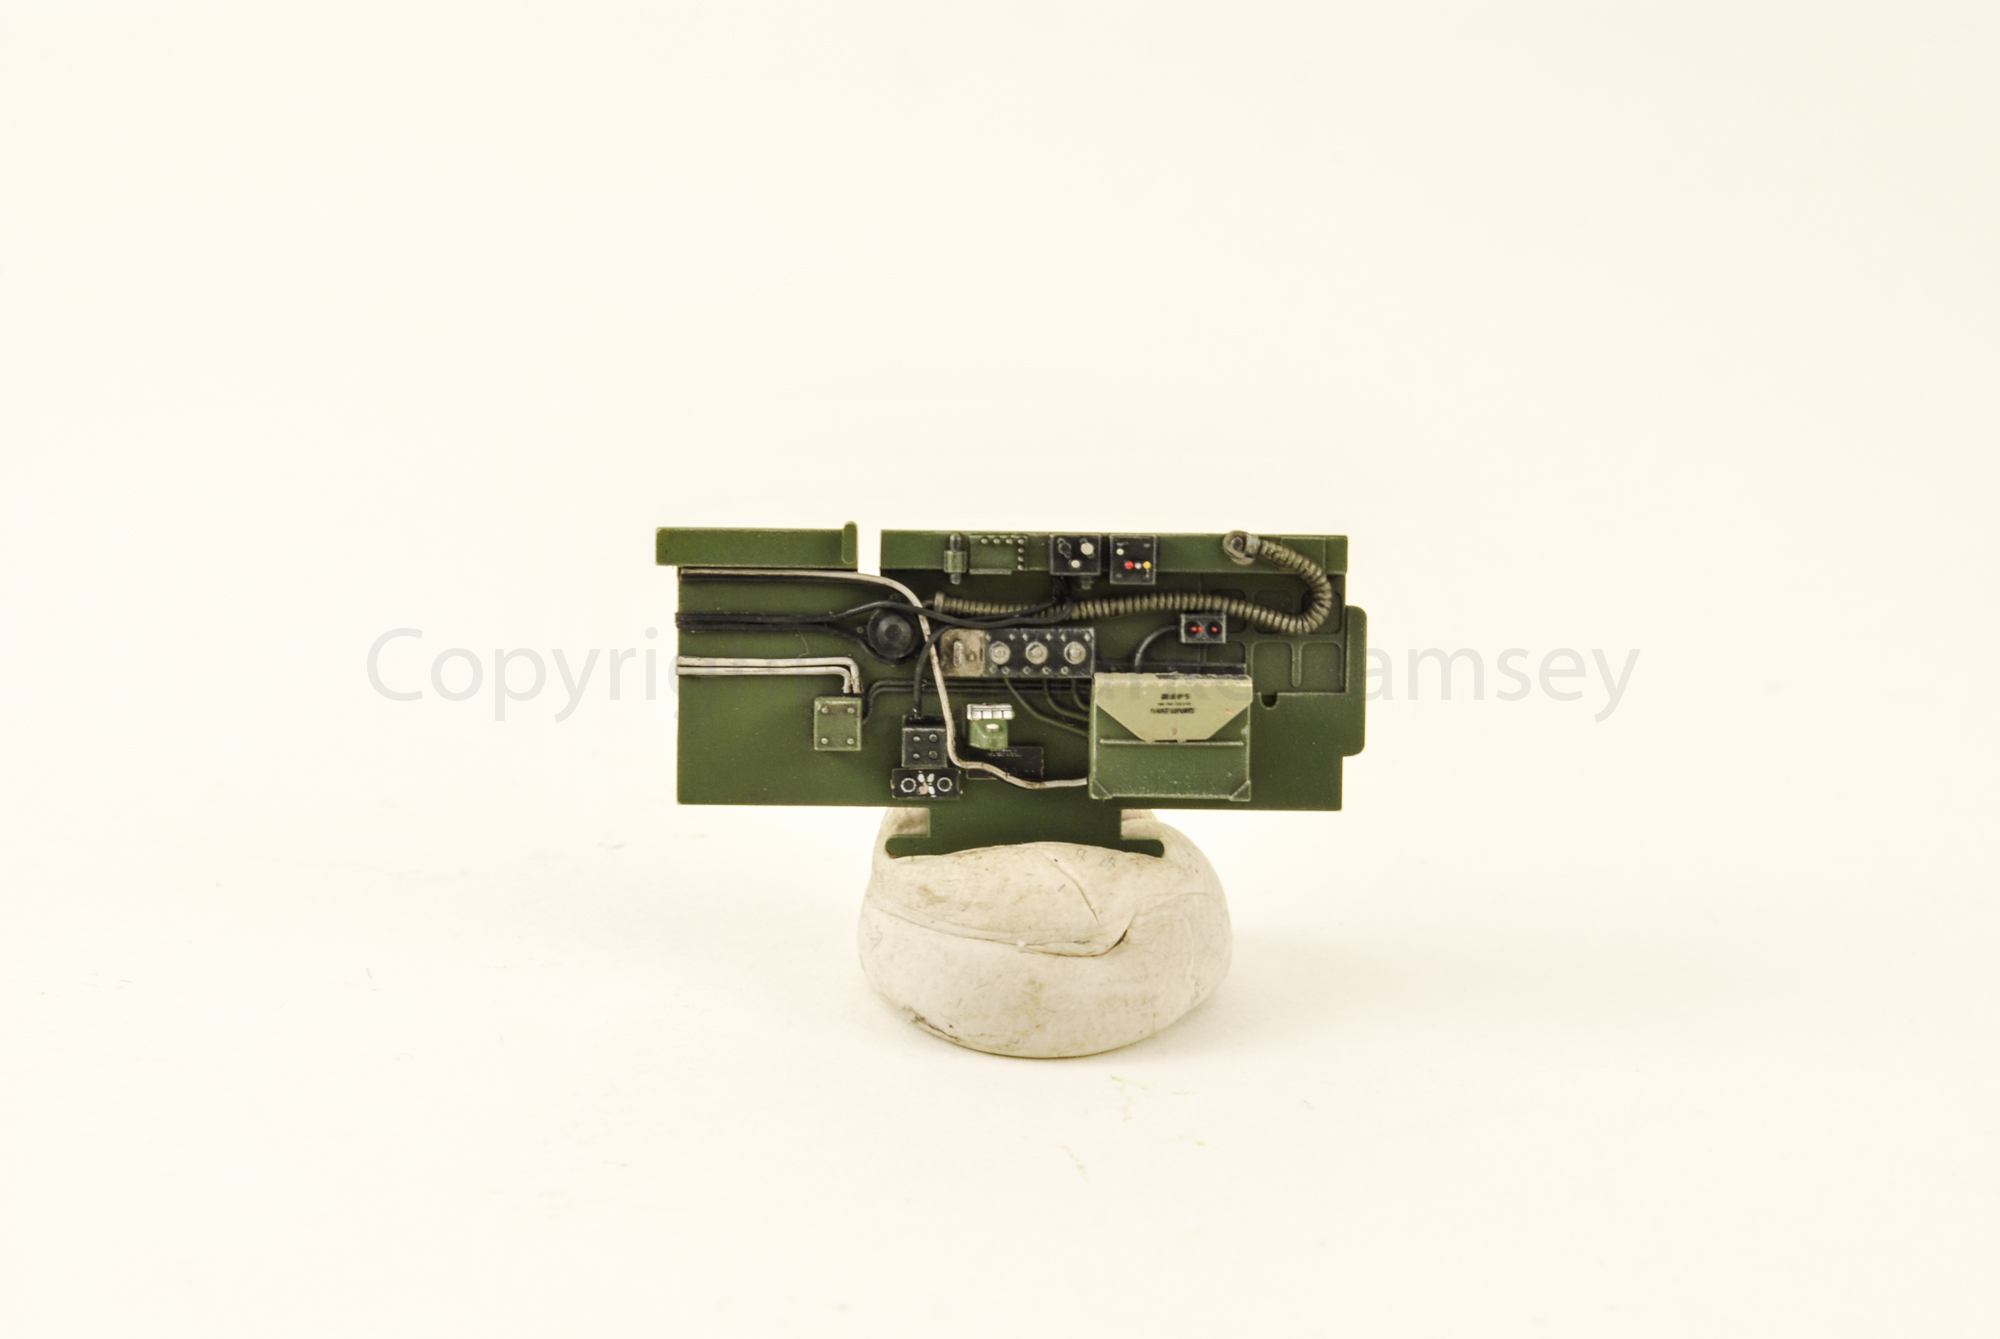
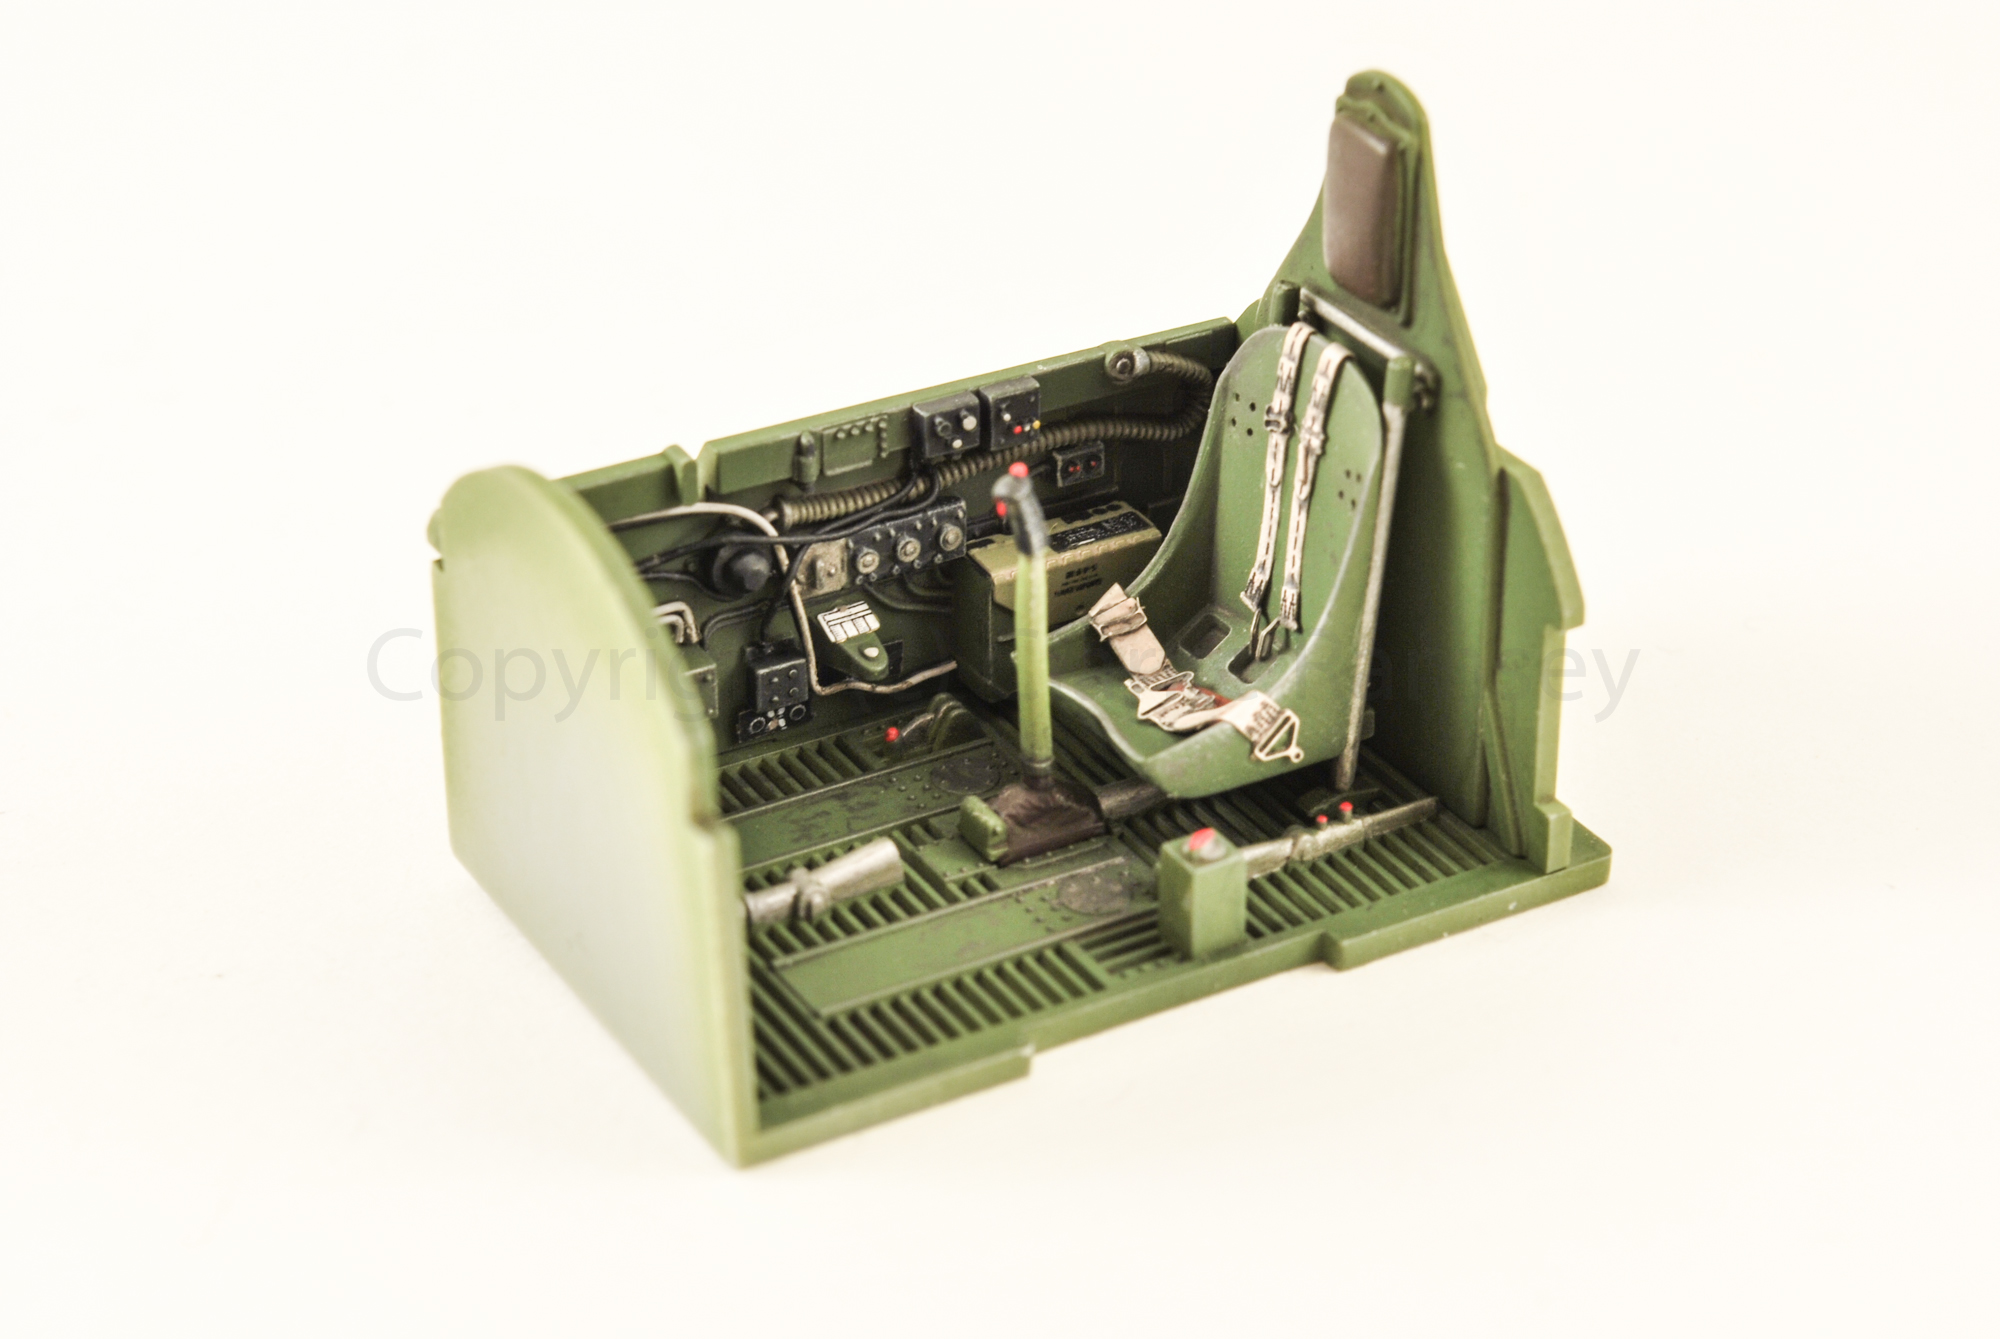
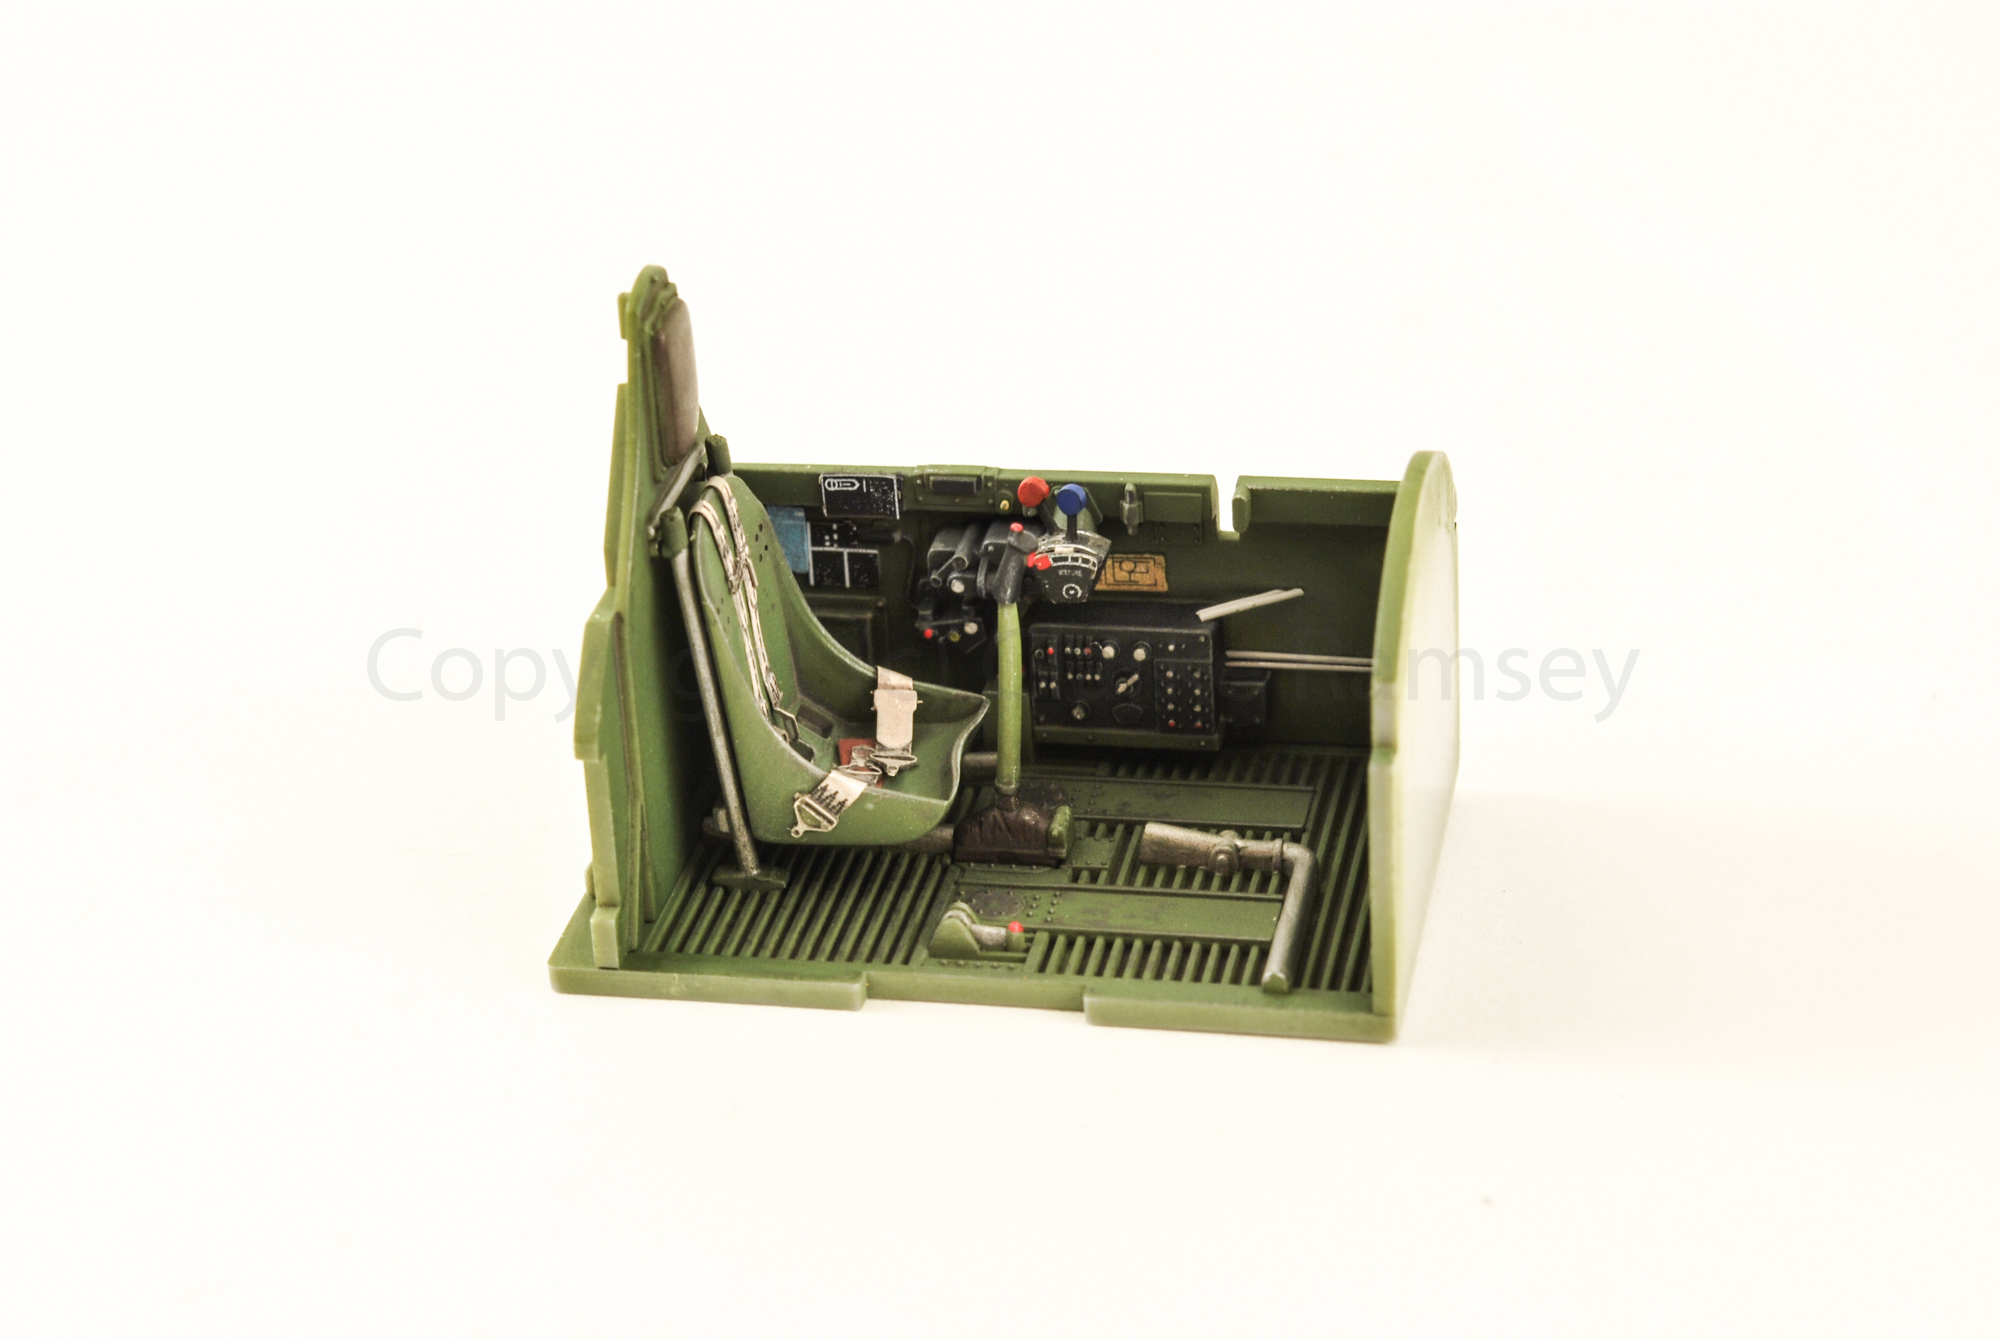
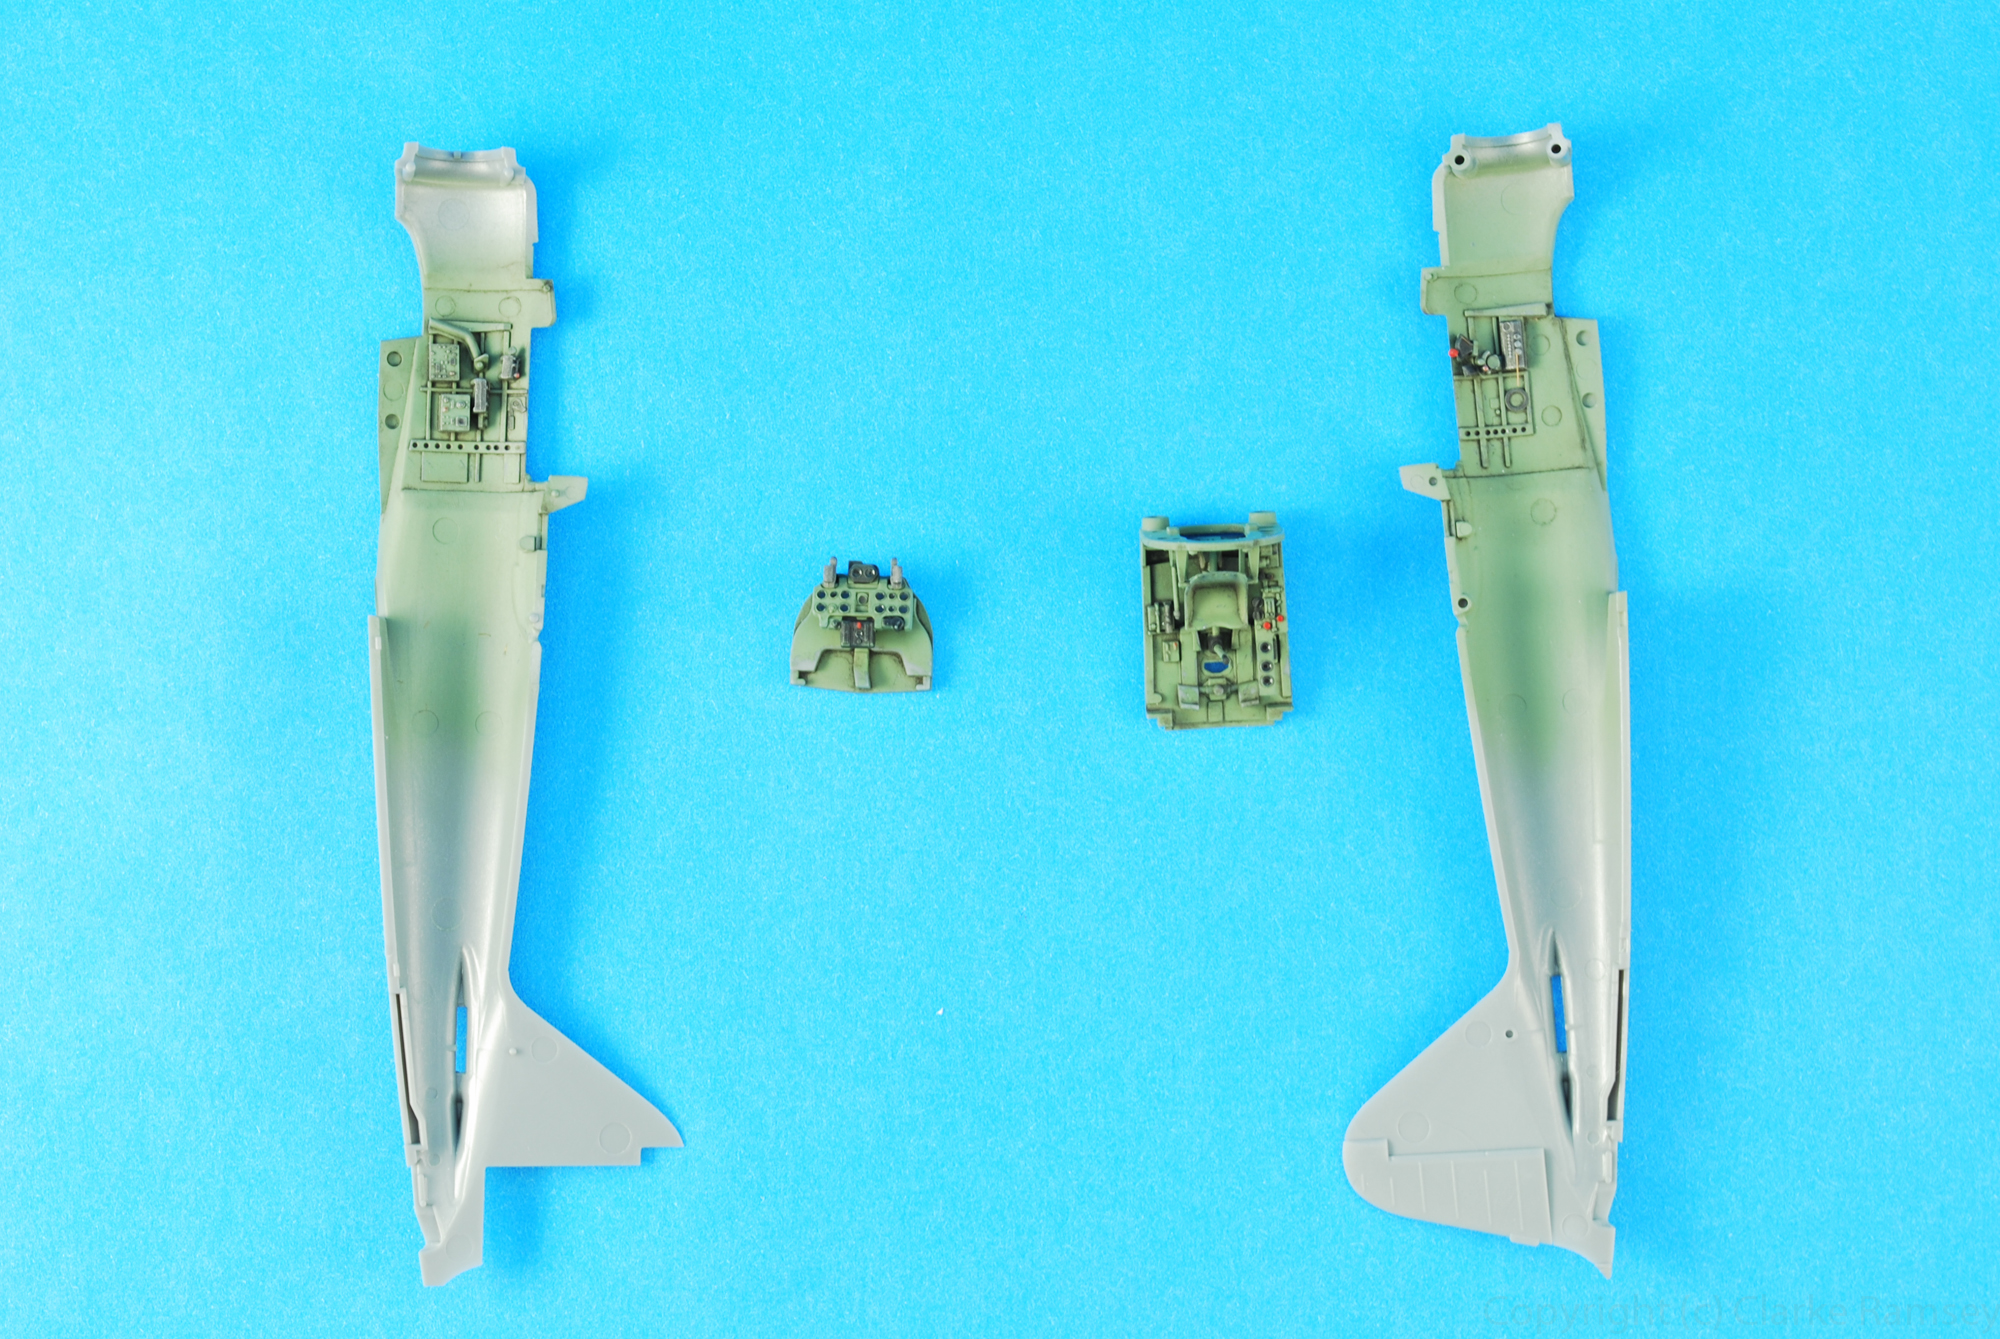
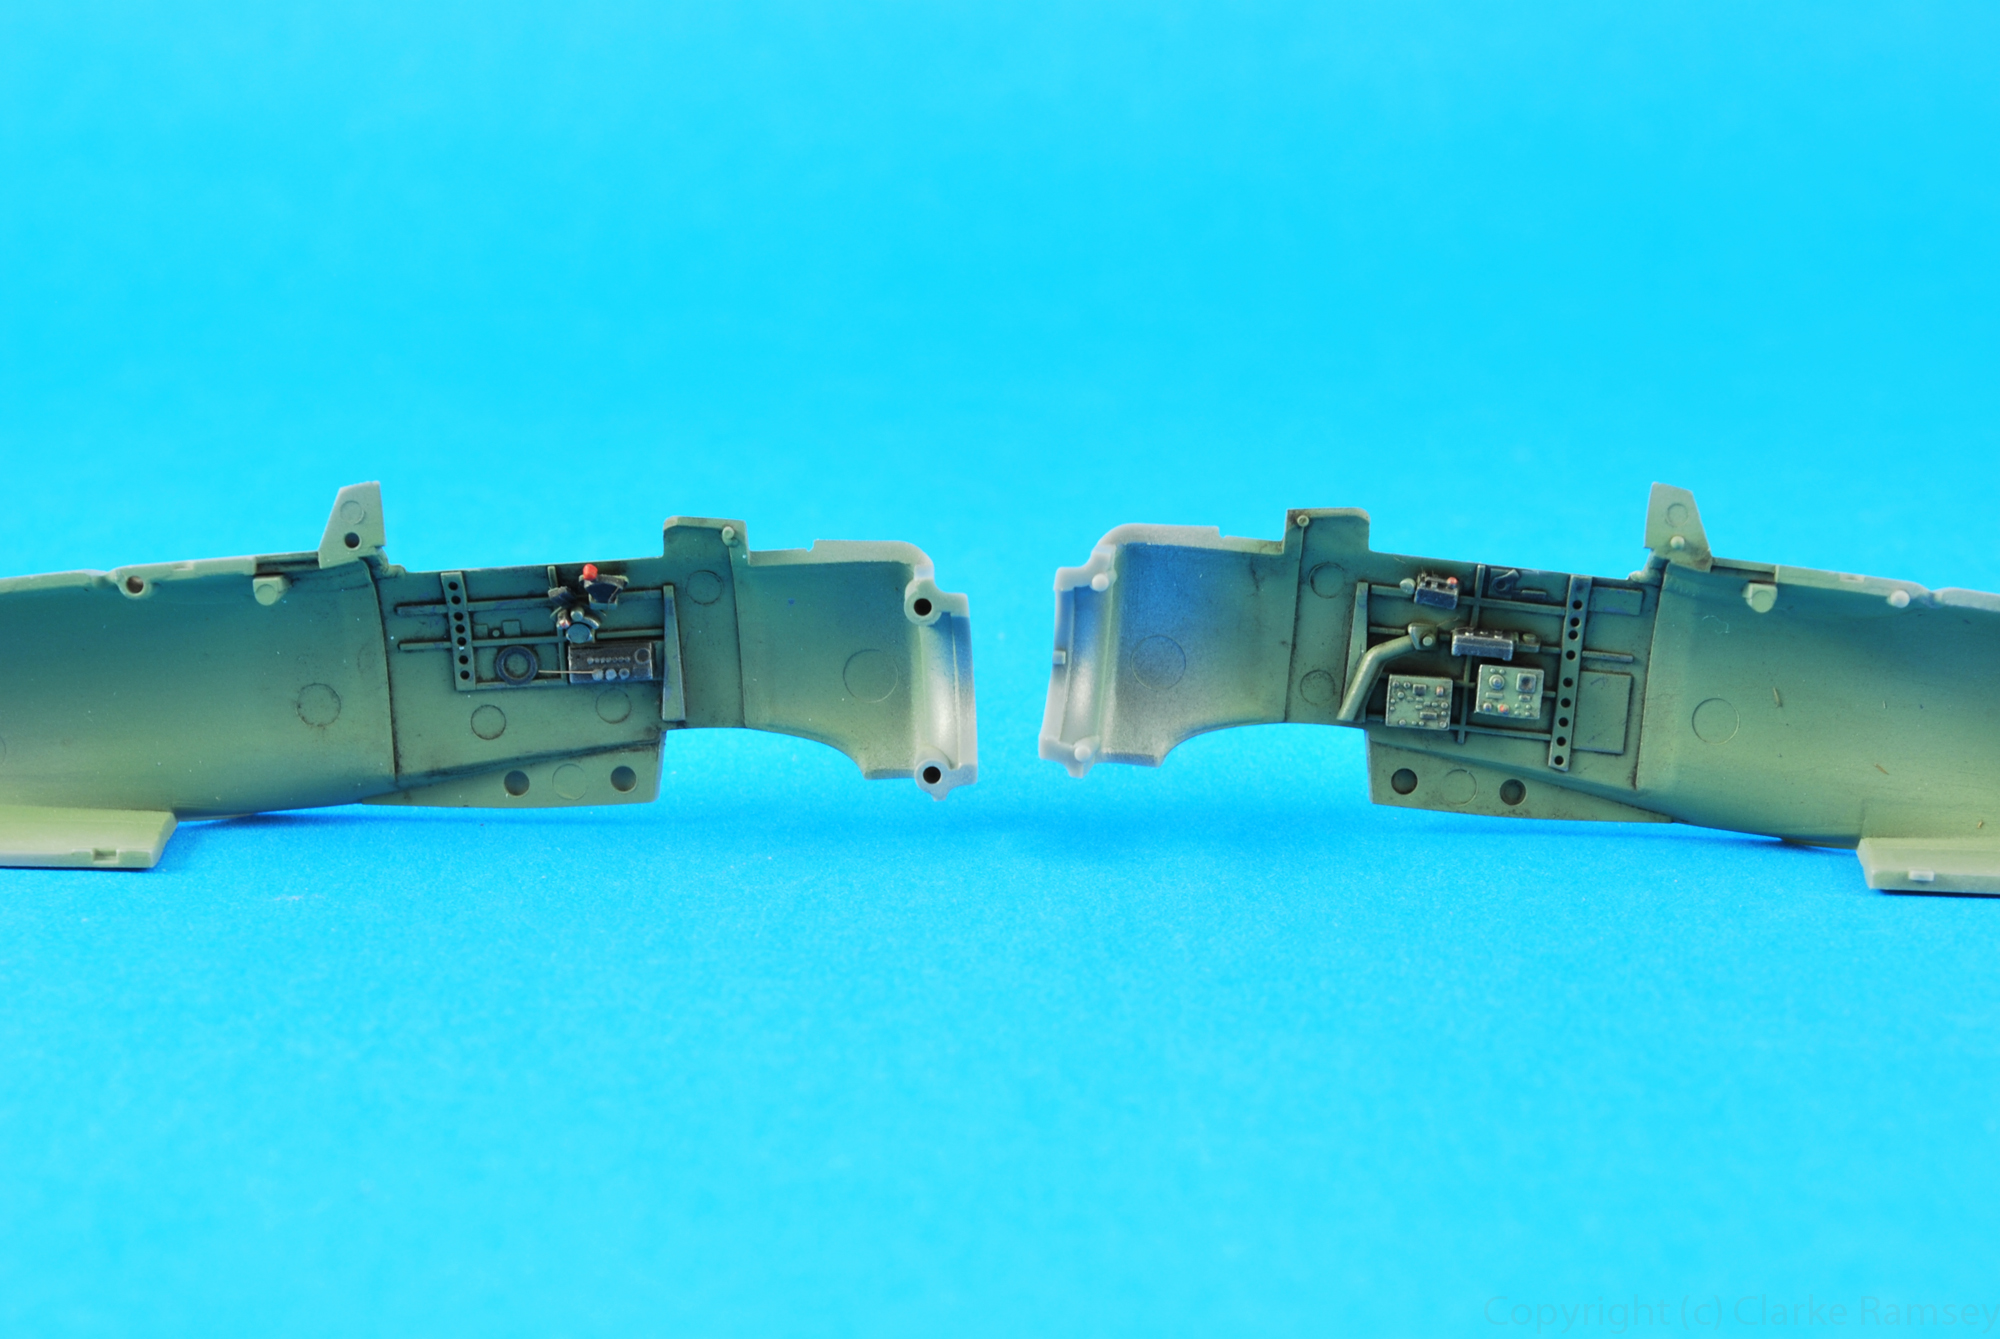
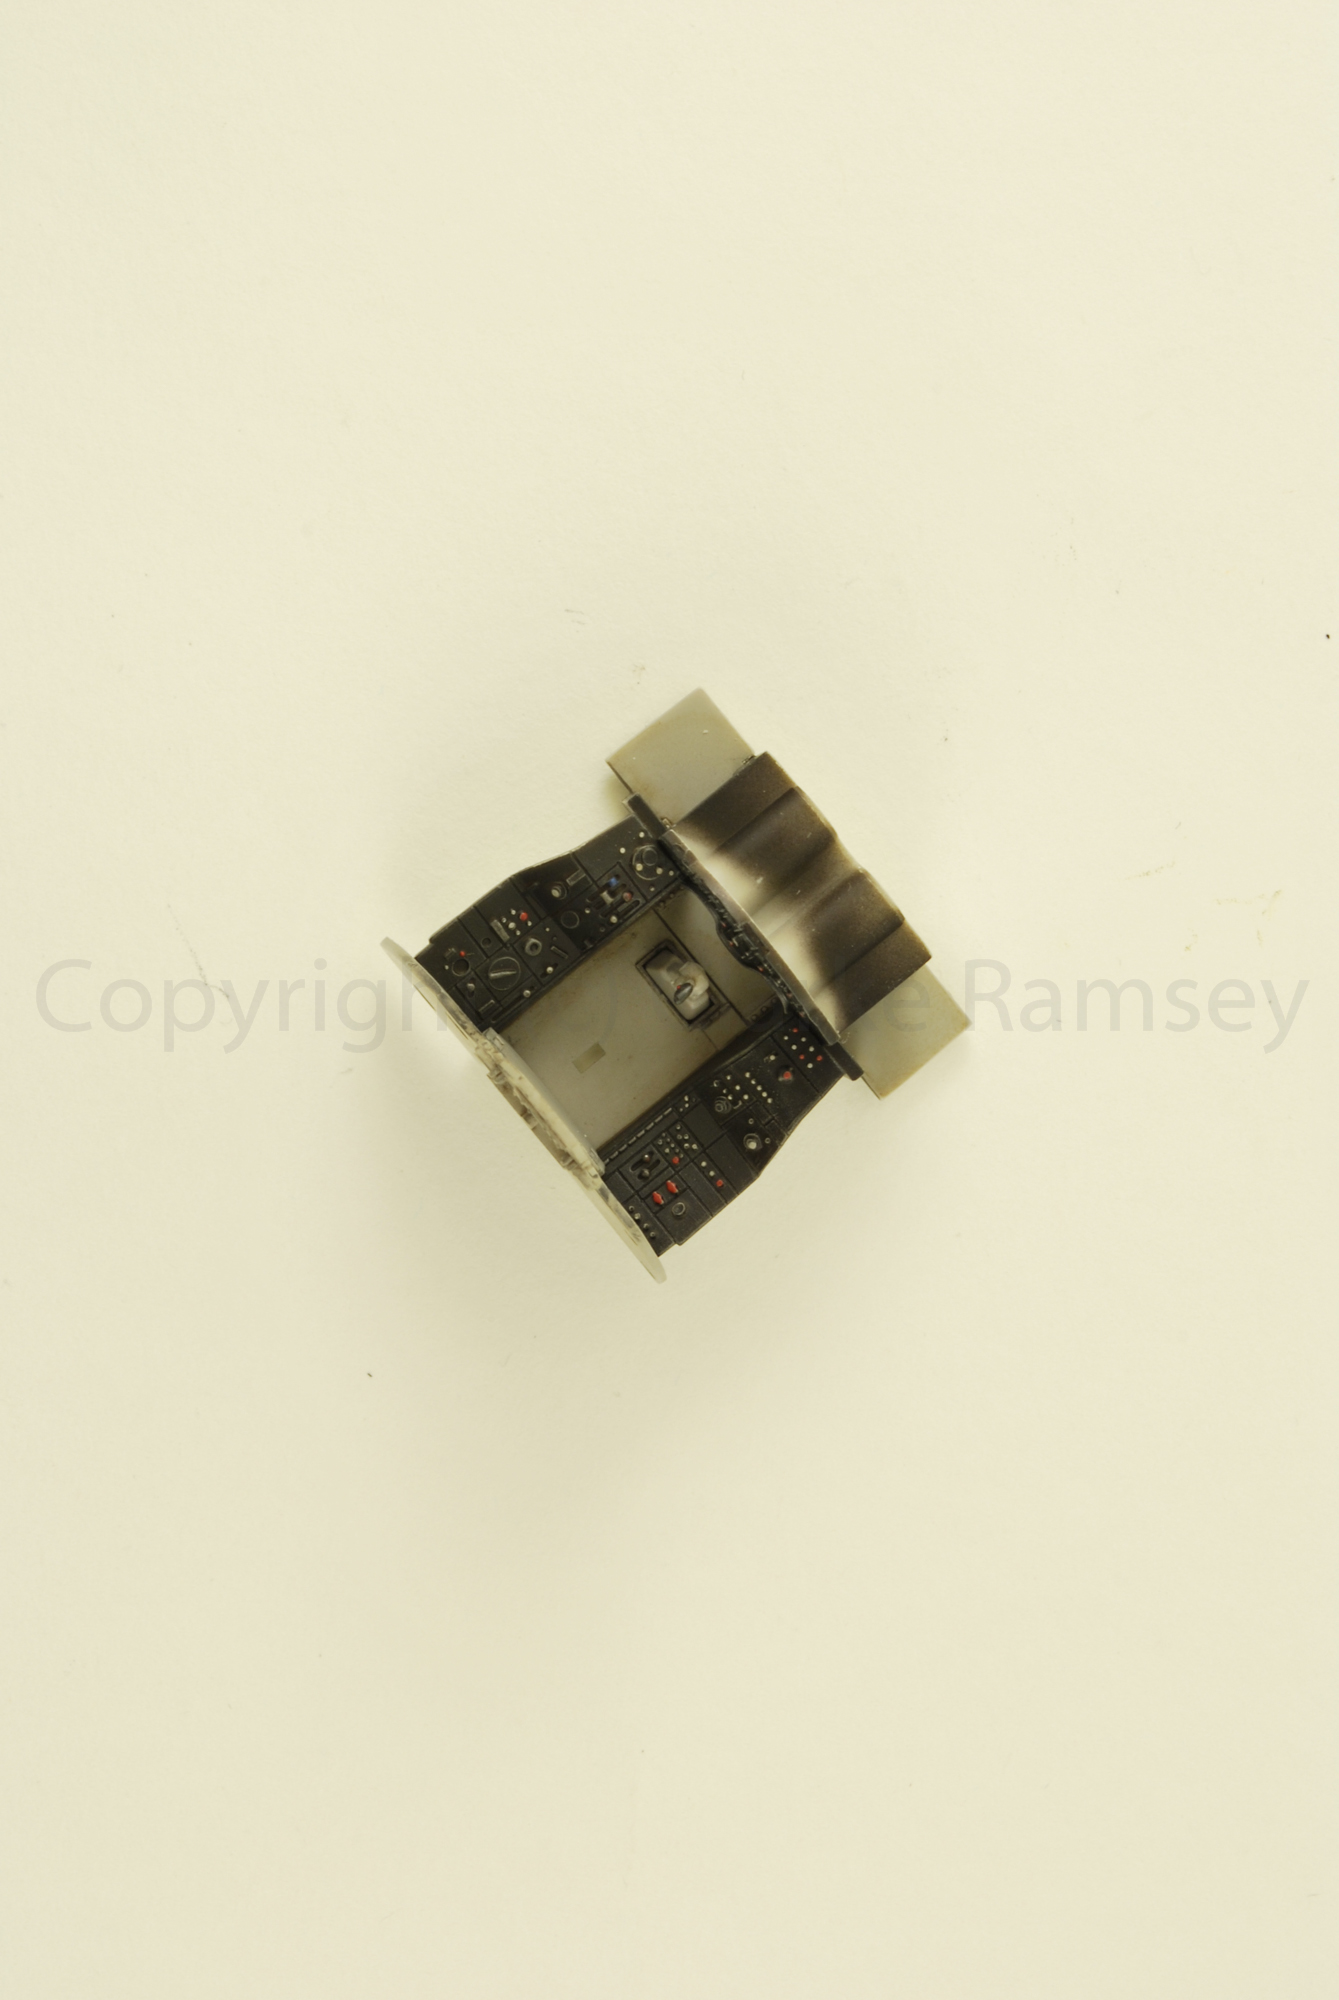
The cockpit was like any other project, primed with Mr. Surfacer 1200 thinned with lacquer thinner and leveling thinner for a smooth surface. Gunze field green was followed up with Vallejo paints and bits n' pieces of Eduard photo etch from past Jug projects. I decided to wire up the back of the instrument panel with lead wire, not knowing it would be unseen by the glare-shield armored panel. lol. two hours of drilling and screaming for something that will never been seen. At least I know what's 'under the hood'.
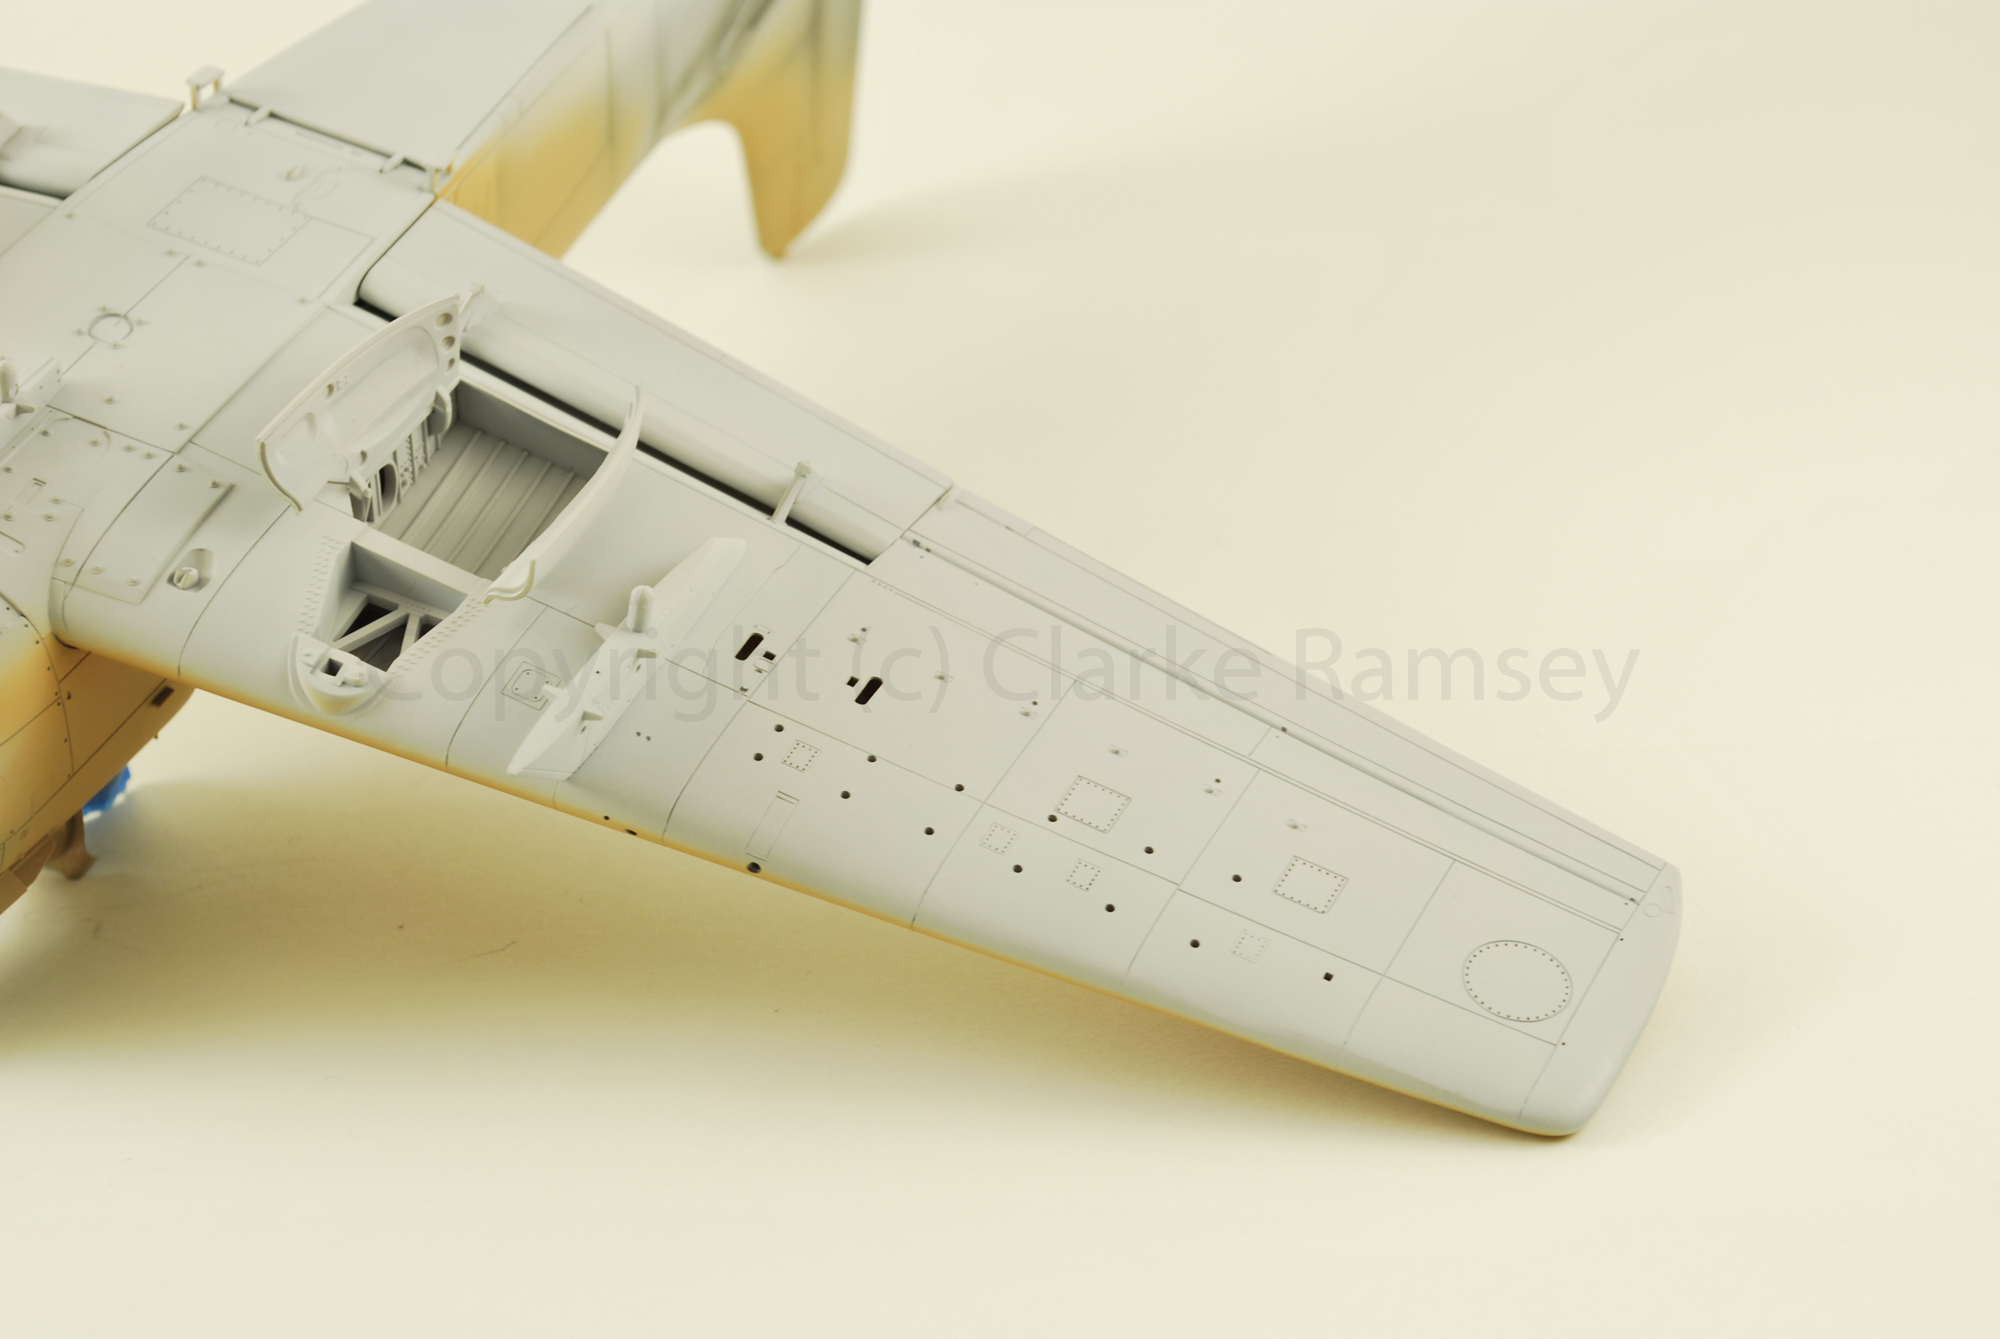
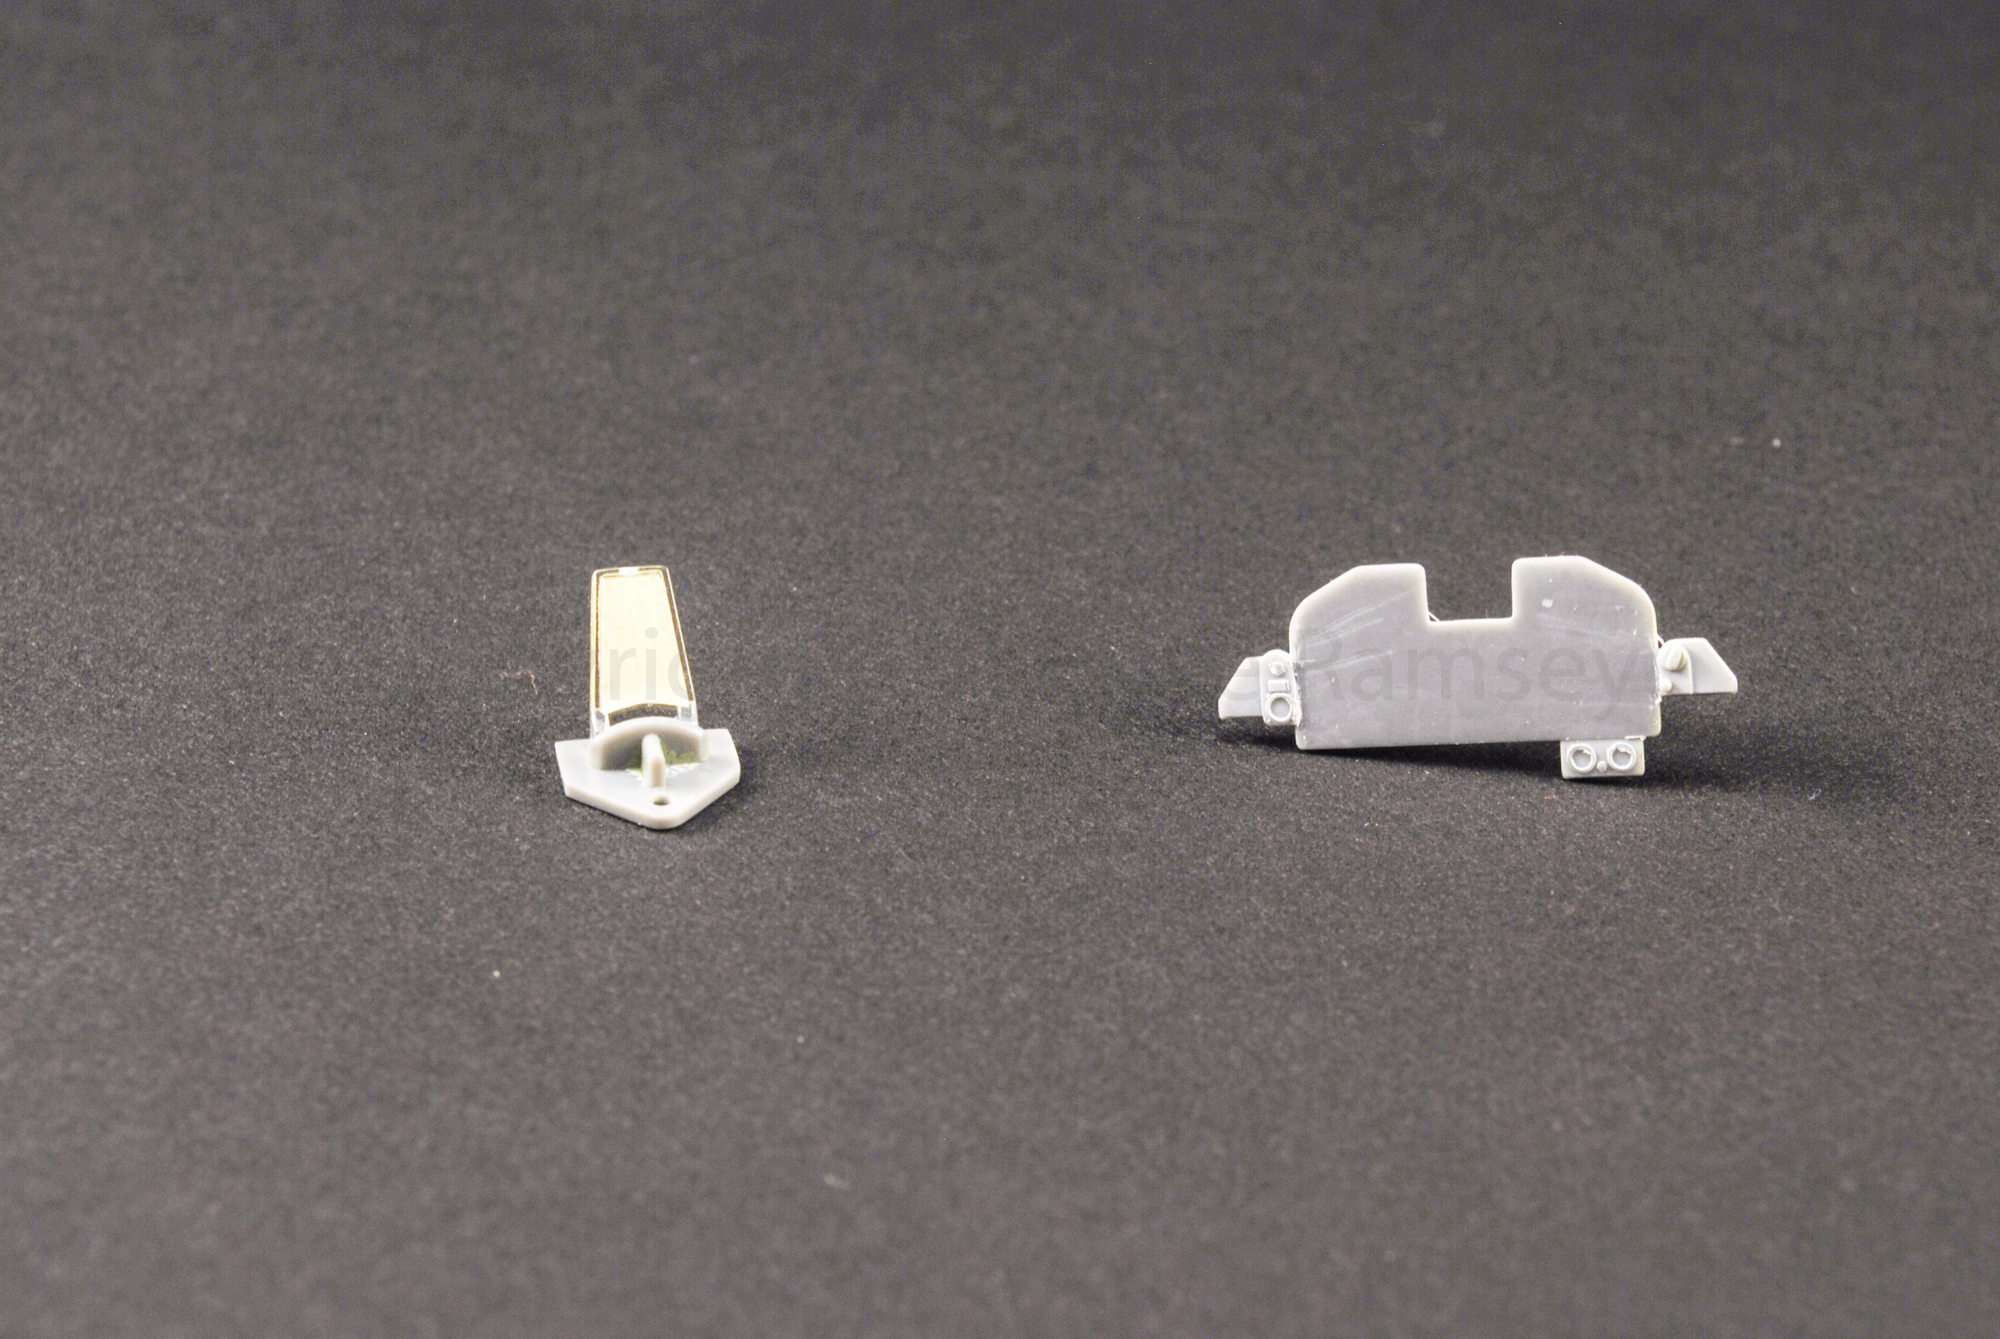
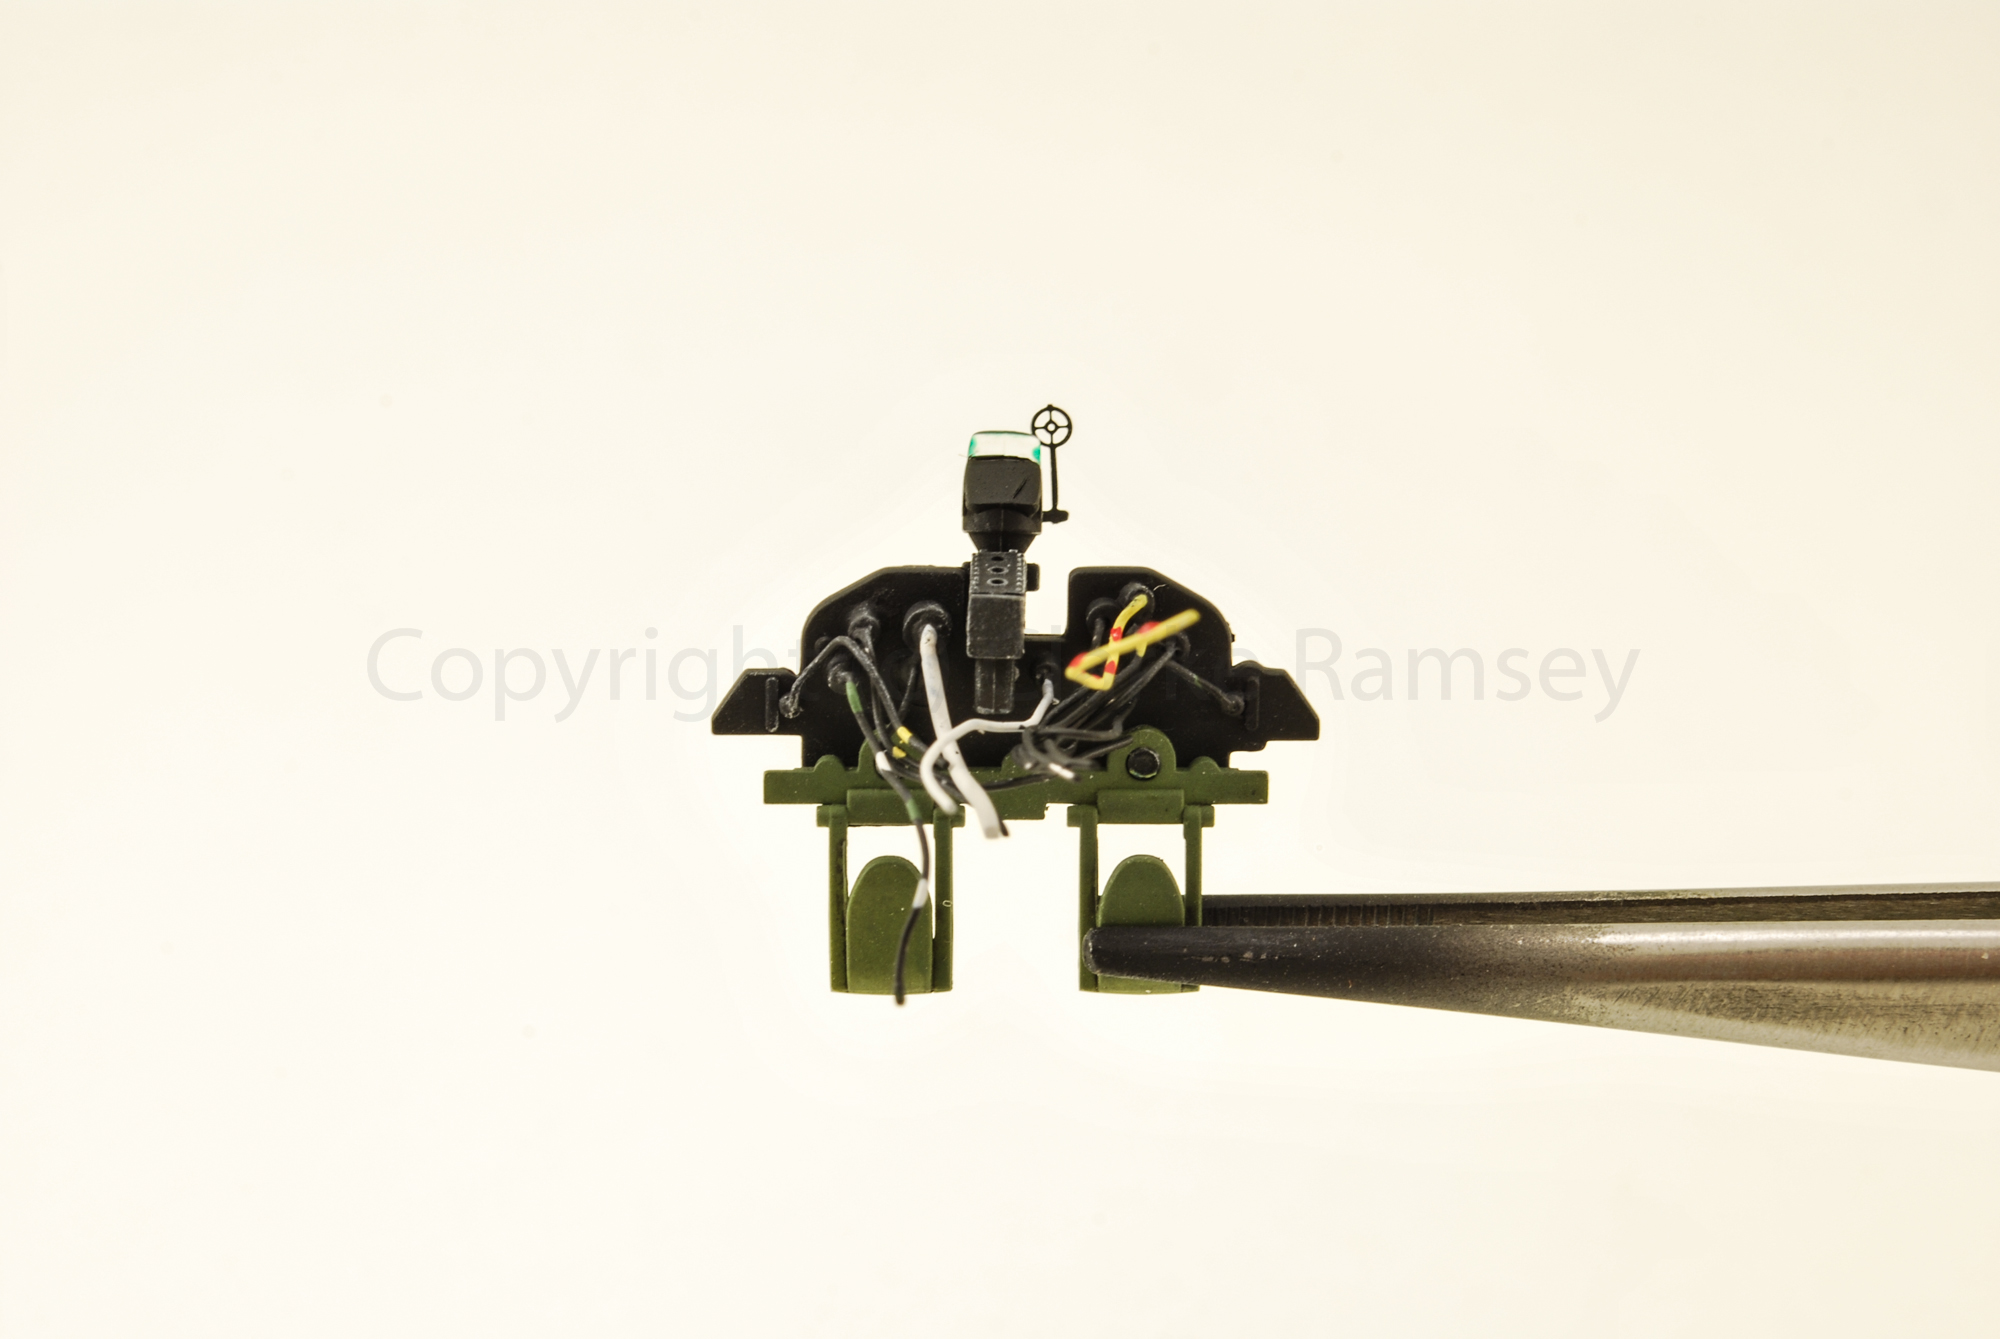
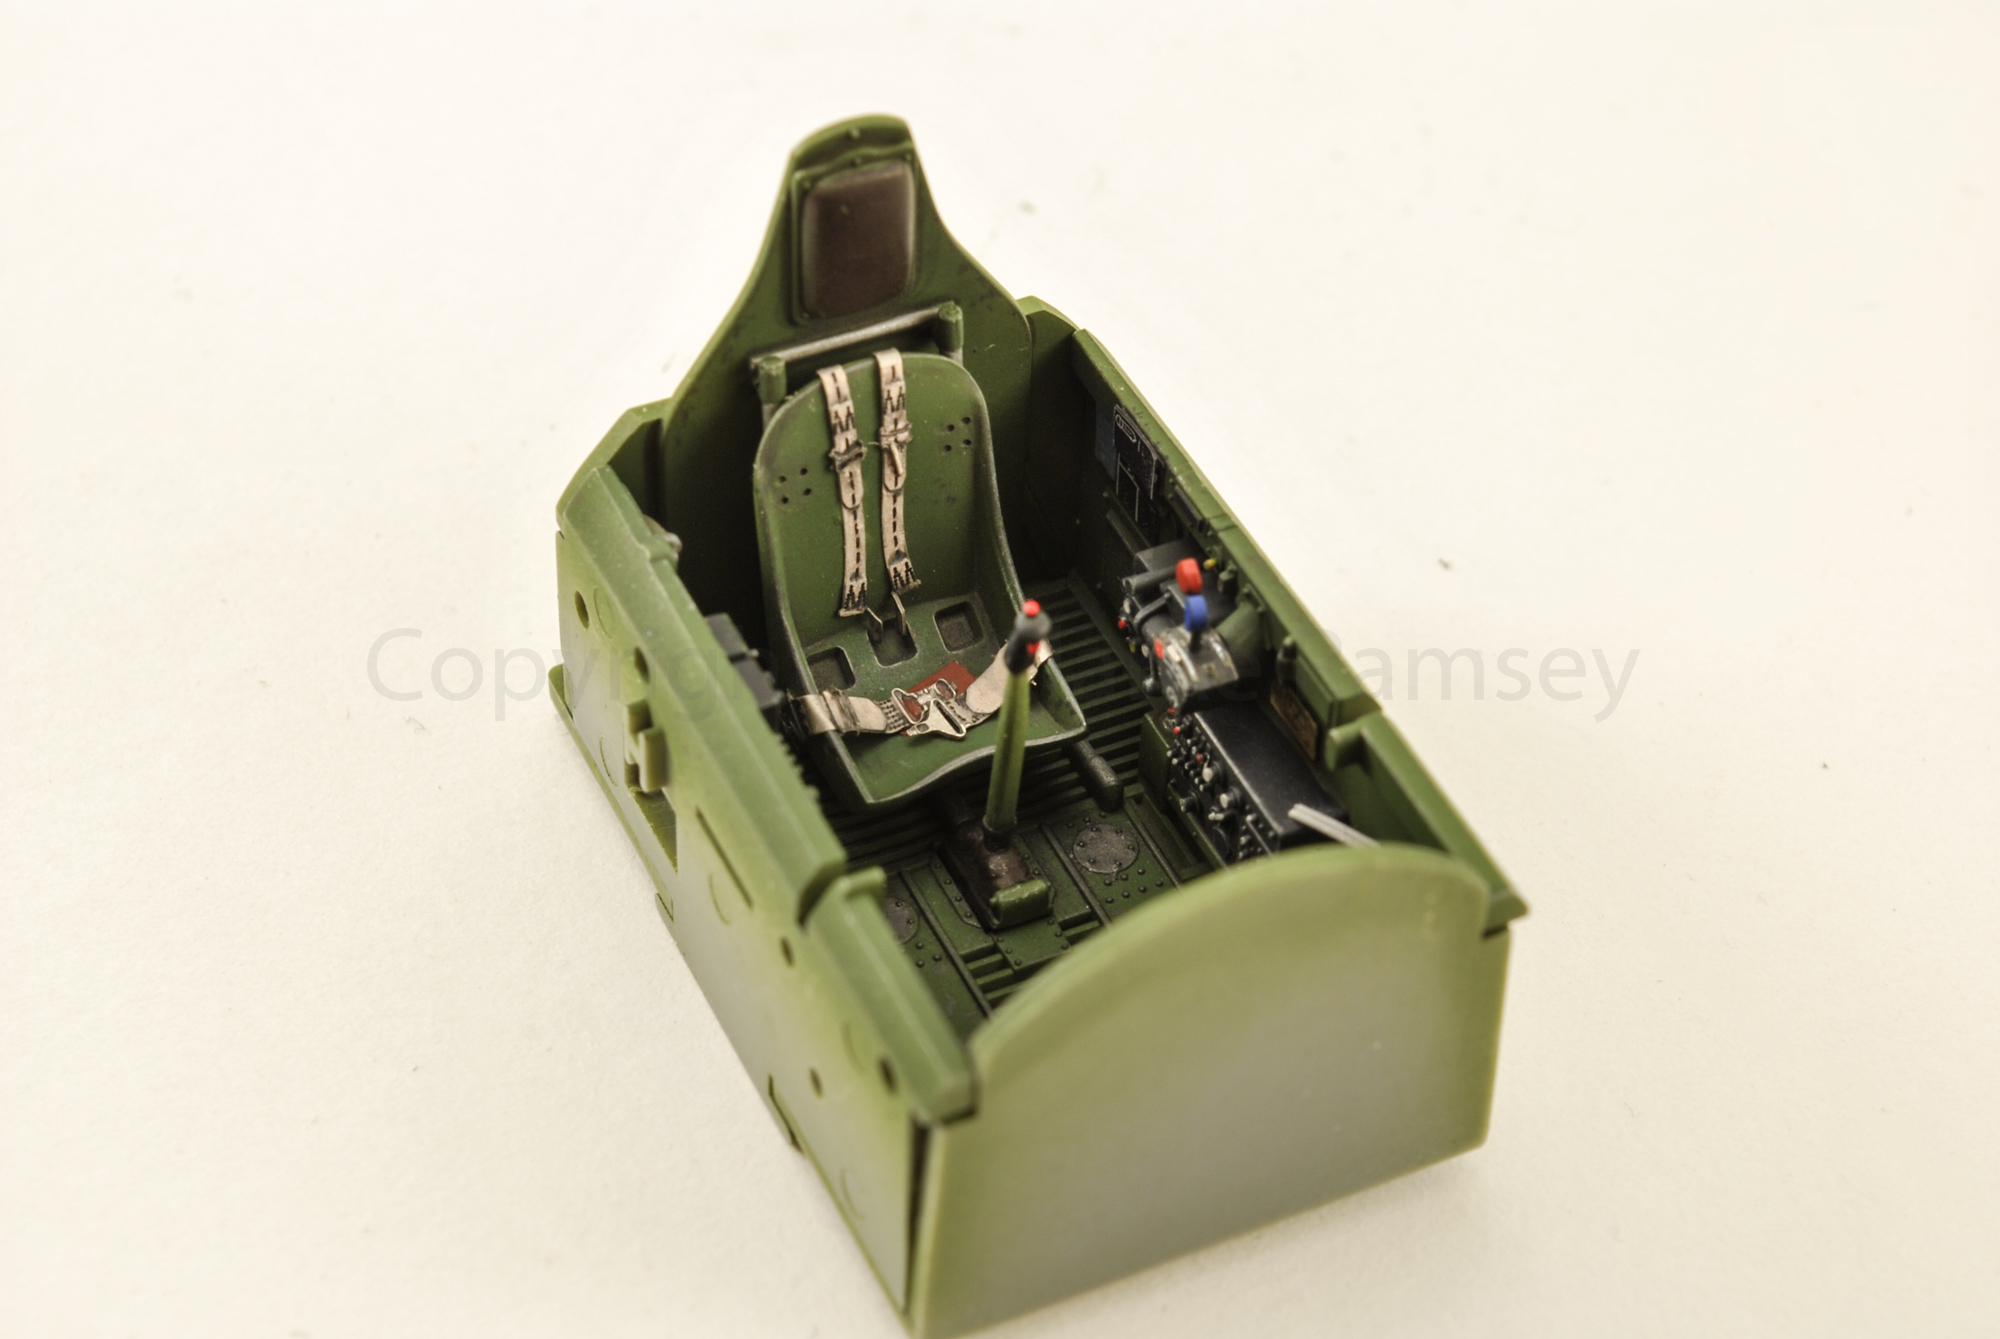
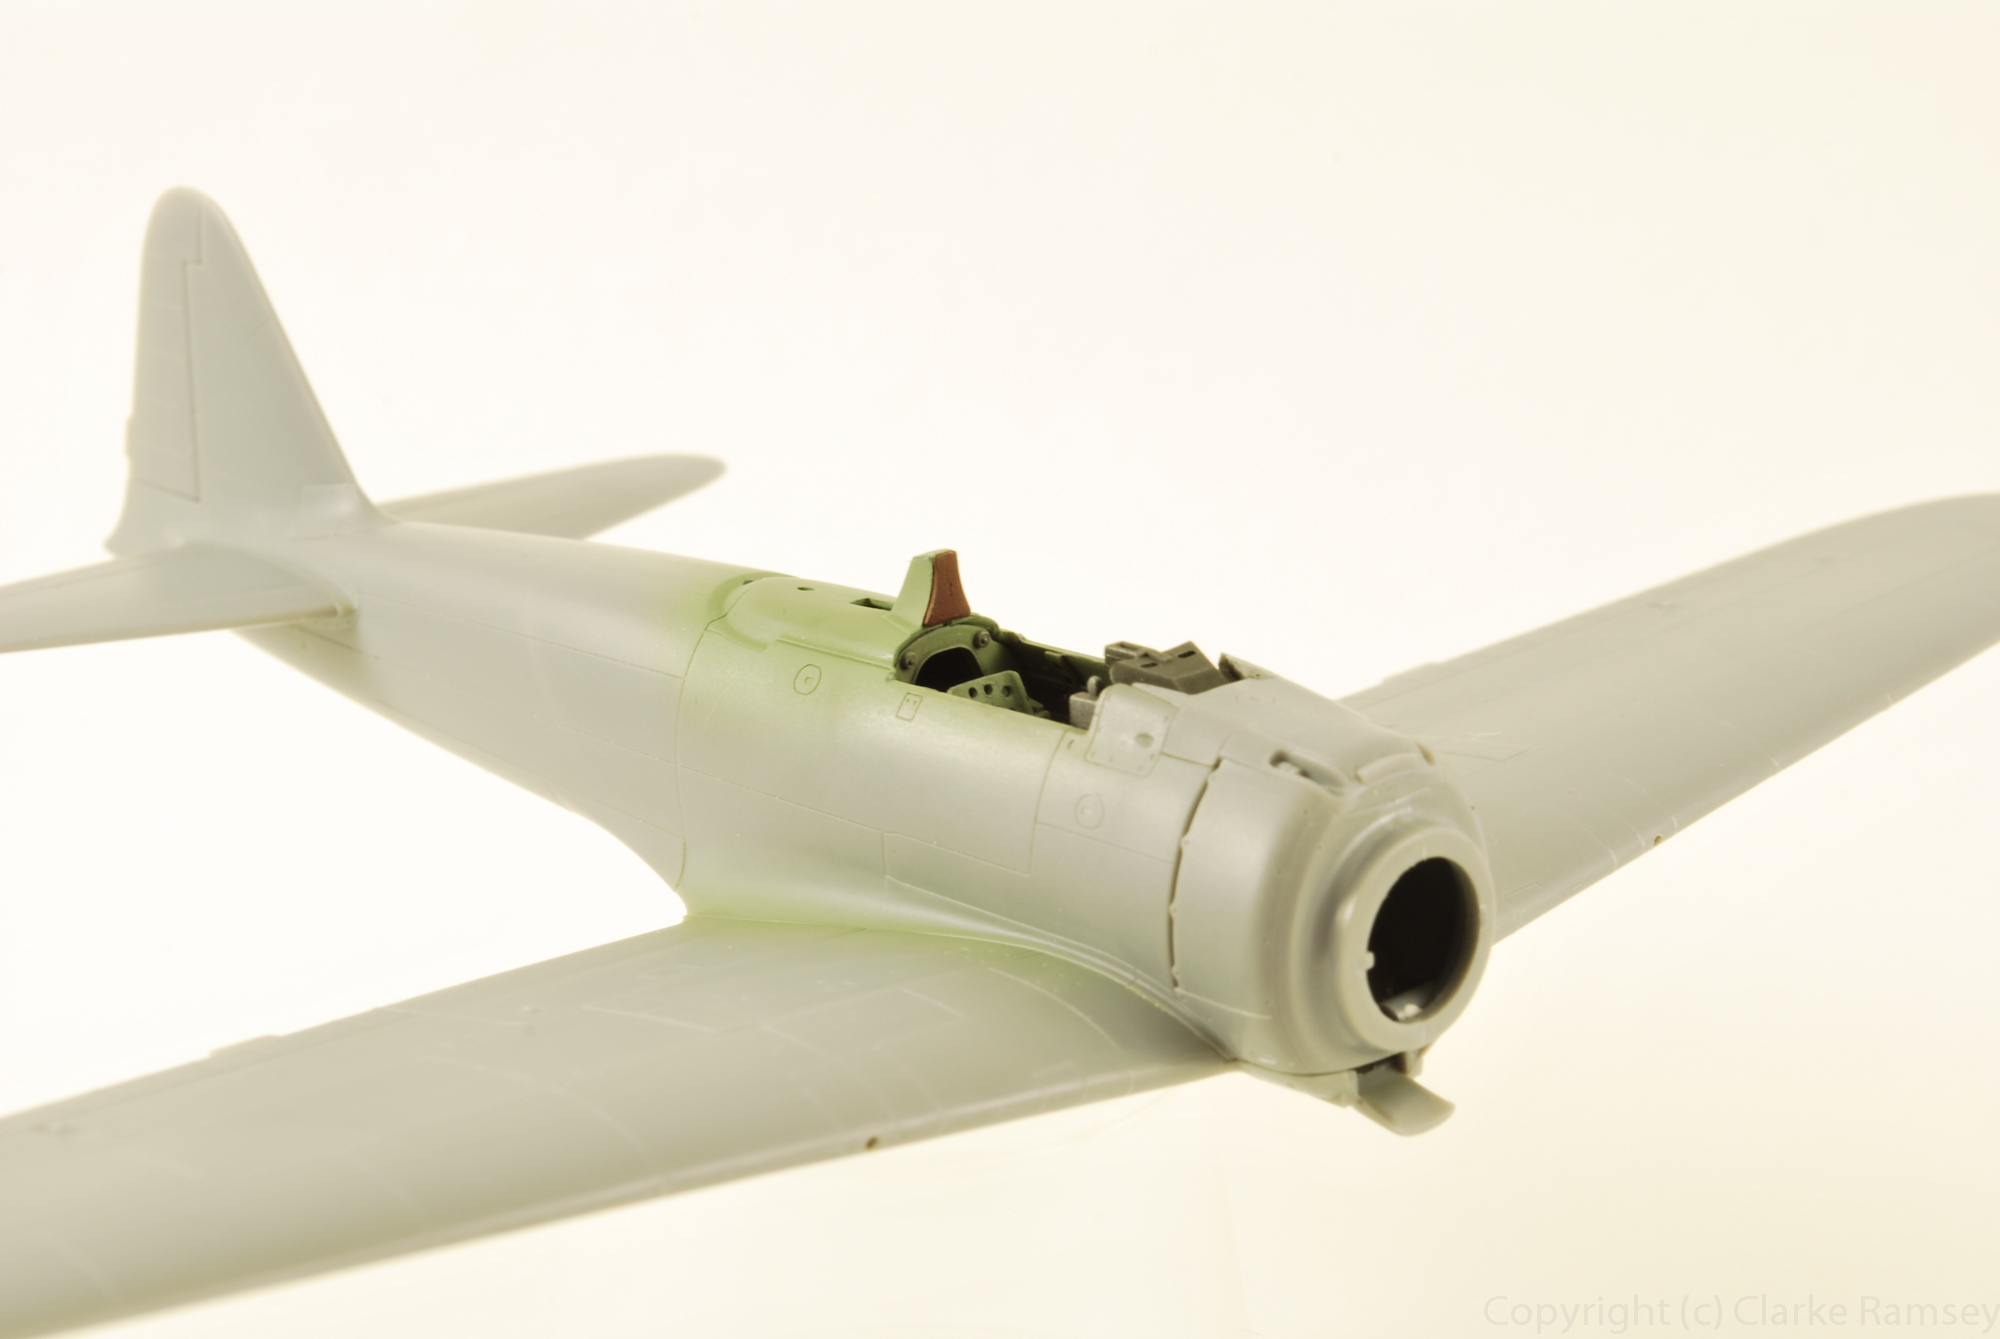
The kit come with several options for gun-sights; the Mark VII Illuminated sight was enhanced with a Eduard sight and glass projector masked with liquid tape for spraying. The pilots seat was further enhanced with Eduard PE belts and given a pin wash of a mix of AK interactive enamel wash.

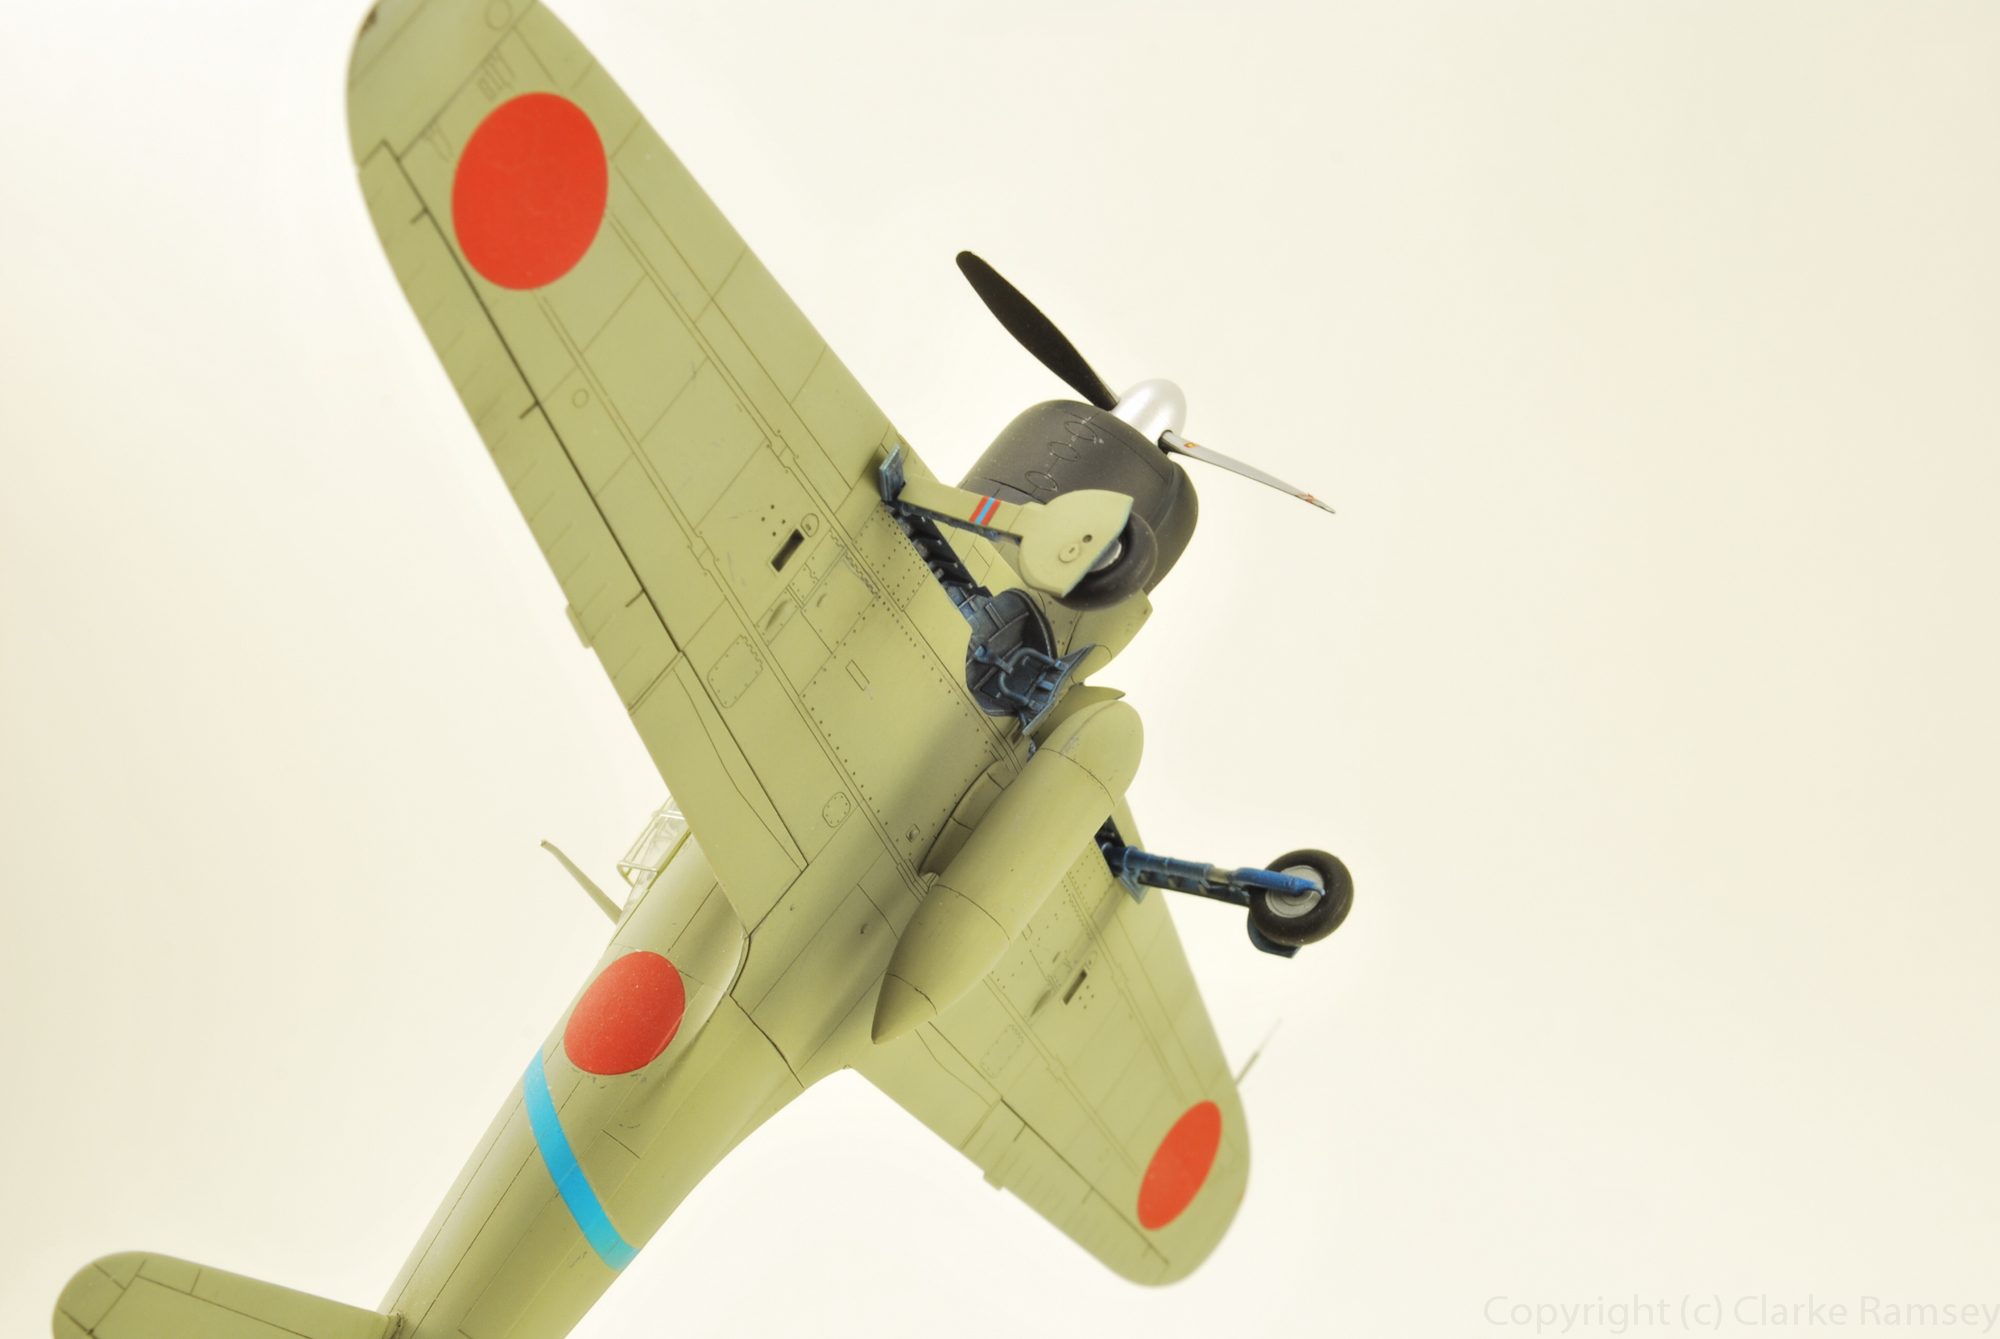
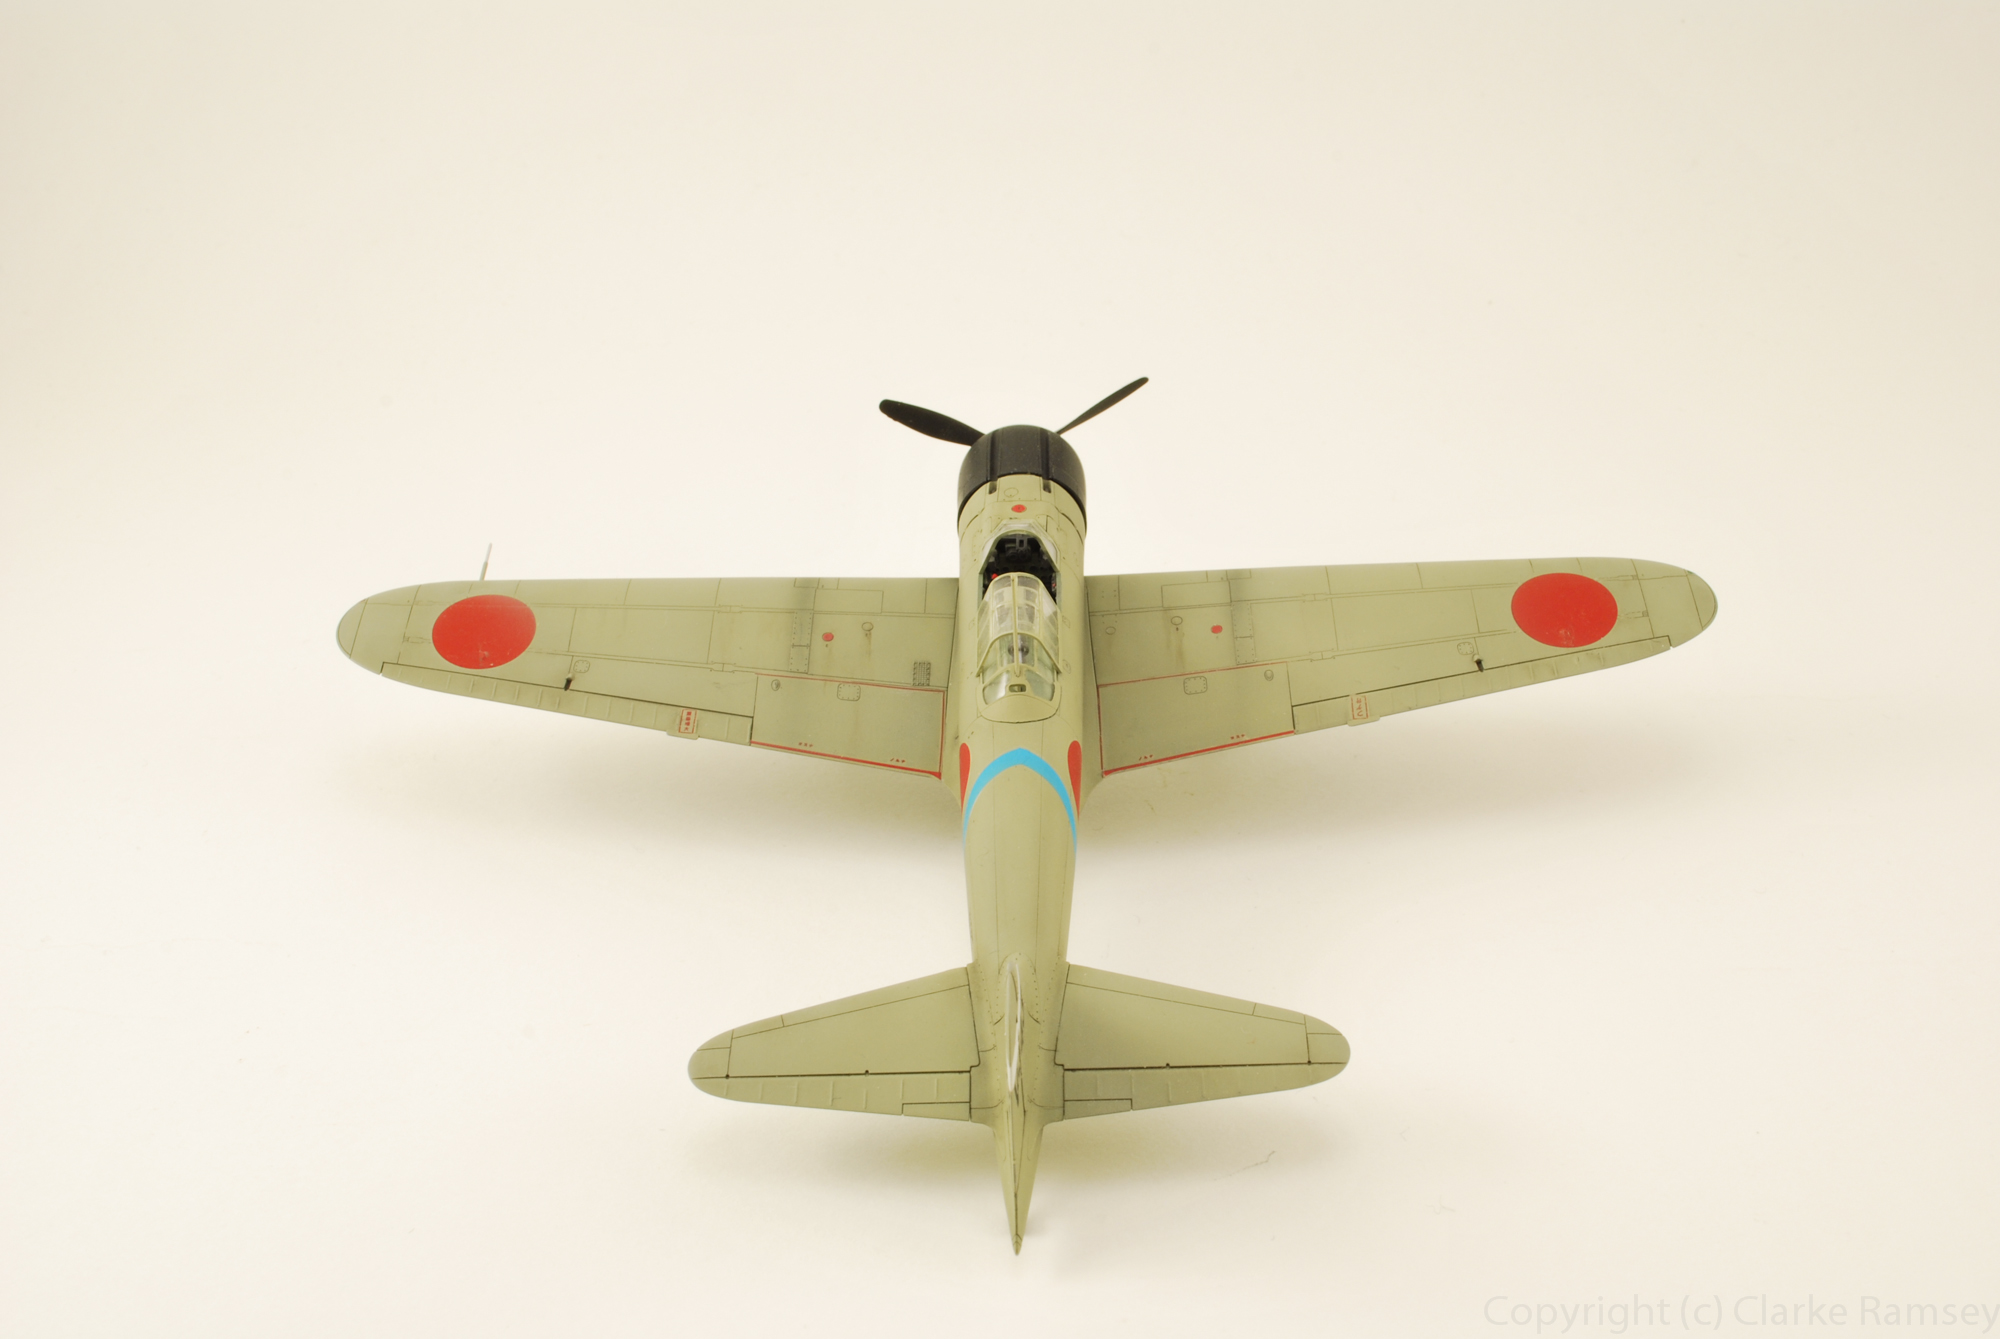
Next, sleep,  cockpit dry-fit and fuselage joining...


Tuesday, November 04, 2014

Tamiya 1/72 Mitsubishi A6M2b Zero Fighter (Zeke)


From the early days of the Second Sino-Japanese War to the end of hostilities in the Pacific, the Mitsubishi Zero served as the Imperial Japanese Navy's main front line fighter. The first major mass-produced version was the A6M2b, which was equipped with 50cm folding wingtips, landing hook, and radio direction finder for carrier-based operations. Flown by expert pilots, the A6M2b took part in daring operations such as the Pearl Harbor attack and the invasion of the Philippines. It's 3,000km range, powerful 20mm cannon armament, and legendary maneuverability quickly earned the respect of Allied aircrews.

There not much to say about this little gem of a kit other than. WOW! It's one of my first 1/72 scale kits that I done in decades. No fit issues at all, reliable Tamiya fit and simple parts with allot of detail. The only aftermarket item was the addition of Eduard pre-cut masks for the canopy.

Painting was as per the instructions with Tamiya paints mixed up. Weathering was with AK washes.


Full photo set available: https://www.flickr.com/photos/cramsey/sets/72157648720157410/

P-47D Finished

After months and months of sitting in a clear box, I've finally finished my Jug. This project presented me with many challenges to overcome. One being a natural metal finish. I've never really attempted one and this is a first that come out OK.


Full image set: https://www.flickr.com/photos/cramsey/sets/72157643931471623/

Wednesday, August 27, 2014

Cobblestone Street

One night I awoke to a idea, and headed straight for the bench. A cobblestone street was that idea. I had no kits for this, so I would need to scratch build something.

I took a old piece of plexiglass for the base. A tad bit small but it could work. I then needed some cobblestones. I tried making them from plaster and cutting them individually. They looked like rocks too much. I grabbed a sheet of poster board. Ripped off the paper covering and started slicing small bricks. A little white glue and about 5 hours later I had a cobblestone street. I needed a vertical element to give depth. A couple parts from the spares bin and some brass wire created the streetlamp. Tamiya paints for the colors and AK/MIG pigments and washes for the effects. Now I just have to create a lamp shade...


Flickr photo set: https://www.flickr.com/photos/cramsey/sets/72157646916396651/

Headlights Fianlly!

I finally found some headlights for my civilian opel truck. Stolen from another kit! For cargo I decided a spare tire, tarp, rope and a piece of board timber. The bucket is PE from ET models. These little gems are great. One word, solder. With the round shape strength is paramount. Tamiya Red for the color and a wash from AK was all that was needed.

The tarp was made from tissue paper and white glue. Crinkled and shaped to fit around the tire and bed. For the dirty bed, pigments and spare leafs were fixed. The empty beer bottle is from the spares box. I still think something is needed for the exterior side of the bed. Maybe some type of lettering for advertisement or something.


Flickr photo set: https://www.flickr.com/photos/cramsey/sets/72157639481585864/